cek wrote:I just read this whole thread again. Conclusion: The OP is insane.
Maytag: The Alpine '87 529i
Re: Maytag: The Alpine '87 528e Bench Player
Re: Maytag: The Alpine '87 528e Bench Player
Great work as always, cek!
As Vlad and Maytag have been a source of inspiration and insight for my own restoration, I have a question from a couple pages back.
viewtopic.php?p=1398975#p1398975
I'm looking for recommendations on the best way to install the stub axle into the rear wheel bearing without ruining the bearing itself. It looks like you were able to install the stub axle using the freezer and hammer trick. I'm assuming it didn't put any negative stress on the inner race of the bearing? Did you brace the rear of the inner race to keep it from moving when driving the axle inward? Do you think a press would have been a better option?
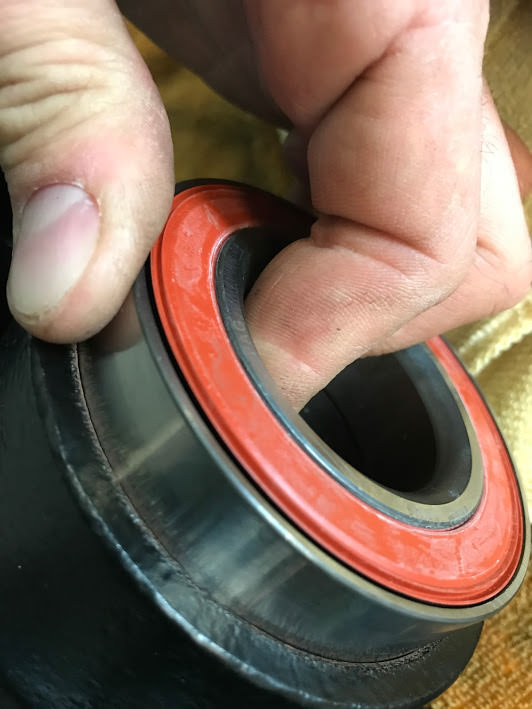
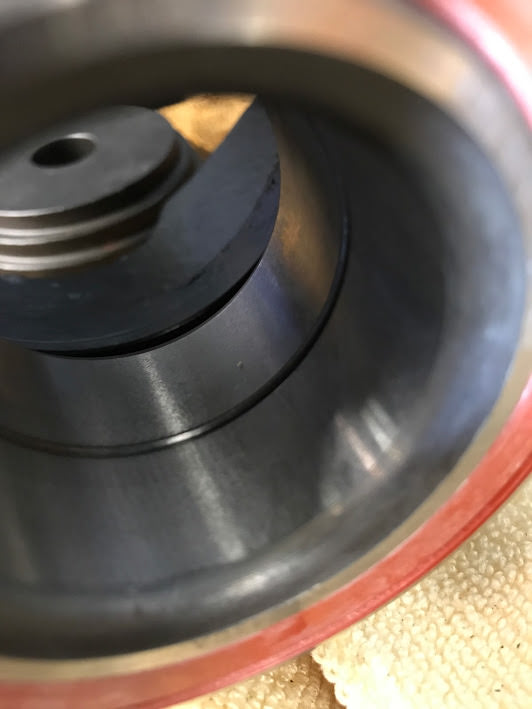
Also, it appears you have FAG bearings. Did you notice any play with the inner races? On my wheel bearings, the red seals slide ever so slightly in and out. To me, this removes the description of it being a "sealed bearing". Below are pictures of my bearings and the play I'm experiencing.
Appreciate any information you're able to share. Thanks!
As Vlad and Maytag have been a source of inspiration and insight for my own restoration, I have a question from a couple pages back.
viewtopic.php?p=1398975#p1398975
I'm looking for recommendations on the best way to install the stub axle into the rear wheel bearing without ruining the bearing itself. It looks like you were able to install the stub axle using the freezer and hammer trick. I'm assuming it didn't put any negative stress on the inner race of the bearing? Did you brace the rear of the inner race to keep it from moving when driving the axle inward? Do you think a press would have been a better option?
Also, it appears you have FAG bearings. Did you notice any play with the inner races? On my wheel bearings, the red seals slide ever so slightly in and out. To me, this removes the description of it being a "sealed bearing". Below are pictures of my bearings and the play I'm experiencing.


Appreciate any information you're able to share. Thanks!
Re: Maytag: The Alpine '87 528e Bench Player
Sorry, I don't remember.TCBimmer wrote:Great work as always, cek!
Thanks!
Freezer and hammer trick worked. I'm sure it put some negative stress on the inner race. But when done, there was no more lateral play than before.TCBimmer wrote:I'm looking for recommendations on the best way to install the stub axle into the rear wheel bearing without ruining the bearing itself. It looks like you were able to install the stub axle using the freezer and hammer trick. I'm assuming it didn't put any negative stress on the inner race of the bearing? Did you brace the rear of the inner race to keep it from moving when driving the axle inward? Do you think a press would have been a better option?
A press would be ideal. But in my experience (limited) what I did worked fine.
TCBimmer wrote: Also, it appears you have FAG bearings. Did you notice any play with the inner races? On my wheel bearings, the red seals slide ever so slightly in and out. To me, this removes the description of it being a "sealed bearing". Below are pictures of my bearings and the play I'm experiencing.
Appreciate any information you're able to share. Thanks!
Re: Maytag: The Alpine '87 528e Bench Player
Thank you for the confirmation!
Re: Maytag: The Alpine '87 528e Bench Player
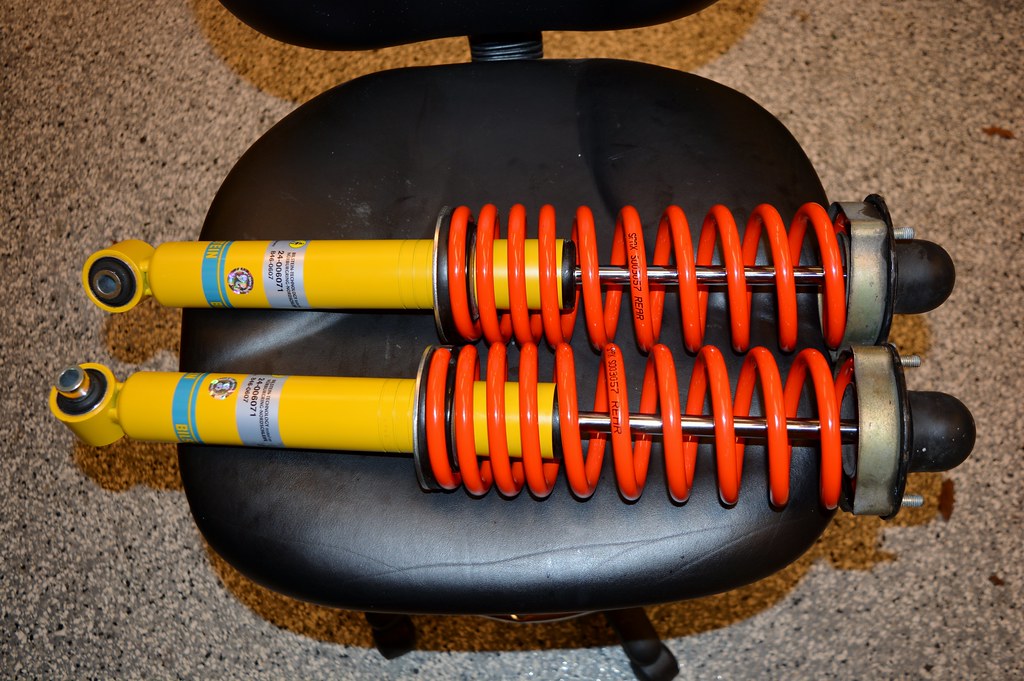
Those shocks are groovy.
Re: Maytag: The Alpine '87 528e Bench Player
I'm slowly making progress in getting the new motor back in. Vacation got in the way, then I keep discovering I'm missing some part. The goal was to use this long weekend to have the transmission connected to the engine by the end of Saturday, the front struts sorted yesterday, and the engine in the car today. But Blunt sending me the wrong flywheel bolts kibosh'd that. I did get the old pilot bearing out (yay bread) but the engine project is stalled until those bolts come.
This morning I was more hungover than I think I ever have been. We went to an amazing 50s themed party last night (after tailgating HARD at the Seahawks game)..

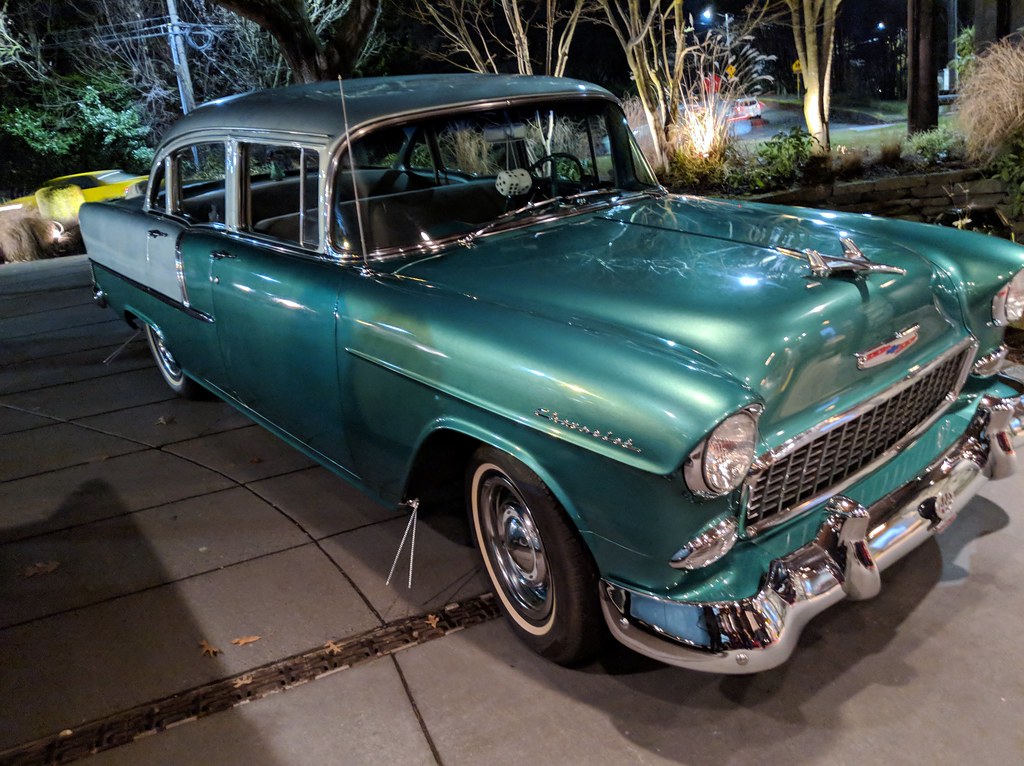
These were parked out front:
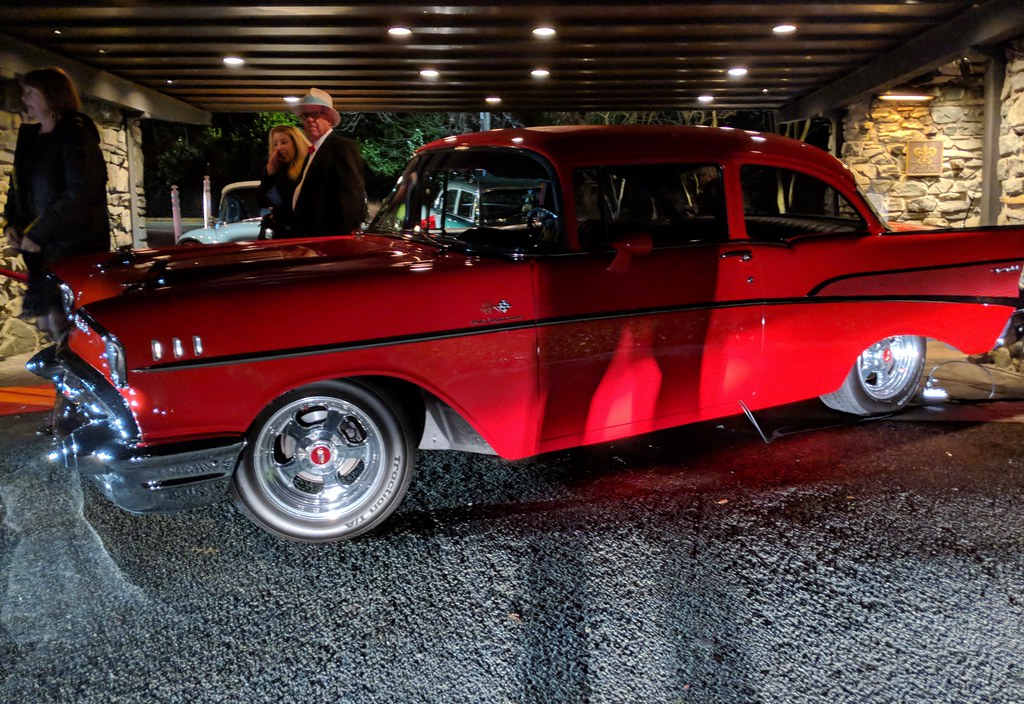
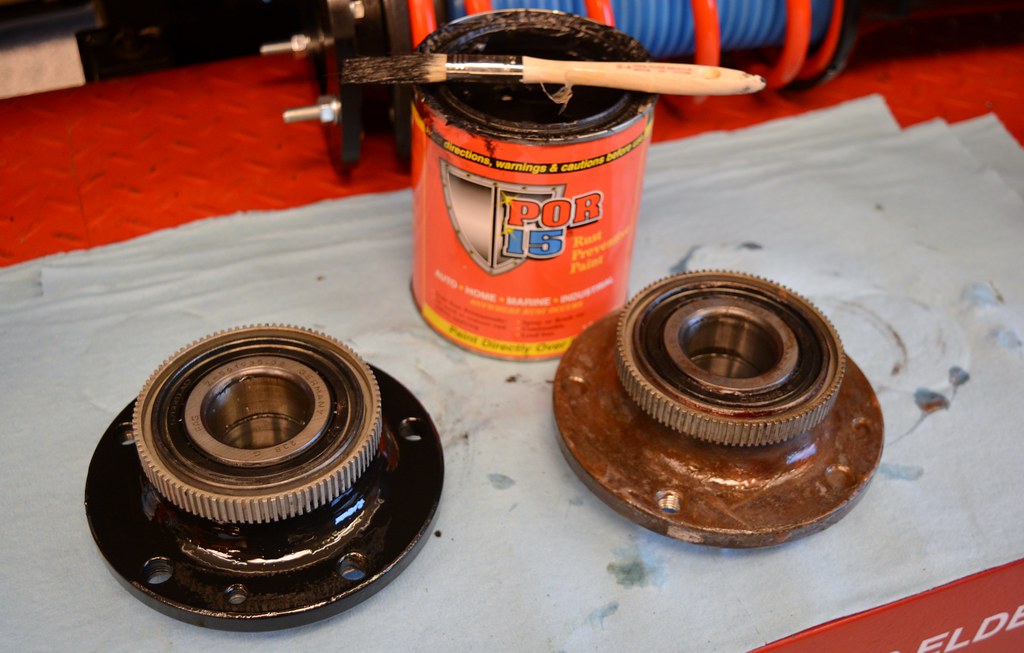
Between the hangover and needing to get a 'pass through' socket set to put together the fronts struts, I didn't actually get any wrenching started until about 3pm. For some reason the backsides of the bearings I put on when I installed the BC Racing coilovers rusted like crazy. They threw rust splatter all over the rest of the suspension. These are FAG bearings. Other's I've installed did not do this. Super annoying.
So I cleaned the rust off and put POR15 on them. I also put some POR15 on the edges of the UCBABs because they were rusting too. I hate rust.
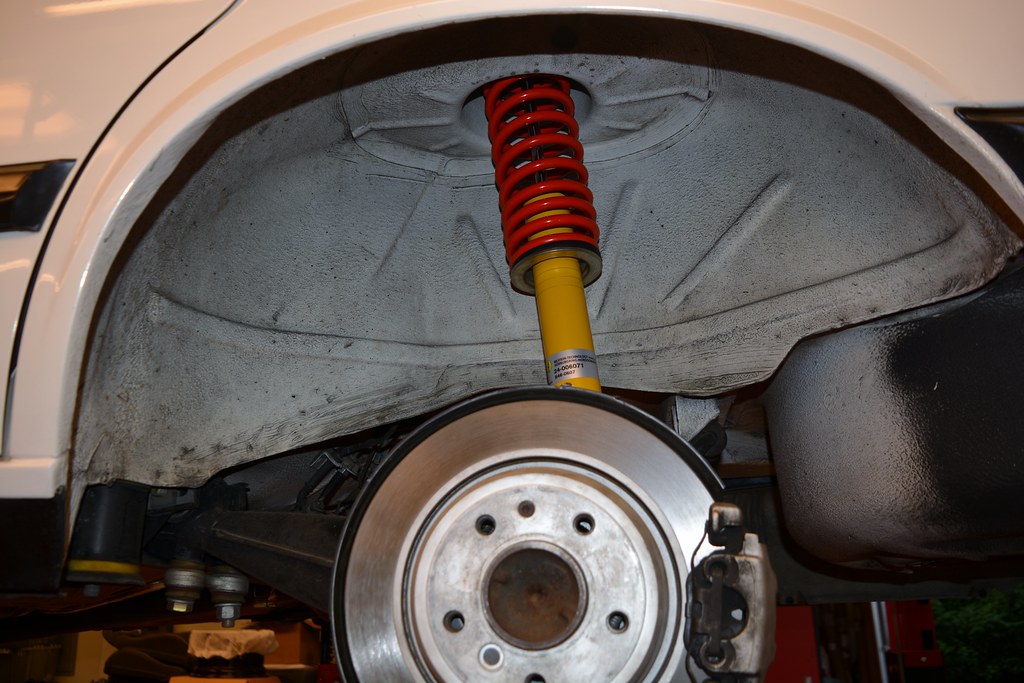
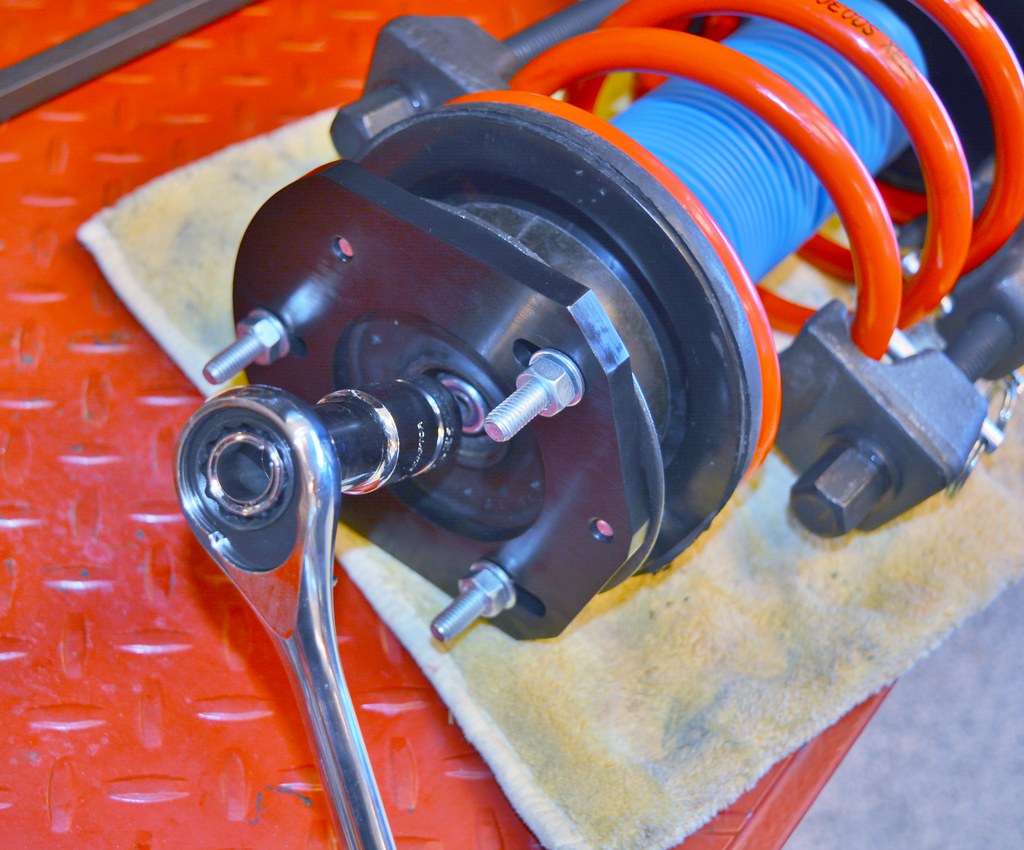
When installing Bilstein Performance Plus front struts you need to use a hex key to keep the shaft from turning while you tighten down the 19mm lock nut. I first went to Sears (which was open) and bought their "pass-through" socket set for like $60. Then I got home and realized that set stopped at 18mm. They had another more expensive set that did have 19mm, but I figured I didn't need to spend even more money just for a tool I'd rarely use, so I got the cheaper one. In my hangover induced fog I obviously didn't look closely enough at what I bought.
So after getting home and discovering my mistake I got in the truck and went out again. I bet Harbor Freight would be open and was right. And sure enough, they have a $19.99 pass-through set that includes a 19mm socket. I bought that then went back to Sears and returned the set I shouldn't have bought.
This is the 21 Pc SAE & Metric Go-Thru Socket Set:

Worked dandy. Total crap-quality tool, but got the job done.
[url=https://flic.kr/p/221H7MC]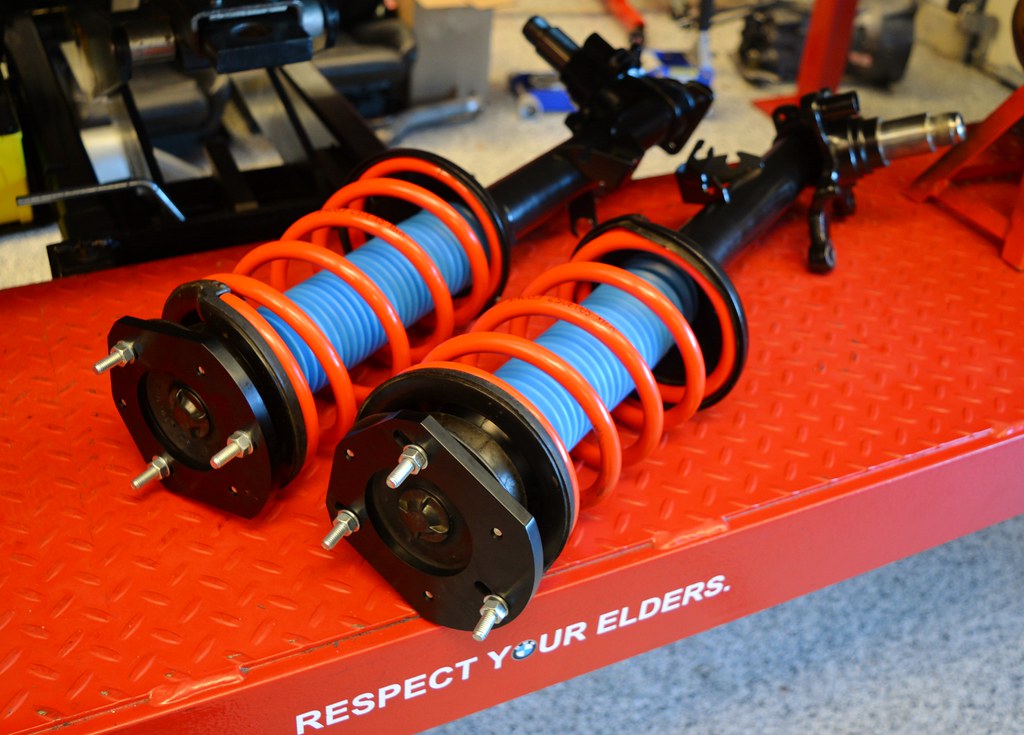
[url=https://flic.kr/p/233zpjQ]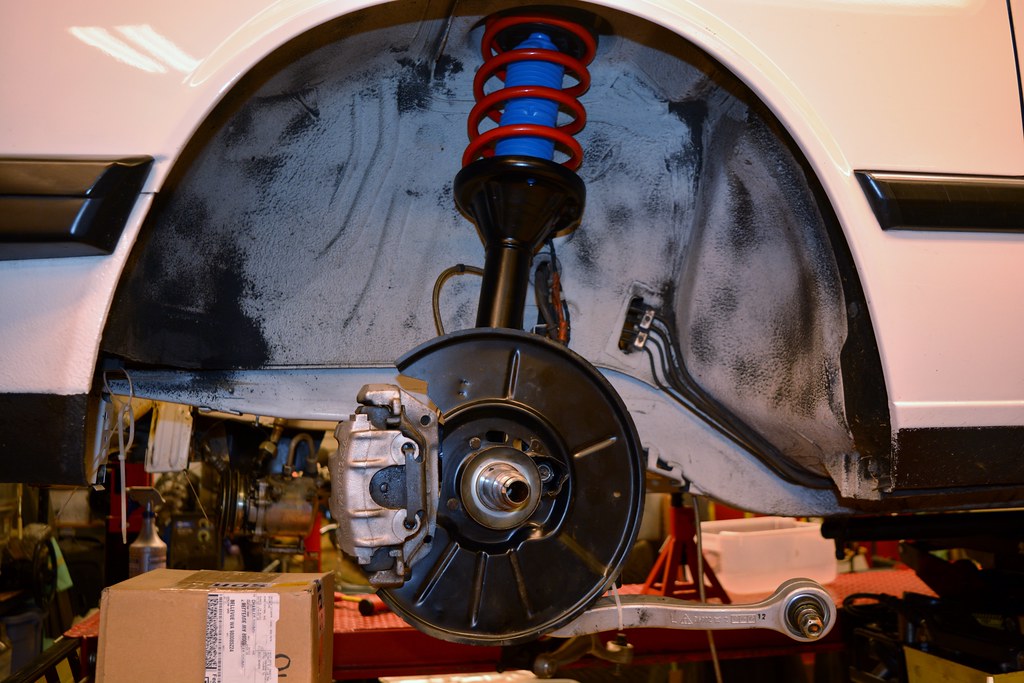
I got as far as putting the dust shield on before it was too cold, I was hungry, and still hungover... so I quit.
(Caliper is just attached so it's not hanging from the brake line, which I don't want to disconnect).
I really need to get this project finished and Maytag drive-able again quick because I need Maytag off the lift. Minerva is ready to come home and Vlad needs servicing.
This morning I was more hungover than I think I ever have been. We went to an amazing 50s themed party last night (after tailgating HARD at the Seahawks game)..

These were parked out front:


Between the hangover and needing to get a 'pass through' socket set to put together the fronts struts, I didn't actually get any wrenching started until about 3pm. For some reason the backsides of the bearings I put on when I installed the BC Racing coilovers rusted like crazy. They threw rust splatter all over the rest of the suspension. These are FAG bearings. Other's I've installed did not do this. Super annoying.
So I cleaned the rust off and put POR15 on them. I also put some POR15 on the edges of the UCBABs because they were rusting too. I hate rust.

When installing Bilstein Performance Plus front struts you need to use a hex key to keep the shaft from turning while you tighten down the 19mm lock nut. I first went to Sears (which was open) and bought their "pass-through" socket set for like $60. Then I got home and realized that set stopped at 18mm. They had another more expensive set that did have 19mm, but I figured I didn't need to spend even more money just for a tool I'd rarely use, so I got the cheaper one. In my hangover induced fog I obviously didn't look closely enough at what I bought.
So after getting home and discovering my mistake I got in the truck and went out again. I bet Harbor Freight would be open and was right. And sure enough, they have a $19.99 pass-through set that includes a 19mm socket. I bought that then went back to Sears and returned the set I shouldn't have bought.
This is the 21 Pc SAE & Metric Go-Thru Socket Set:

Worked dandy. Total crap-quality tool, but got the job done.

[url=https://flic.kr/p/221H7MC]

[url=https://flic.kr/p/233zpjQ]

I got as far as putting the dust shield on before it was too cold, I was hungry, and still hungover... so I quit.
(Caliper is just attached so it's not hanging from the brake line, which I don't want to disconnect).
I really need to get this project finished and Maytag drive-able again quick because I need Maytag off the lift. Minerva is ready to come home and Vlad needs servicing.
Re: Maytag: The Alpine '87 528e Bench Player
For posterity, I'm going to add some stuff from my "e2i" "Stroker" M20B27 build thread here (for me when I forget and search this thread to remember)...
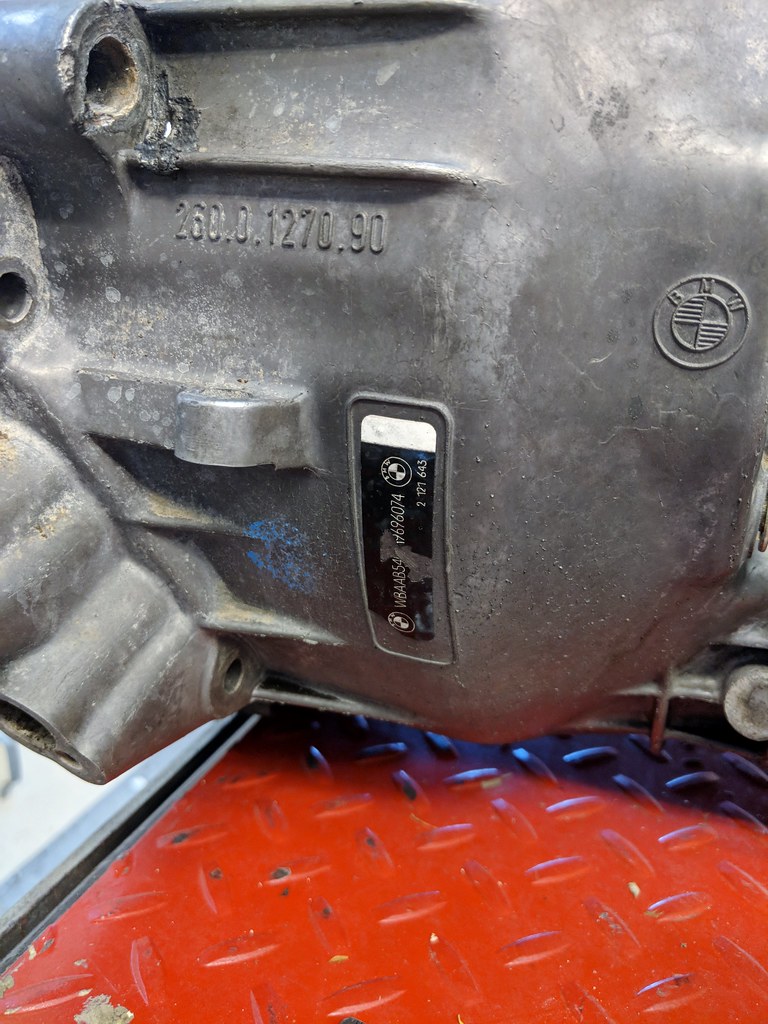
If you saw this thread you know that I am struggling with the fact the clutch pedal disengages clutch too high and how to resolve. I learned a bunch (and discovered there are two variants of getrag 260/5; one with a 5mm deeper bell-housing). But I am still unsure why my engagement point is wrong. I'm moving ahead with what I think will address it: Switching to the shorter variant of the throw out bearing.
Transmission on Maytag
PN on Bellhousing: 260.0.1270.90
VIN: WBAAB5407H9696074
Model: 1986-07-31 US 325E (not a 528e as I had previously thought)
Housing PN from RealOEM: 23111222657
T/O Bearing PN from RealOEM: 21517521471
OAL (output shaft to bell-housing face): 55mm
Bell-housing length (rear casing front to bell-housing face): 37.5mm
Bell-housing depth (slave face to bell-housing face): 17mm
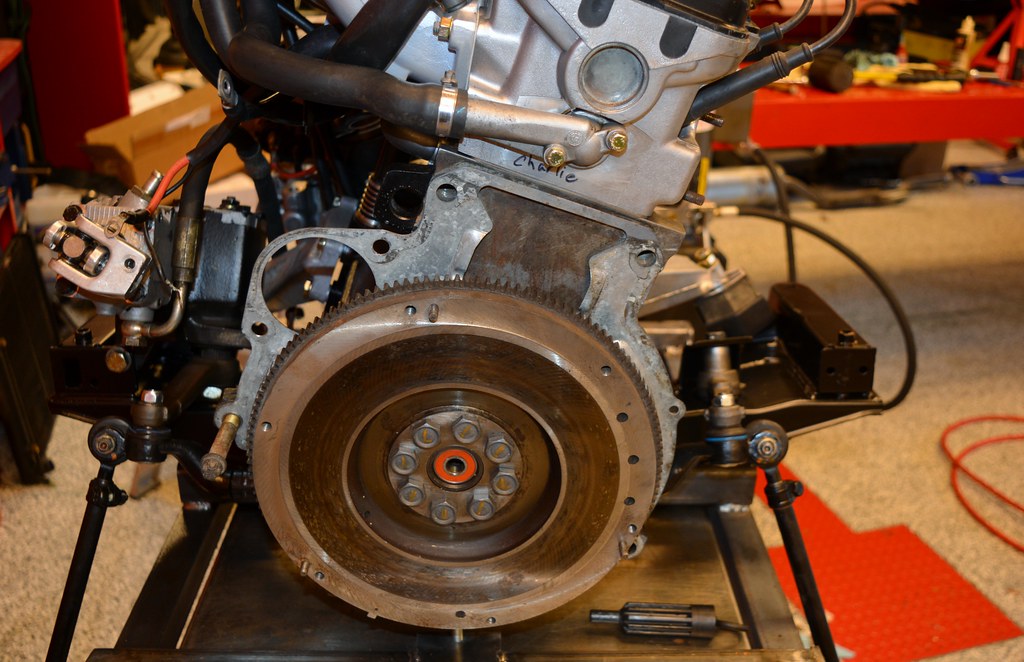
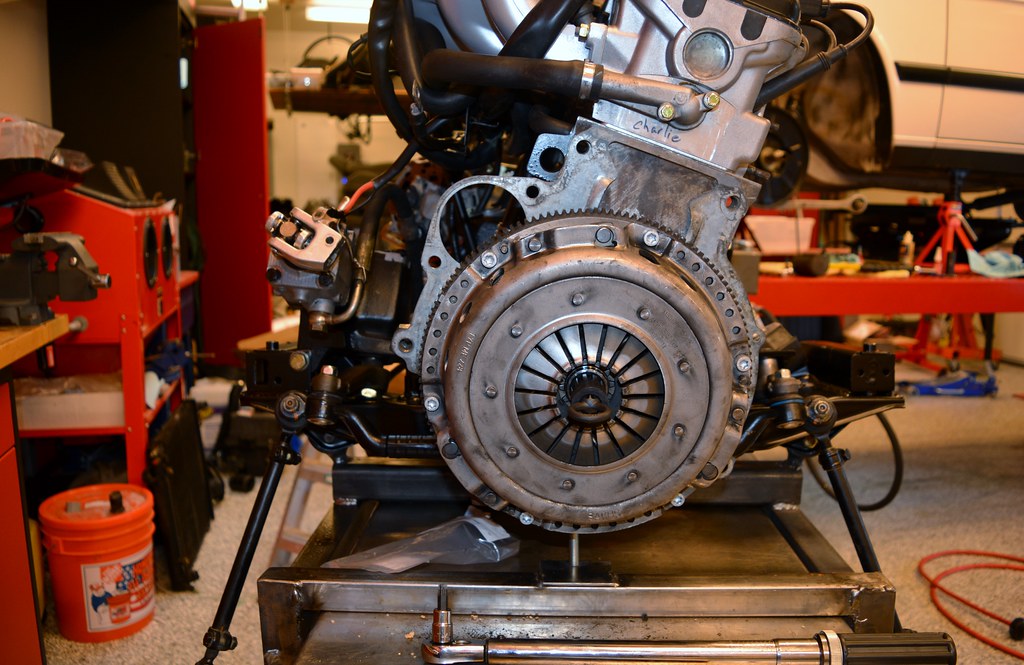
Got the right flywheel bolts from blunt.
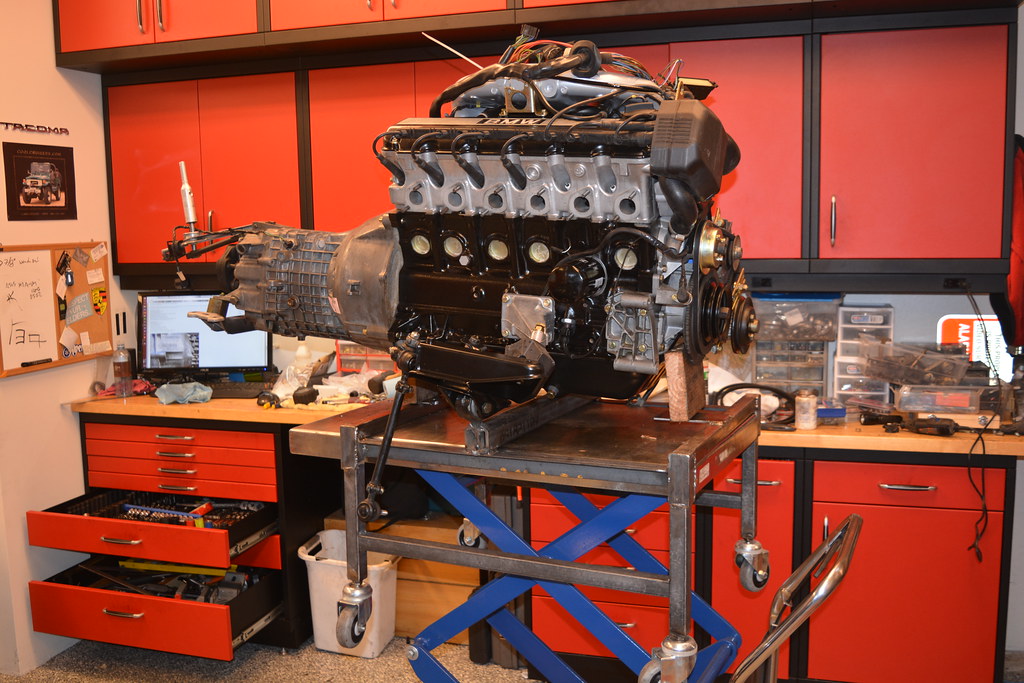
Hooked transmission up. Used the right greases on the splines and TO bearing.
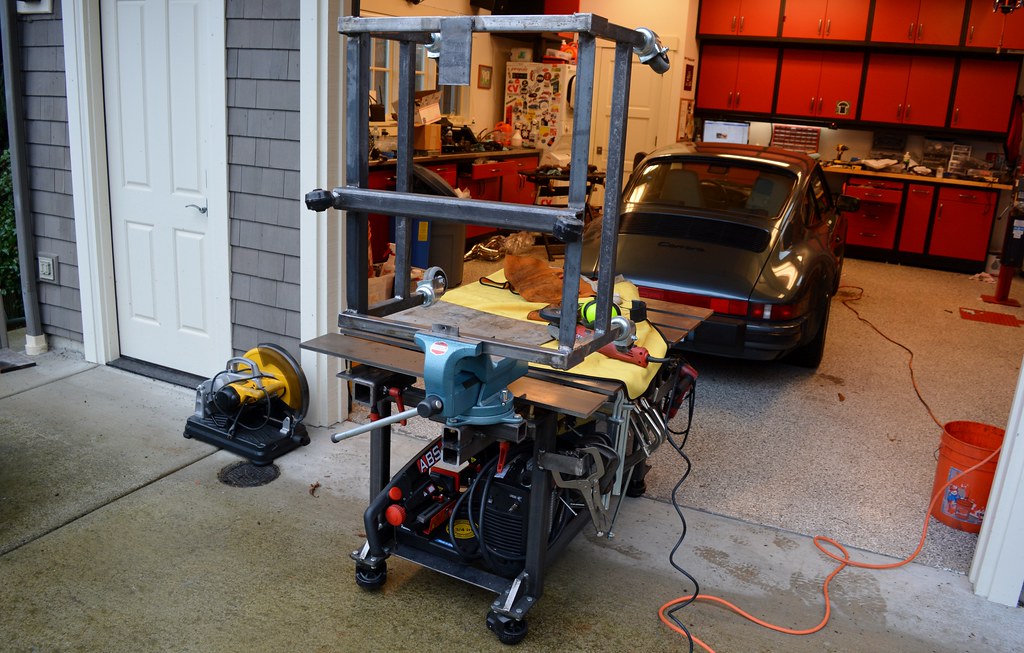
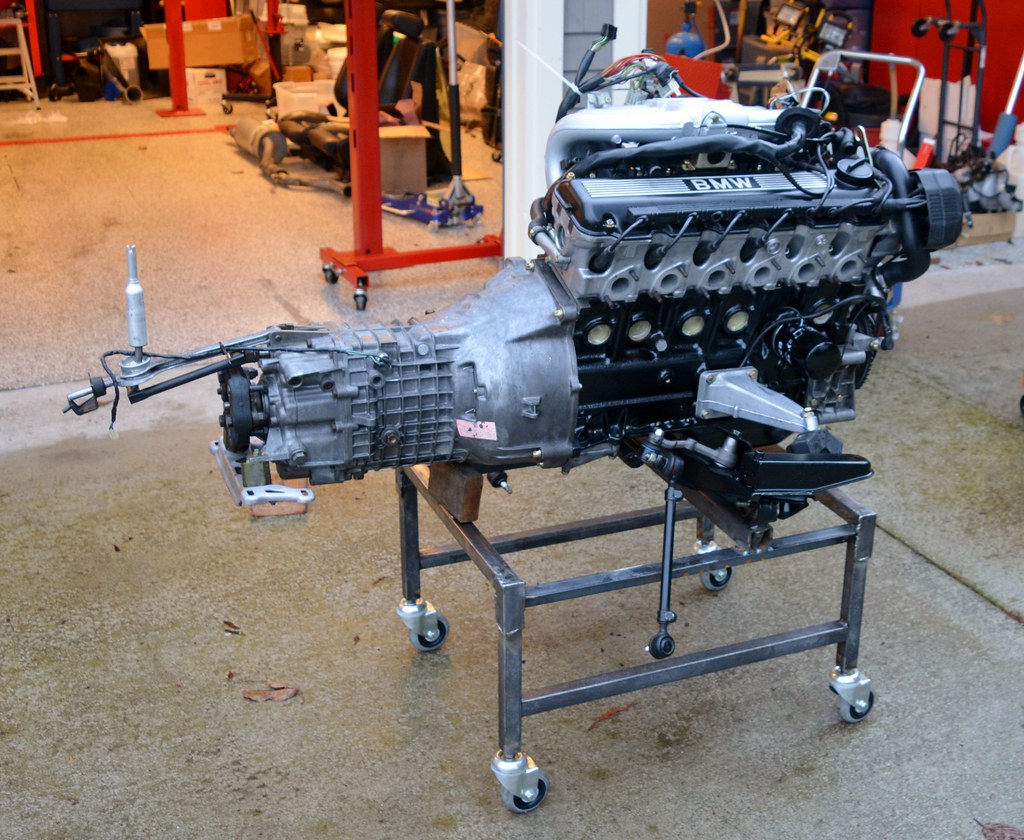
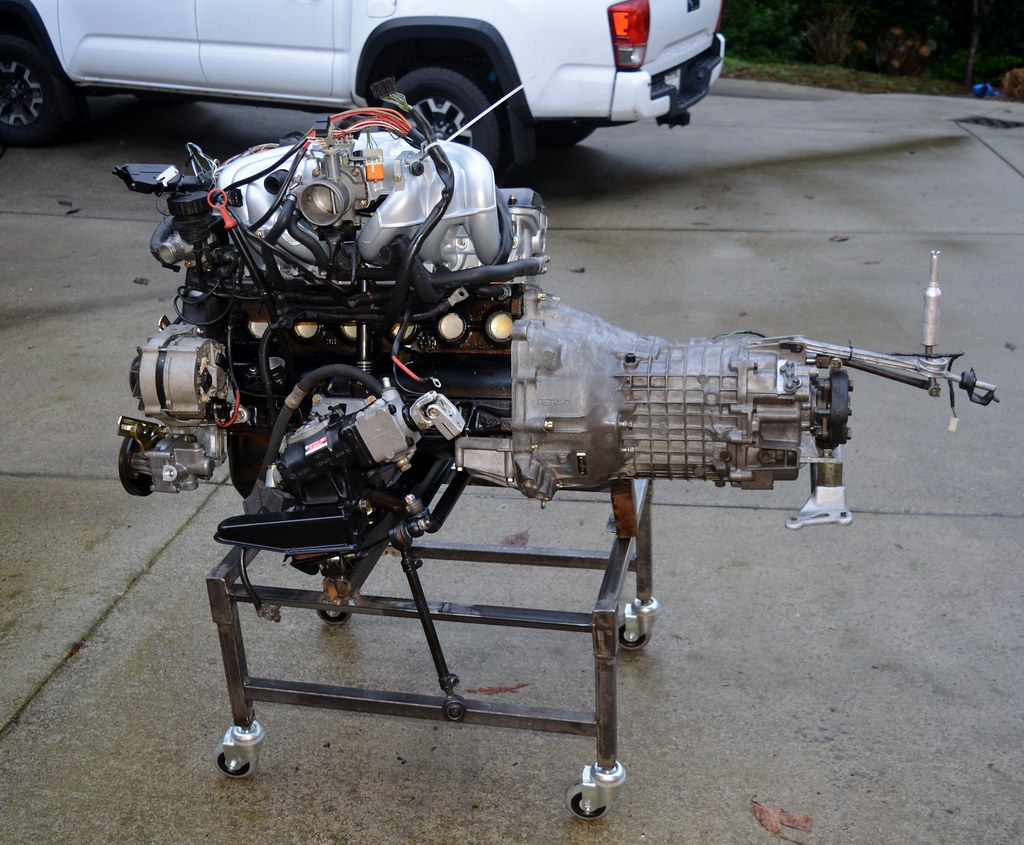
Tried another test-fitting lifting the engine and transmission up through the bottom with the lift table. Realized everything would go much more smoothly if I modified my cradle to mount the assembly further forward; will give more clearance with the front of my 4-post lift.
Always love a chance to get the welding table out!
A bit of the grinding wheel and some fresh welds and I set the engine/tranny back on. Much better balance too.
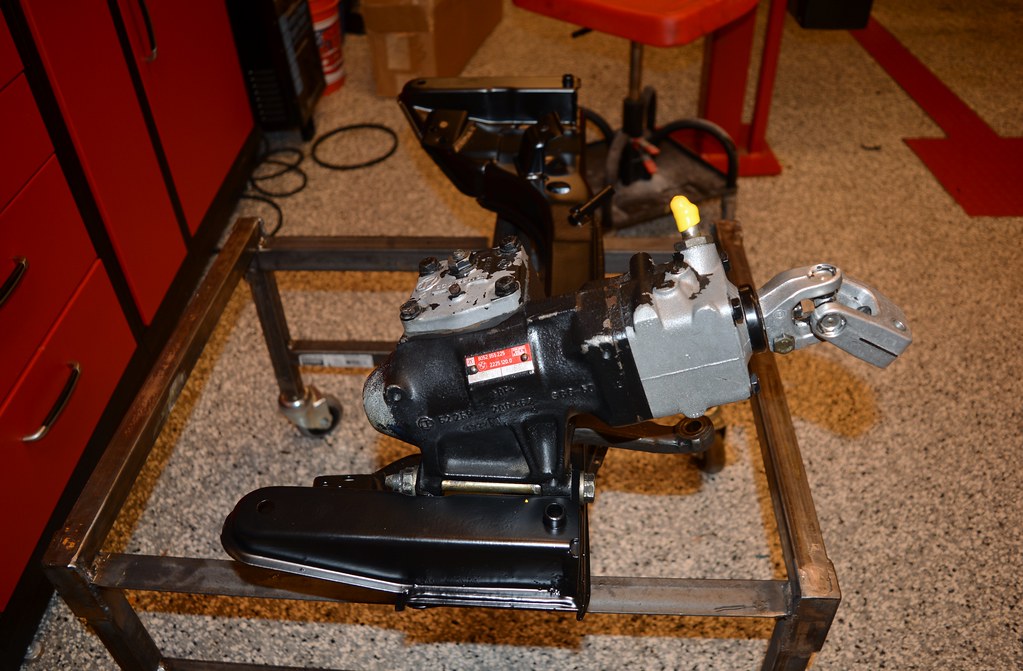
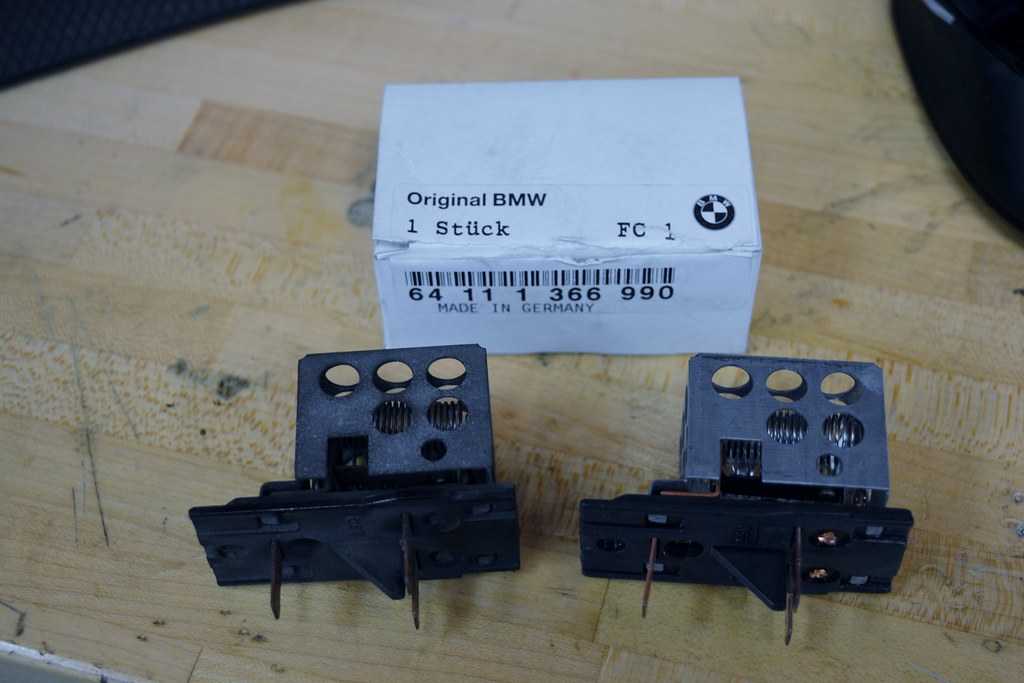
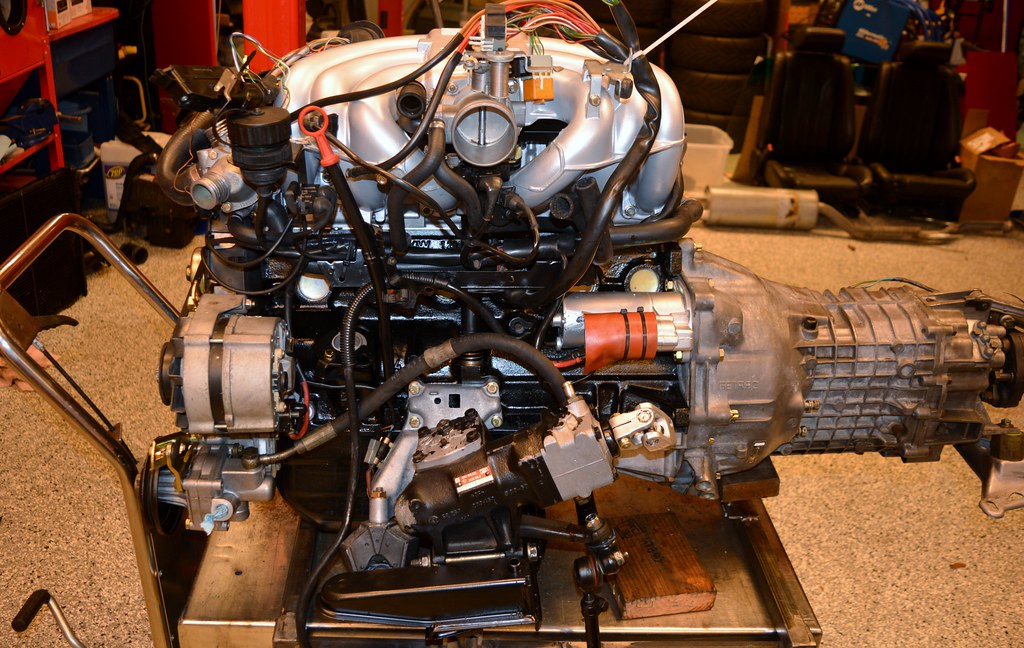
Got the starter installed and hooked up the PS hoses. Everything that needs to go together before it goes in the car is now done. But before I can put it in I need to do a few more things in the engine bay, including installing a new resistor pack. You'll recall my heater fan "races" to full speed at random times any time it is on. I expected the old resistor pack to look super rusty or destroyed. It actually looks fine. Hopefully this actually fixes the problem.
Re: Maytag: The Alpine '87 528e Bench Player
1st 5er wrote:cek wrote:I just read this whole thread again. Conclusion: The OP is insane.
... but he does deliver.
Re: Maytag: The Alpine '87 528e Bench Player
I read Vlad's entire thread tonight...
I read up on Maytag(who I think I fancy more than Vlad... I'm weird)...
... now to Minerva. Charlie, you inspire while I'm away from my E30. (and make me want to sell it for an E30!)
I read up on Maytag(who I think I fancy more than Vlad... I'm weird)...
... now to Minerva. Charlie, you inspire while I'm away from my E30. (and make me want to sell it for an E30!)
Re: Maytag: The Alpine '87 528e Bench Player
~80 miles on the new engine and suspension. Report.
Heater fan 'racing' appears to have been successfully resolved by installation of new heater resistor pack. yay.
New suspension (Spax + Billy Sports) is as good as I had hoped. Feels much like Vlad (which is perfect). I have snow tires on, so jury's still out until I swap back on summer tires
M5 steering box is <3
Engine pulls very strongly. Car is noticeably faster. Idle is rough. Need to adjust valves since they were last set on the bench. FWIW, I believe this roughness is what caused the transmission 'death rattle' to become so pronounced...the old engine idles smoothly enough to not cause it.
When I did the 5-speed swap, I developed a weird rattle / buzz from the pedal box area under acceleration. It persists. Light pressure on the clutch pedal causes it to go away; sounds like a spring really getting worked up. I will be removing the pedal box and trying to fix asap. Anyone else ever heard such a thing have any advice?
New hood release cable inbound from Blunt. Can't believe I broke the old one. Pissed me off good.
I'm jonesing to fix the seats. The seats in the car are Vlad's old Sport seats. Passenger seat was old driver's seat and thigh bolster is worn/torn. And it rocks like grandma's rocking chair. I have another set of Sport seats and have been considering recovering/refurbishing them and then selling these. Still noodling on what to do there.
Still don't have a 7k tach face.
Life is good.
Re: Maytag: The Alpine '87 528e Bench Player
Installed new hood release cable.
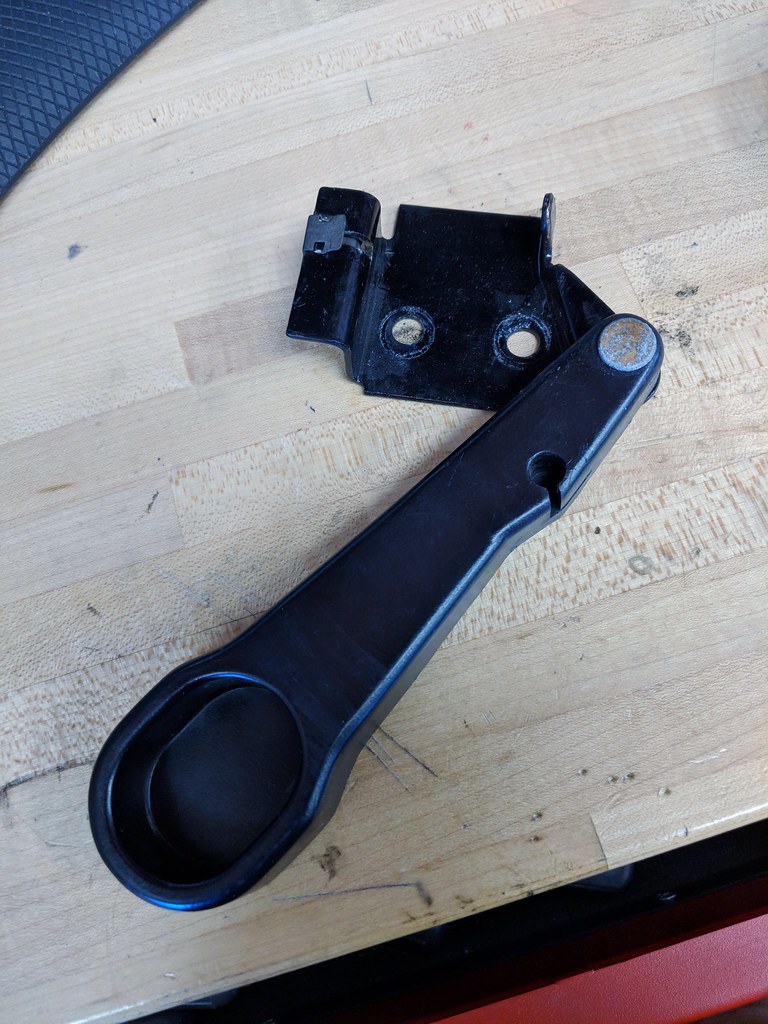
They go in a lot easier than I thought (Especially with the kick panel already removed). Pretty scary adjusting them though because if you get it wrong you are royally screwed. I took my time and care and amazingly didn't eff it up.
Interestingly the handle for the old one is fine. Just the cable snapped. On Minerva the handle is broken. I guess I'll keep this as a spare.

Re: Maytag: The Alpine '87 528e Bench Player
I would love to have a metal version of this handle, probably half the E28s I've owned had either a broken handle or broken cable.
The E23/24 both use a metal lever...
The E23/24 both use a metal lever...
Re: Maytag: The Alpine '87 528e Bench Player
See this thread in the Tech FAQs. Ask me how I knew it was there.cek wrote:Installed new hood release cable.
They go in a lot easier than I thought (Especially with the kick panel already removed). Pretty scary adjusting them though because if you get it wrong you are royally screwed. I took my time and care and amazingly didn't eff it up.
Re: Maytag: The Alpine '87 528e Bench Player
Bath and BBS RZ wheels. Went for a spirited drive...
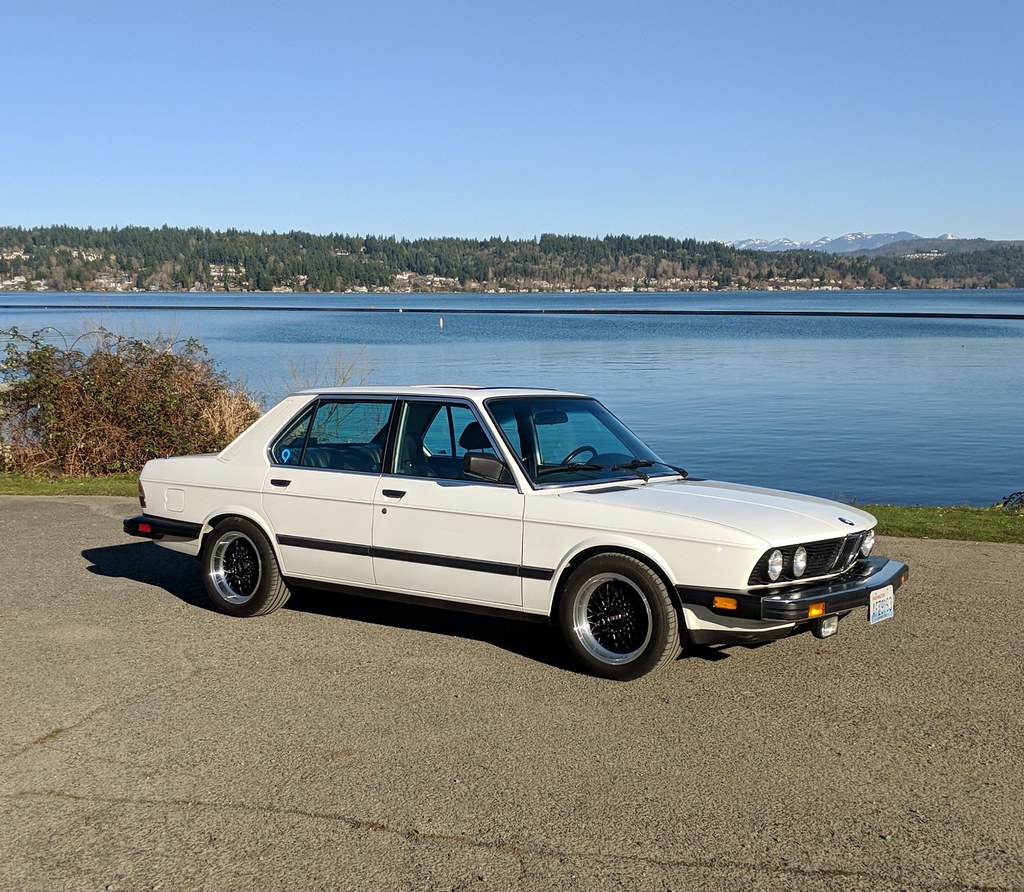
With real tires (as opposed to the Nokian Hakkapeliitta snow and ice tires that have been on all winter) I could finally push hard off the line and in the twisties. The car is totally transformed, as expected, by the much higher revving and more powerful motor, billie sports/H&R springs, and M5 steering box. I'm in love all over again.

With real tires (as opposed to the Nokian Hakkapeliitta snow and ice tires that have been on all winter) I could finally push hard off the line and in the twisties. The car is totally transformed, as expected, by the much higher revving and more powerful motor, billie sports/H&R springs, and M5 steering box. I'm in love all over again.
Re: Maytag: The Alpine '87 528e Bench Player
Belly, belly nice.
Re: Maytag: The Alpine '87 528e Bench Player
#inspirational
Re: Maytag: The Alpine '87 527i
Few things.
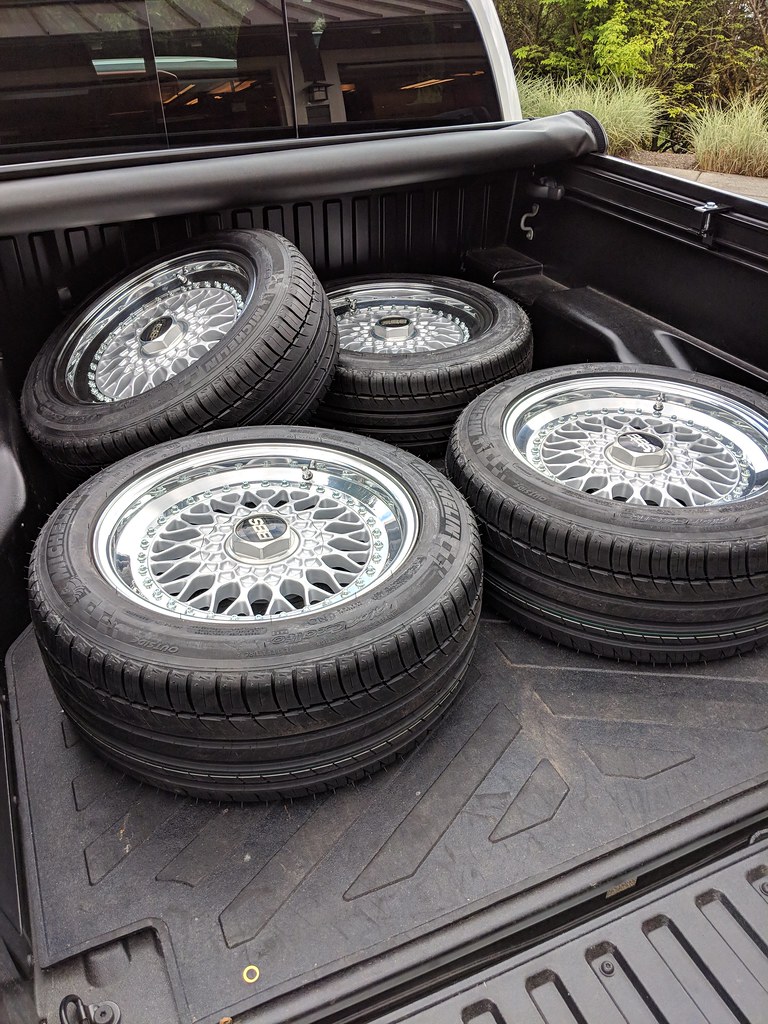
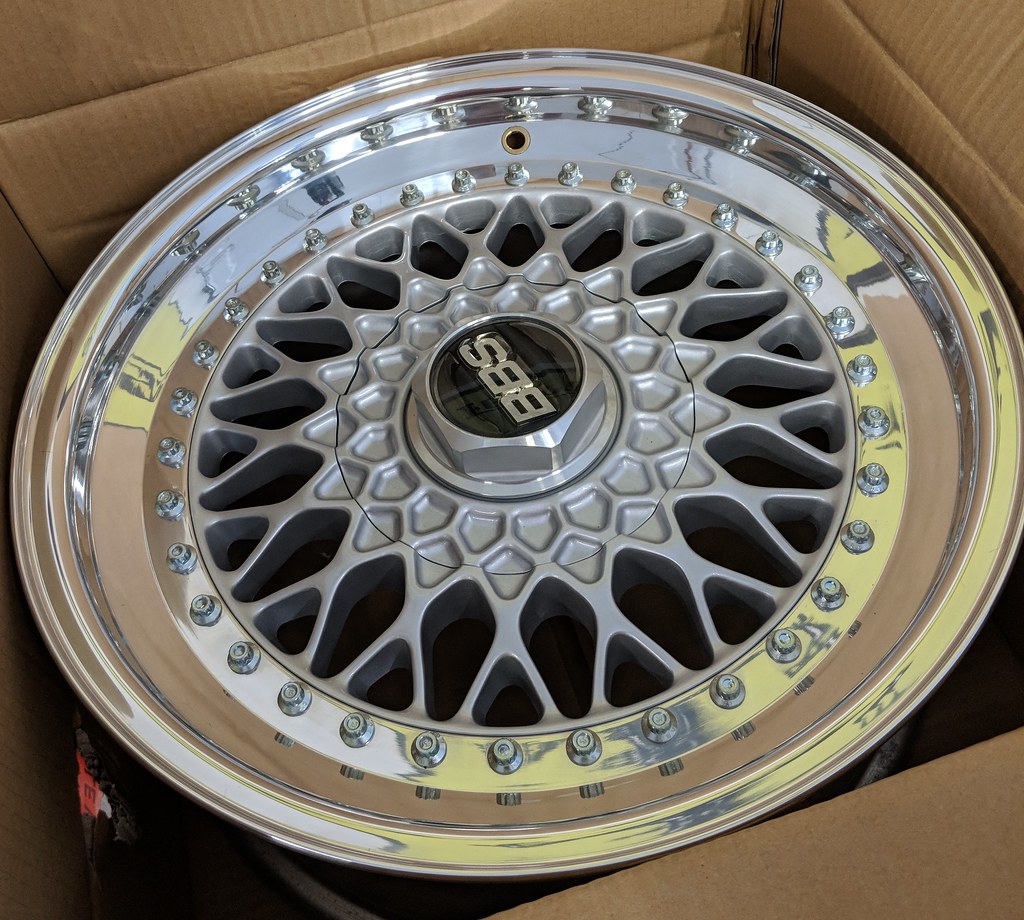
First, because wheels, these will be going on Maytag first. I'm putting pure summer tires on them (Michelin Pilot Exalto PE2). On @occoupe's recommendation I had them ceramic coated.
Yesterday I started digging into the Sport Seats that came out of the '88 Turbo car I parted out. Recall the seats in Maytag now are Vlad's old seats and they are not ideal. The passenger seat (which was the driver seat) rocks like granny's old chair and the thigh bolster is ripped. The driver's seat is in good cosmetic shape, but also rocks/squeaks pretty badly.
The plan was to see how good/bad the '88 Turbo seats were and how far I could get making one great set out of two. I also bought a set of re-enforcement plates from @bengerman (http://www.mye28.com/viewtopic.php?f=3&t=142588).
Step one was to start inspecting the seats.
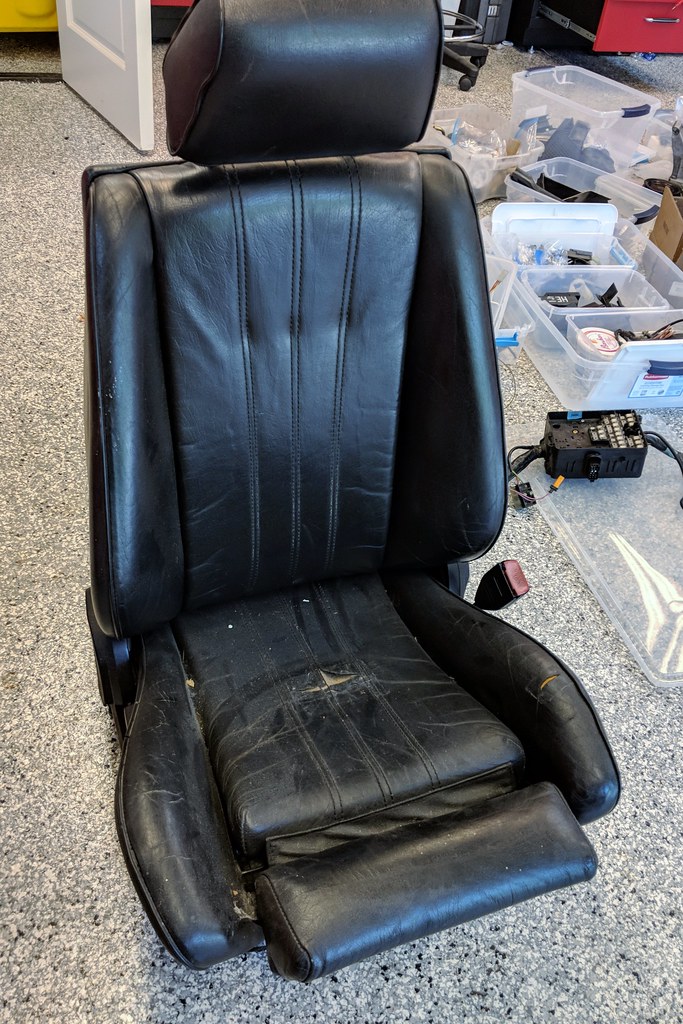
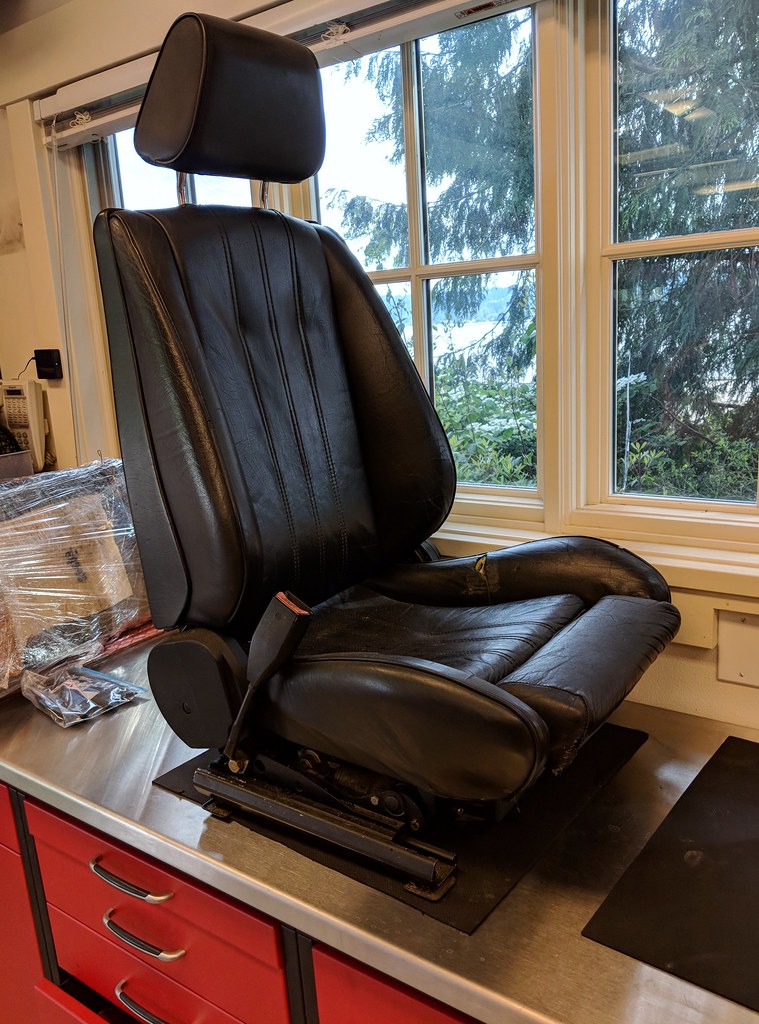
Both show tears. It appears the PO swapped these left to right previously because (a) they are both worn on the left side, and (b) the driver seat is in FAR better shape mechanically than the passenger seat. In fact, I've never felt an E28 sport seat that was so tight! This makes me happy. This seat will be Maytag's new driver's seat for sure!
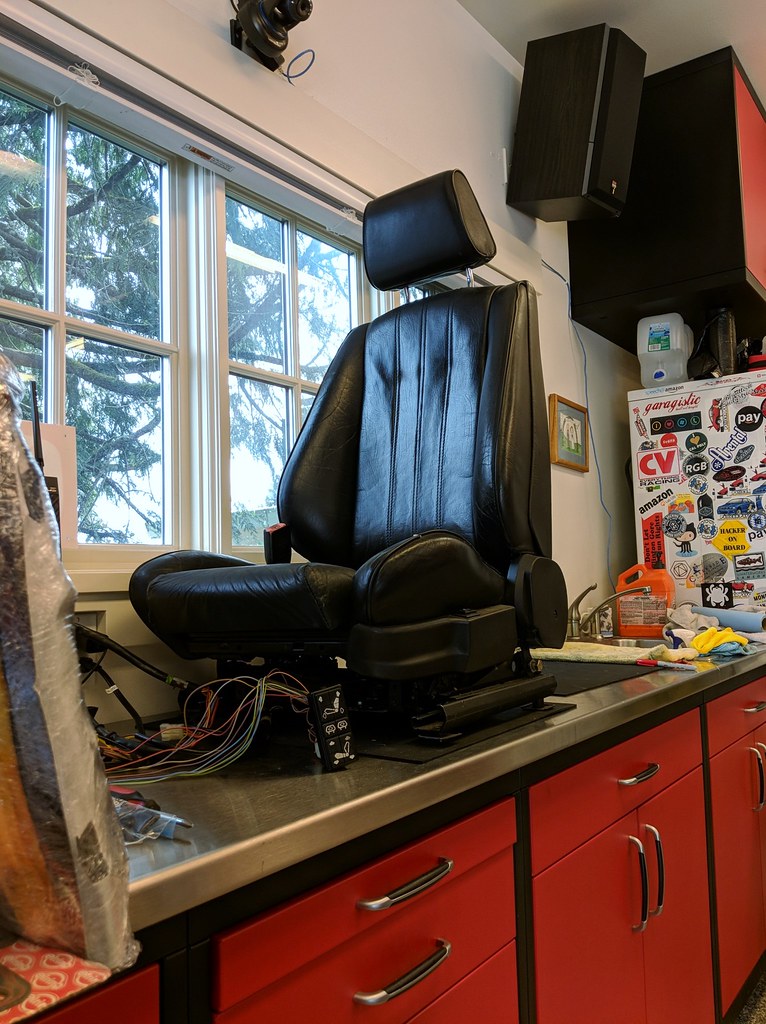
I rigged up a 12V supply and seat switch to test the mechanisms. Everything but the headrests works, but all could use a cleaning and greasing.
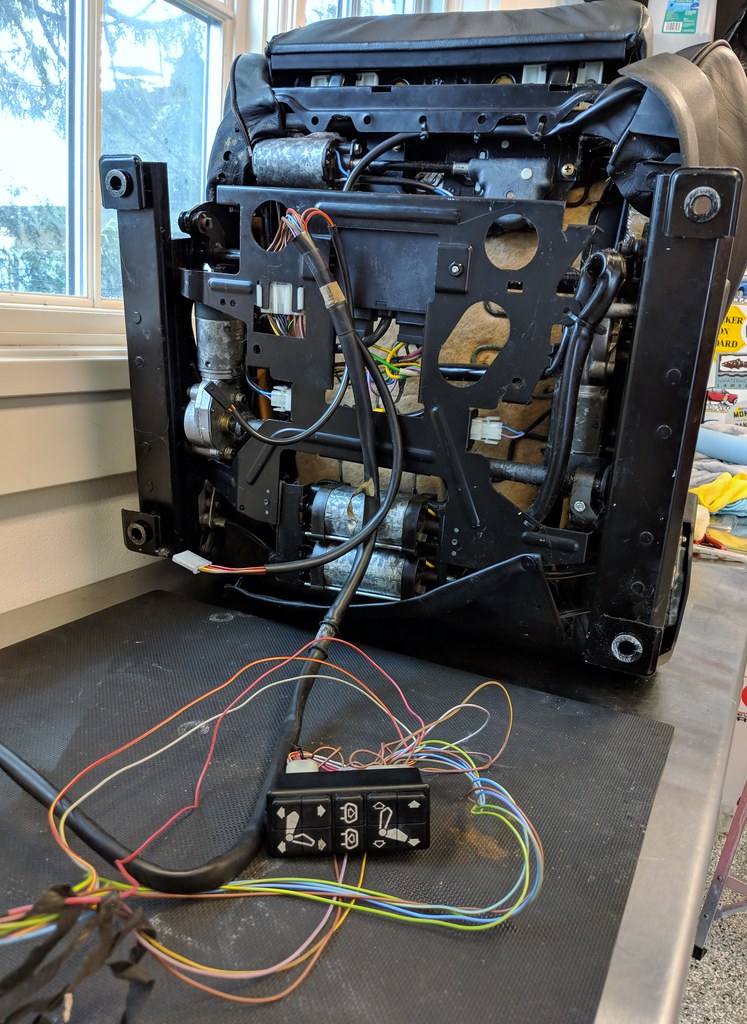
You don't actually have to remove the headrest mechanism to fix this problem, but I was feeling ambitious. Fixing head rests that stop working is actually very easy. What happens is the rubber sheath that houses the cable from the motor to the mechanism gets longer over time. This causes the cable to pull out of the motor/mechanism so it doesn't engage.
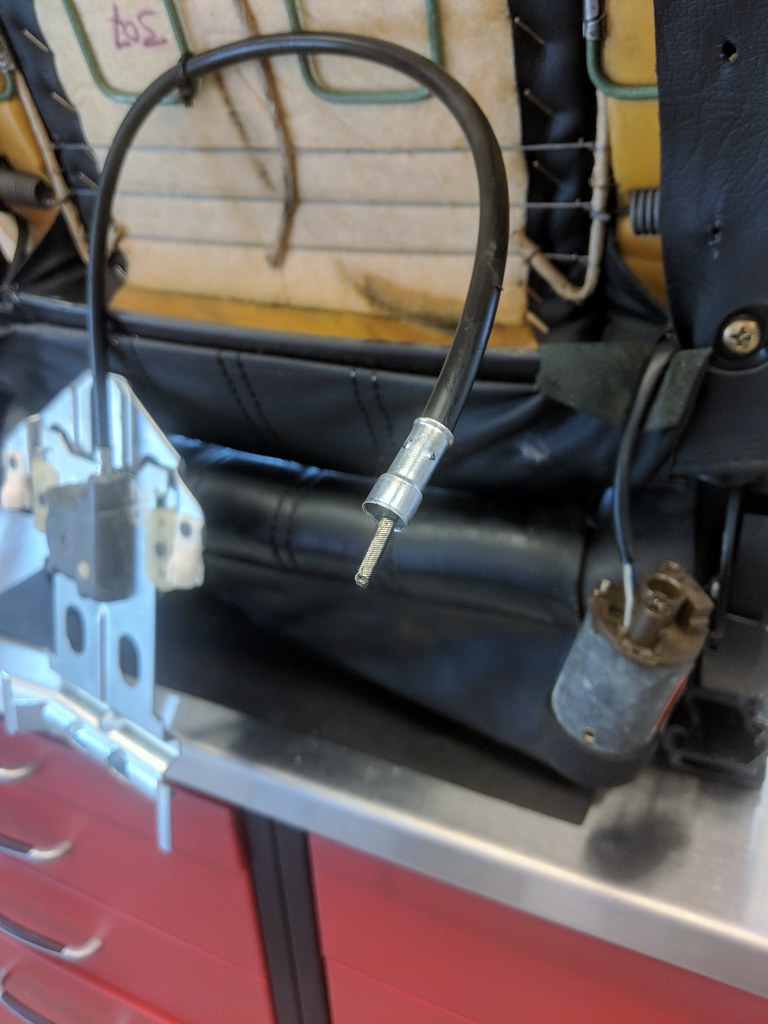
The fix is to shorten the rubber sheath.
1) Remove the two screws that hold the bracket to the motor. This will enable the motor-end of the cable to come free.
2) Slide the cable out of the sheath. It should be greasy. It needs to be greasy. Lithium grease is good.
3) Use a torch/lighter/heat gun to heat up the tip you pulled out of the motor. Once the rubber has melted/softened you can easily pull the tip off.
4) Cut the sheath. I find cutting it the length it was inserted into the tip works fine, but you are better off cutting less than more, because you can always cut more if it doesn't work well.
5) Use some sort of cylinrical tool that will fit within the tip and press the little grabby hook things back. I used a tapered chisel like this:

6) Press the rubber sheath into the tip.
7) Slide cable back into sheath and test the mechanism.
8) If it goes in all the way and the mechanism works, use a punch to cause the grabby hook things to bite into the rubber again and final assemble.
https://www.instagram.com/p/BiaEbHDF09p/?taken-by=cekzy
Woot!
If anyone has a black leather left-side lower bolster for an E28 sport seat that is not torn, I will pay good monies for it!! Let me know.
First, because wheels, these will be going on Maytag first. I'm putting pure summer tires on them (Michelin Pilot Exalto PE2). On @occoupe's recommendation I had them ceramic coated.

Yesterday I started digging into the Sport Seats that came out of the '88 Turbo car I parted out. Recall the seats in Maytag now are Vlad's old seats and they are not ideal. The passenger seat (which was the driver seat) rocks like granny's old chair and the thigh bolster is ripped. The driver's seat is in good cosmetic shape, but also rocks/squeaks pretty badly.
The plan was to see how good/bad the '88 Turbo seats were and how far I could get making one great set out of two. I also bought a set of re-enforcement plates from @bengerman (http://www.mye28.com/viewtopic.php?f=3&t=142588).
Step one was to start inspecting the seats.


Both show tears. It appears the PO swapped these left to right previously because (a) they are both worn on the left side, and (b) the driver seat is in FAR better shape mechanically than the passenger seat. In fact, I've never felt an E28 sport seat that was so tight! This makes me happy. This seat will be Maytag's new driver's seat for sure!

I rigged up a 12V supply and seat switch to test the mechanisms. Everything but the headrests works, but all could use a cleaning and greasing.

You don't actually have to remove the headrest mechanism to fix this problem, but I was feeling ambitious. Fixing head rests that stop working is actually very easy. What happens is the rubber sheath that houses the cable from the motor to the mechanism gets longer over time. This causes the cable to pull out of the motor/mechanism so it doesn't engage.

The fix is to shorten the rubber sheath.
1) Remove the two screws that hold the bracket to the motor. This will enable the motor-end of the cable to come free.
2) Slide the cable out of the sheath. It should be greasy. It needs to be greasy. Lithium grease is good.
3) Use a torch/lighter/heat gun to heat up the tip you pulled out of the motor. Once the rubber has melted/softened you can easily pull the tip off.
4) Cut the sheath. I find cutting it the length it was inserted into the tip works fine, but you are better off cutting less than more, because you can always cut more if it doesn't work well.
5) Use some sort of cylinrical tool that will fit within the tip and press the little grabby hook things back. I used a tapered chisel like this:

6) Press the rubber sheath into the tip.
7) Slide cable back into sheath and test the mechanism.
8) If it goes in all the way and the mechanism works, use a punch to cause the grabby hook things to bite into the rubber again and final assemble.
https://www.instagram.com/p/BiaEbHDF09p/?taken-by=cekzy
Woot!
If anyone has a black leather left-side lower bolster for an E28 sport seat that is not torn, I will pay good monies for it!! Let me know.
Re: Maytag: The Alpine '87 527i
I dug in further to these seats today. The one above is actually either the original driver's seat which was moved to the passenger side or the passenger was of this car was a fat ass as well as the driver.
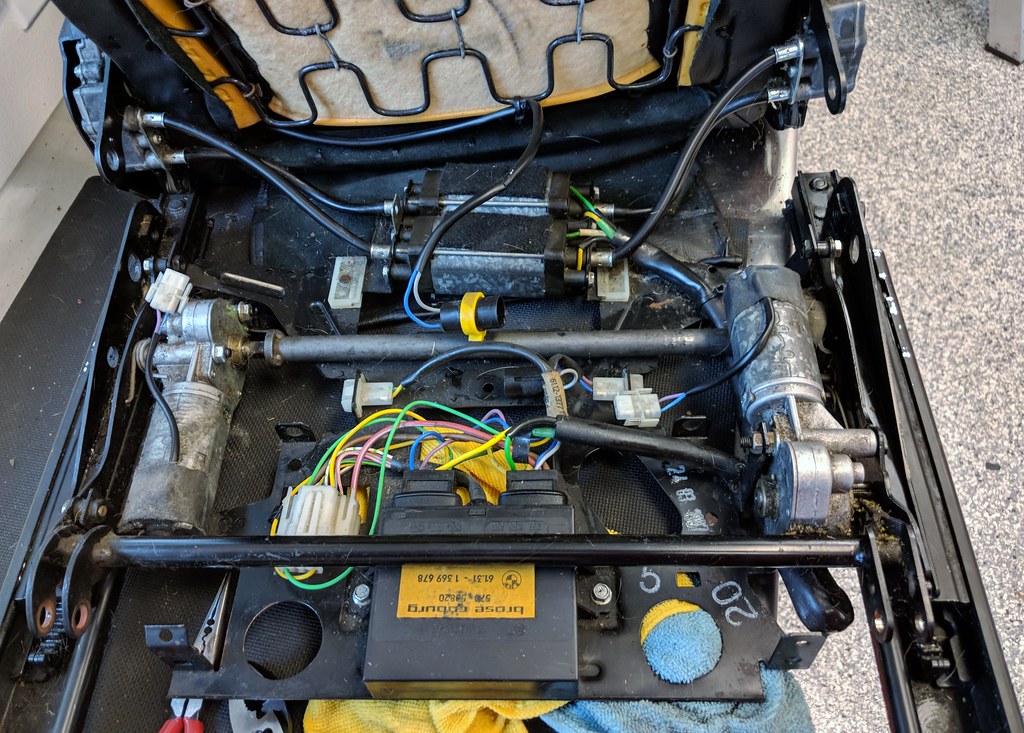
Both seats have broken frames. I dug into the one above to get the bad leather off and immediately noticed the bolster support welds were broken.
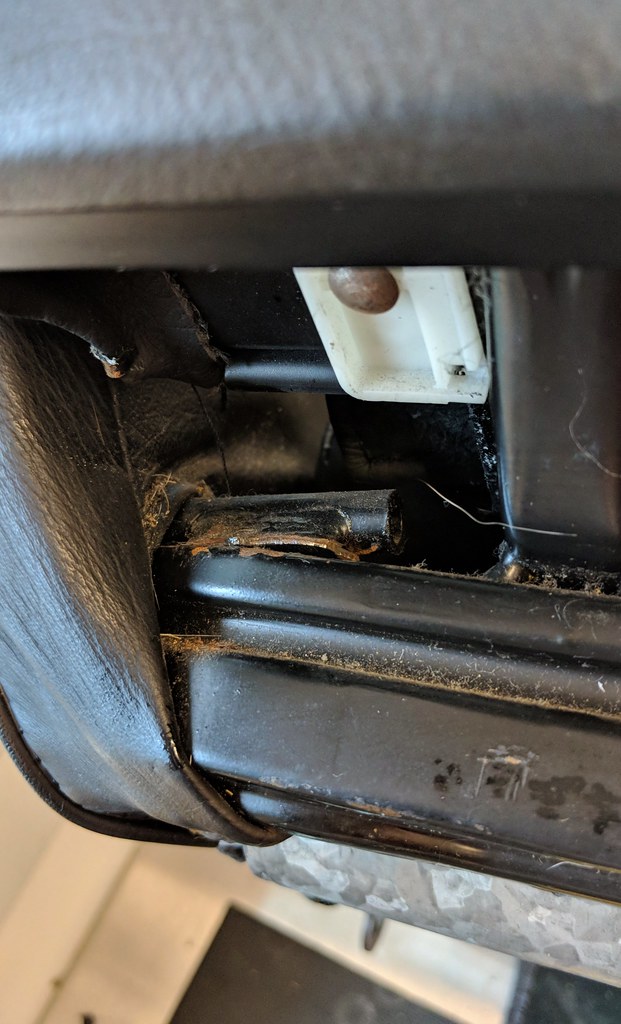
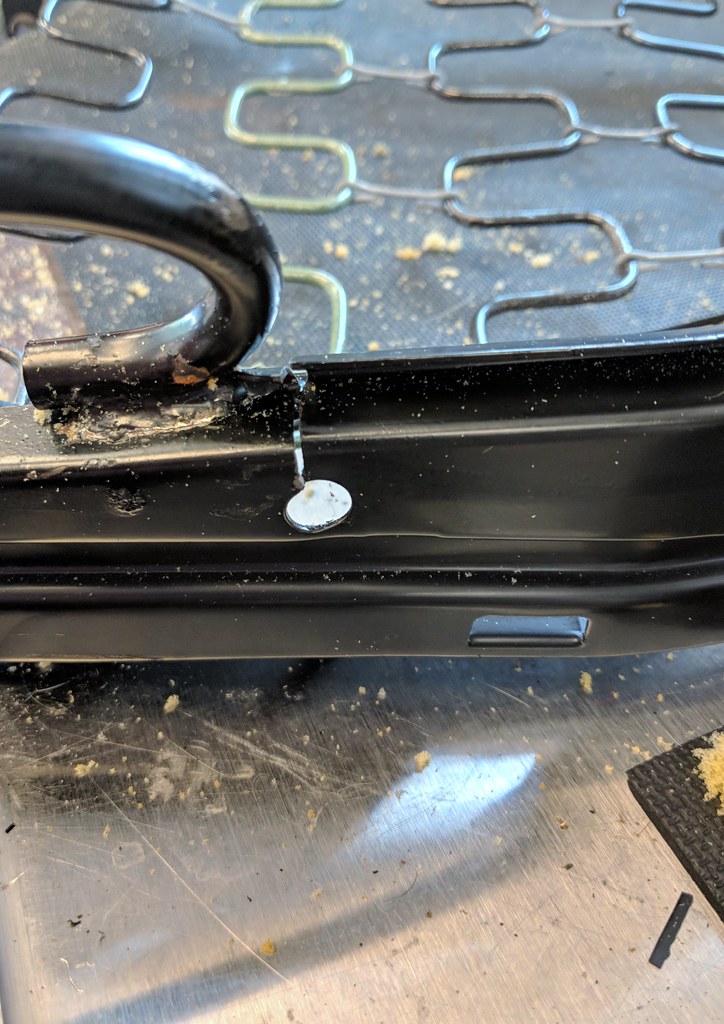
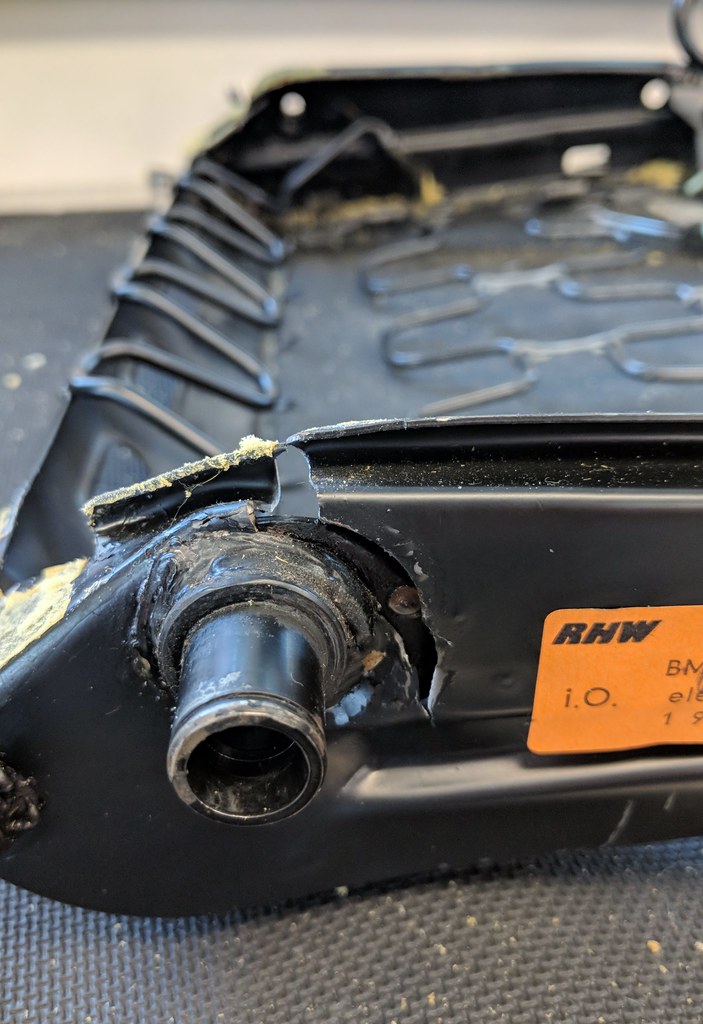
It's odd because this seat (a) LOOKed to less wonky and (b) has almost no play in the mechanism. But it's actually broken in FOUR places.
As I pulled them apart, I was careful to photograph where at the hog-ties go.
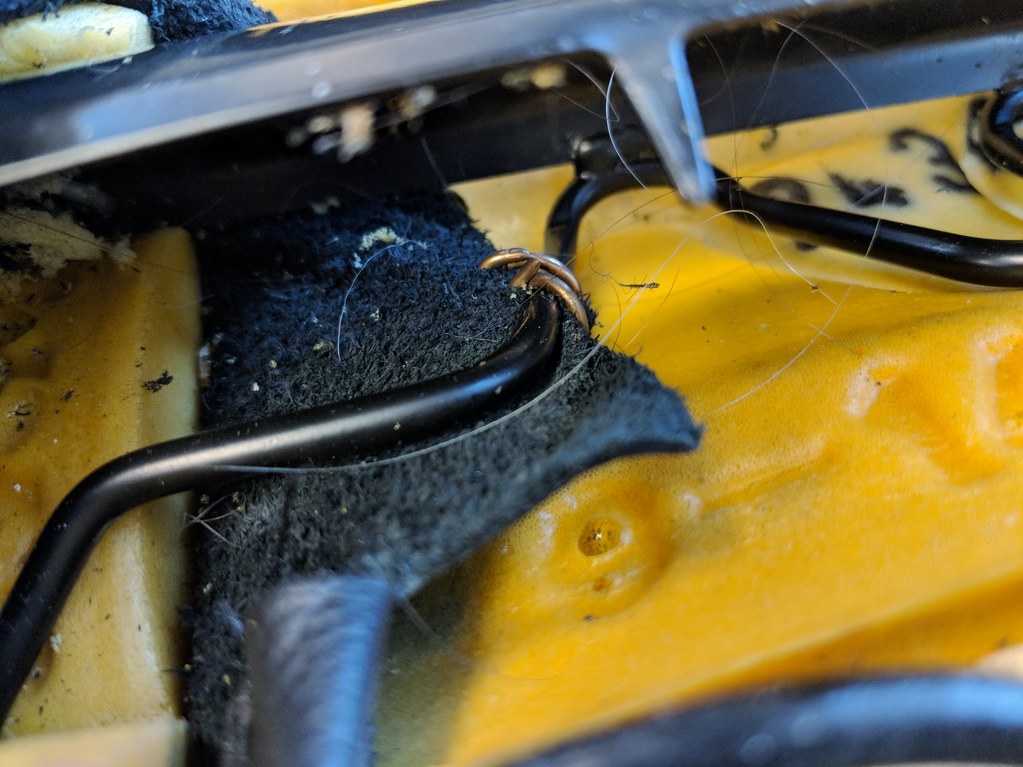
Both bolster supports:
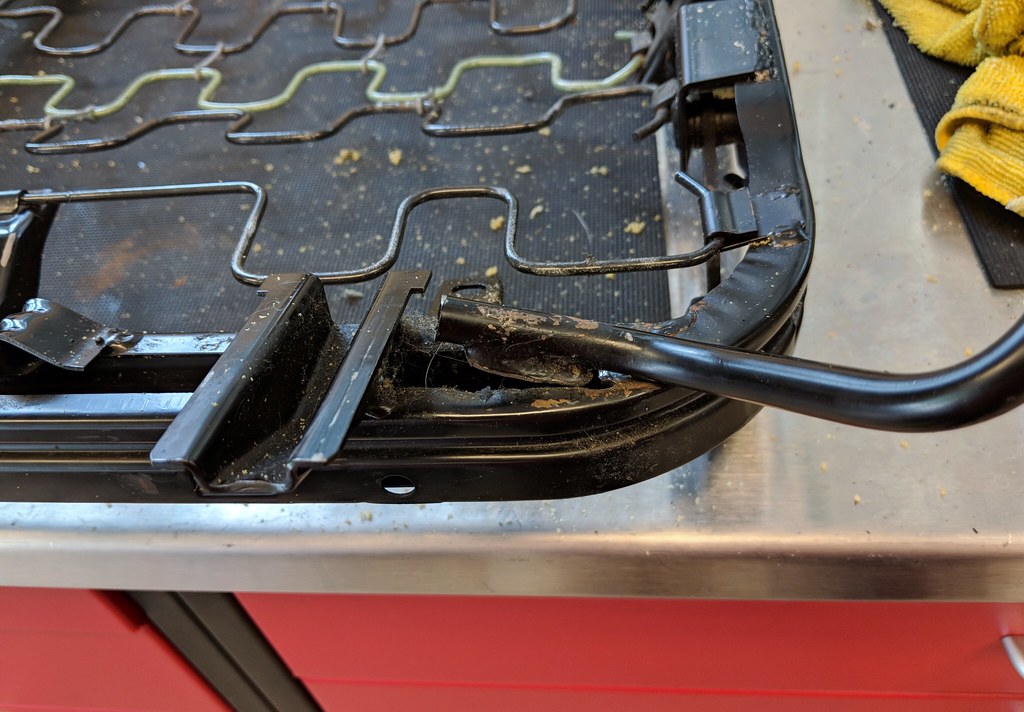
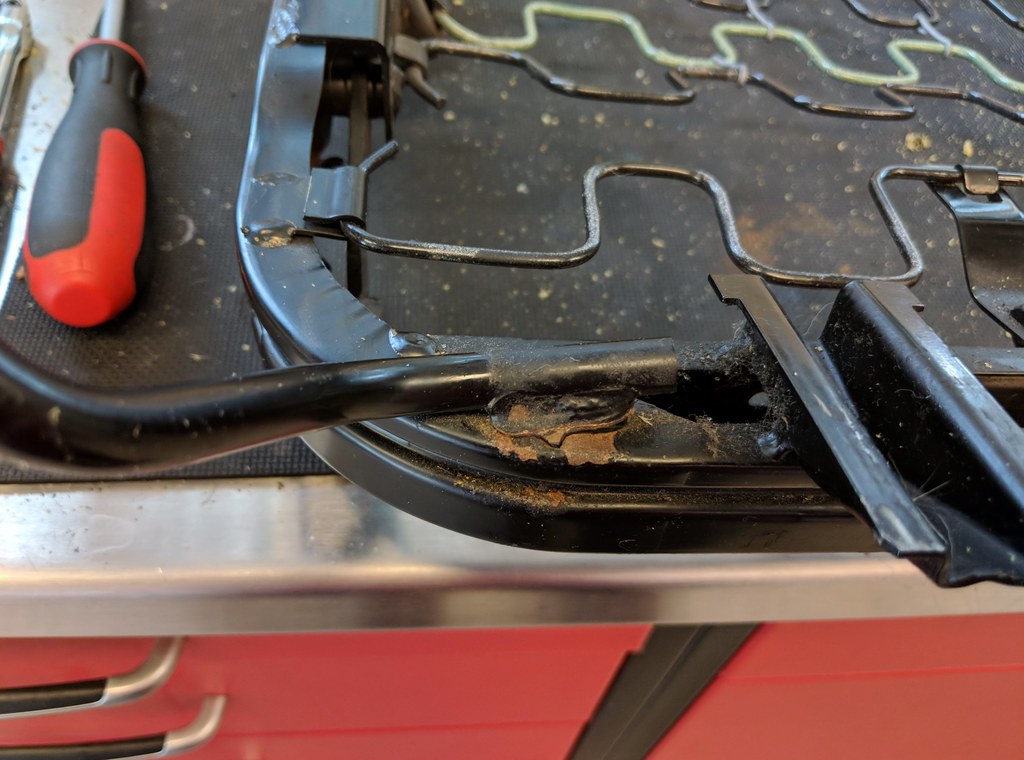
On the left side, behind the bolster support weld:
And, on the right side by the hinge. Yowza!
The 2nd seat was clearly the driver's seat and was DISGUSTING:
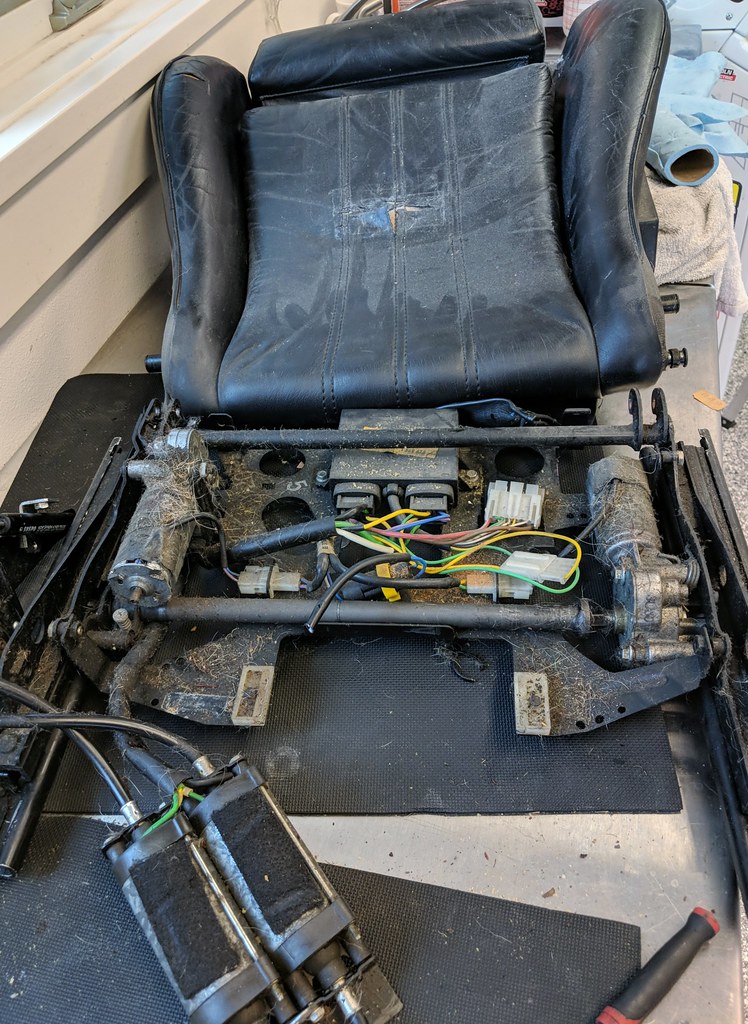
And had a broken wire:
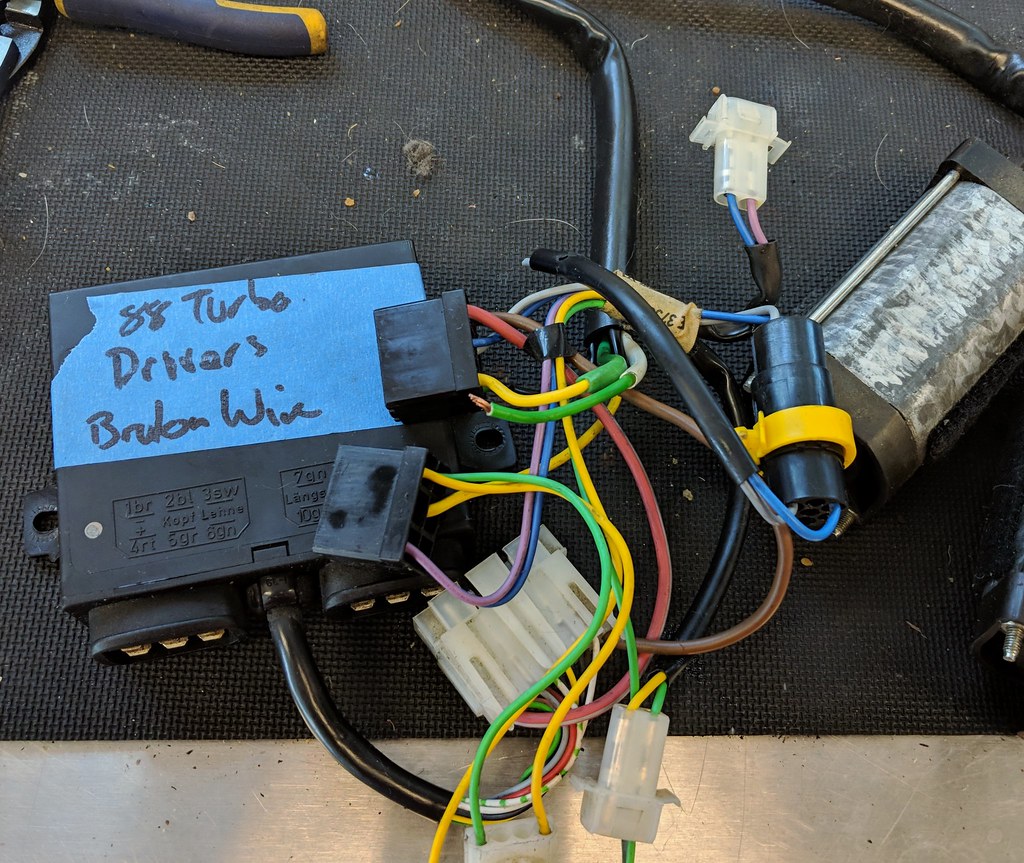
It also had both bolster supports broken::
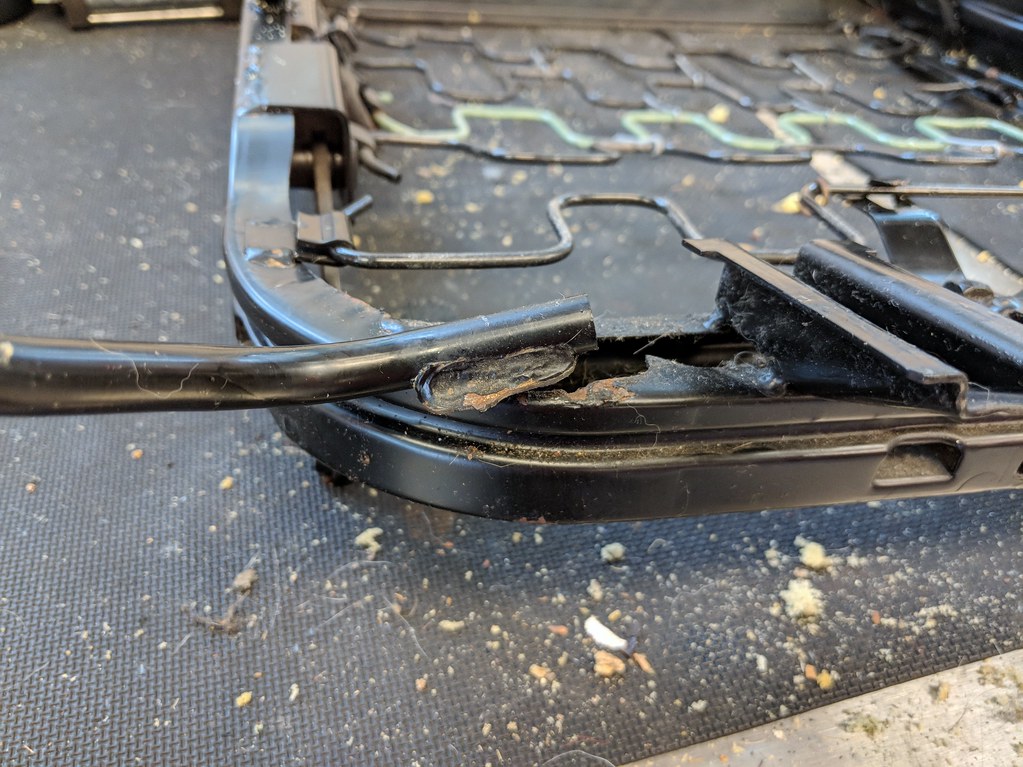
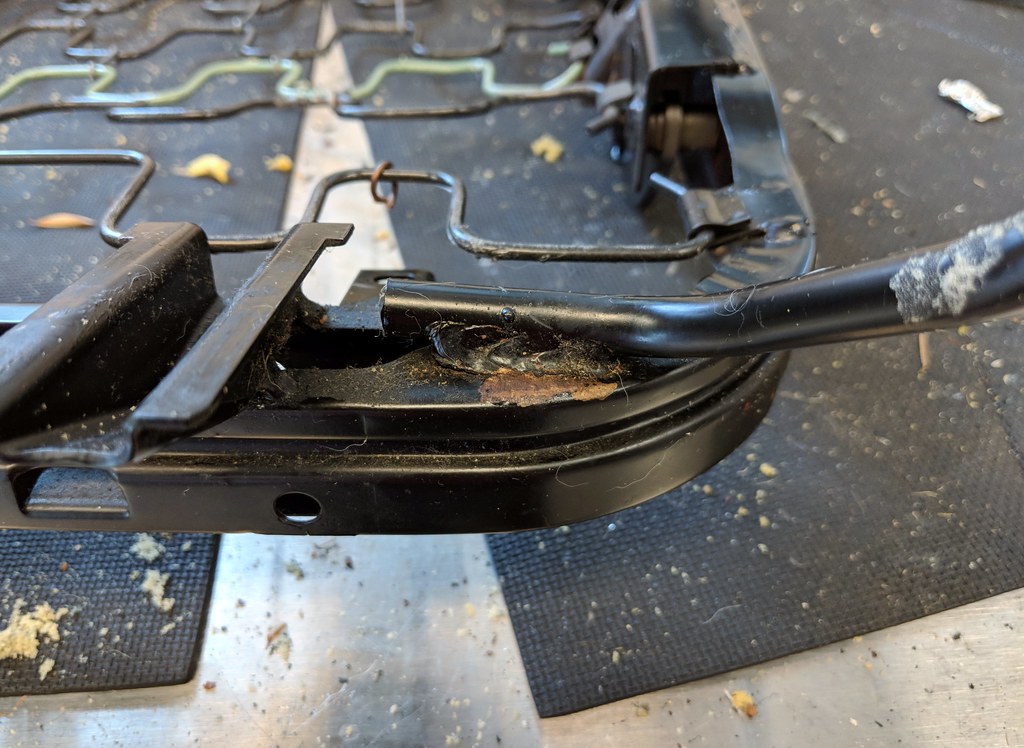
Both lower bolsters on this seat were bent way out of shape, so I'm not surprised these welds are broken. I am surprised that the rest of this seat's frame is perfectly fine.
This really shows how horked that passenger seat was!
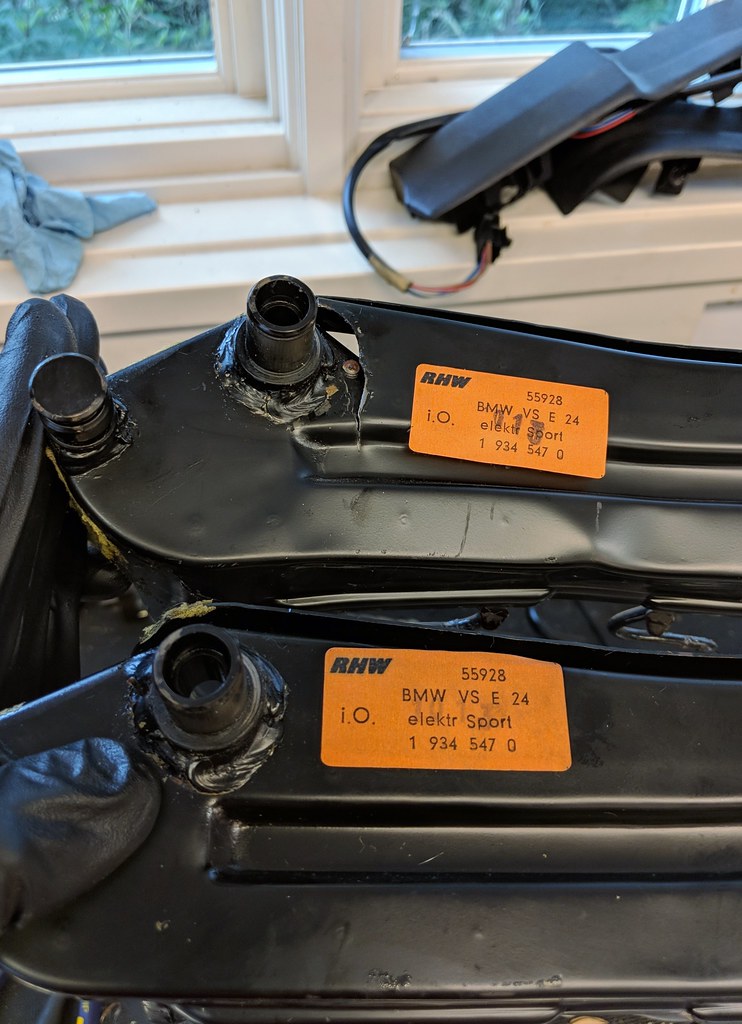
Need to source one of these:
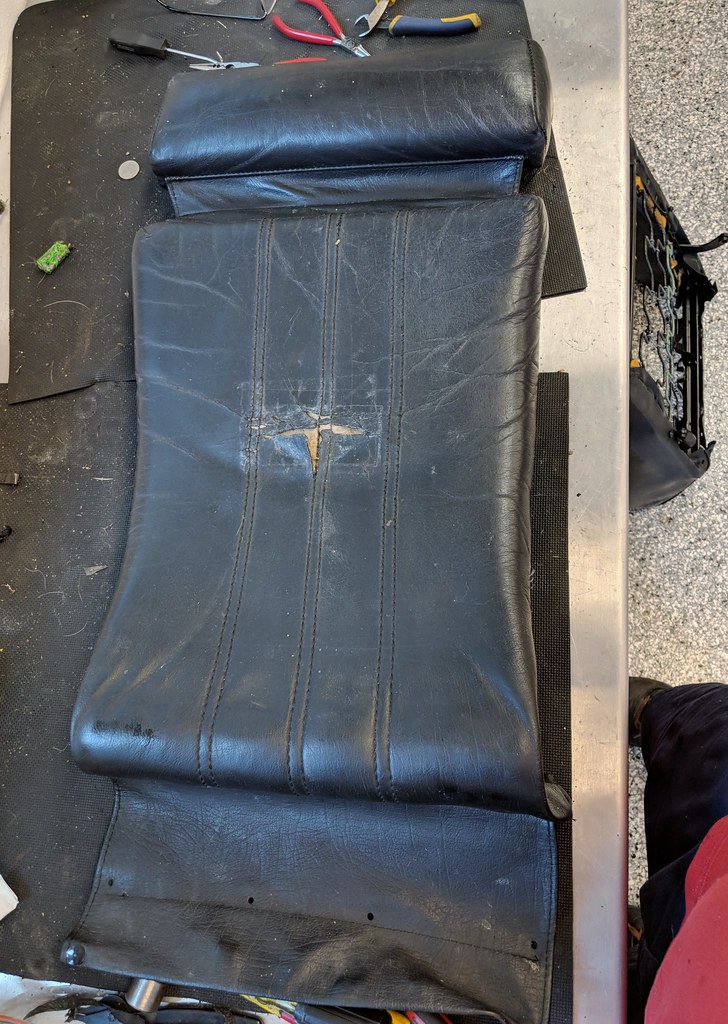
With a side piece from a good seat this is totally awesome for the driver's seat:
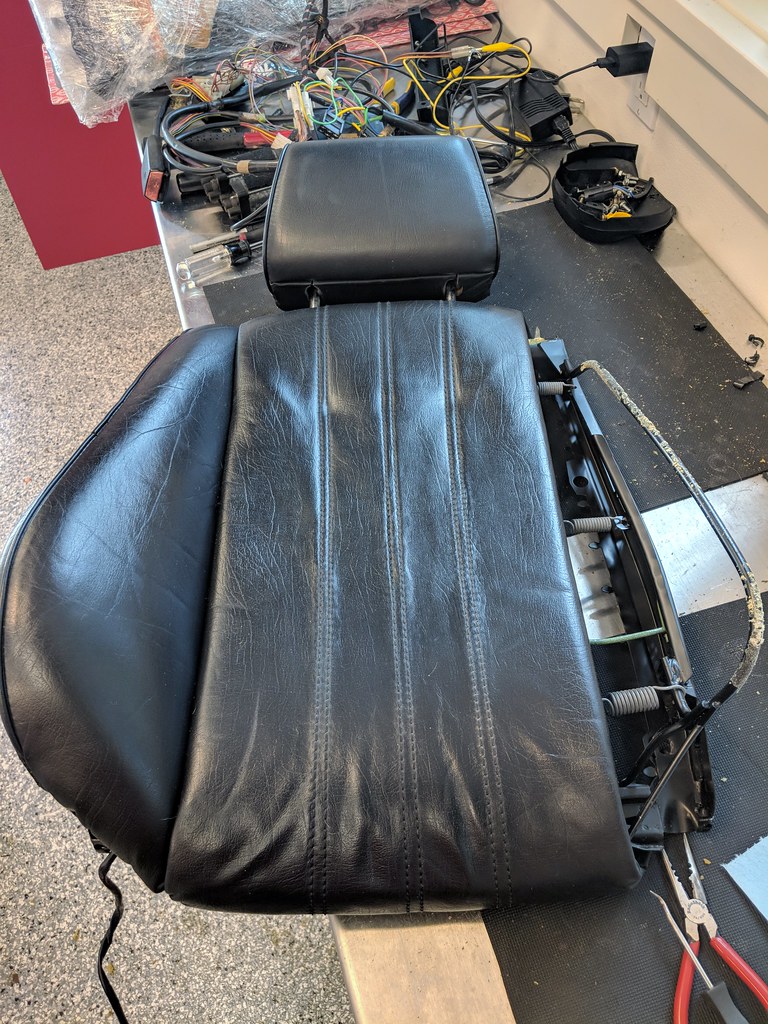
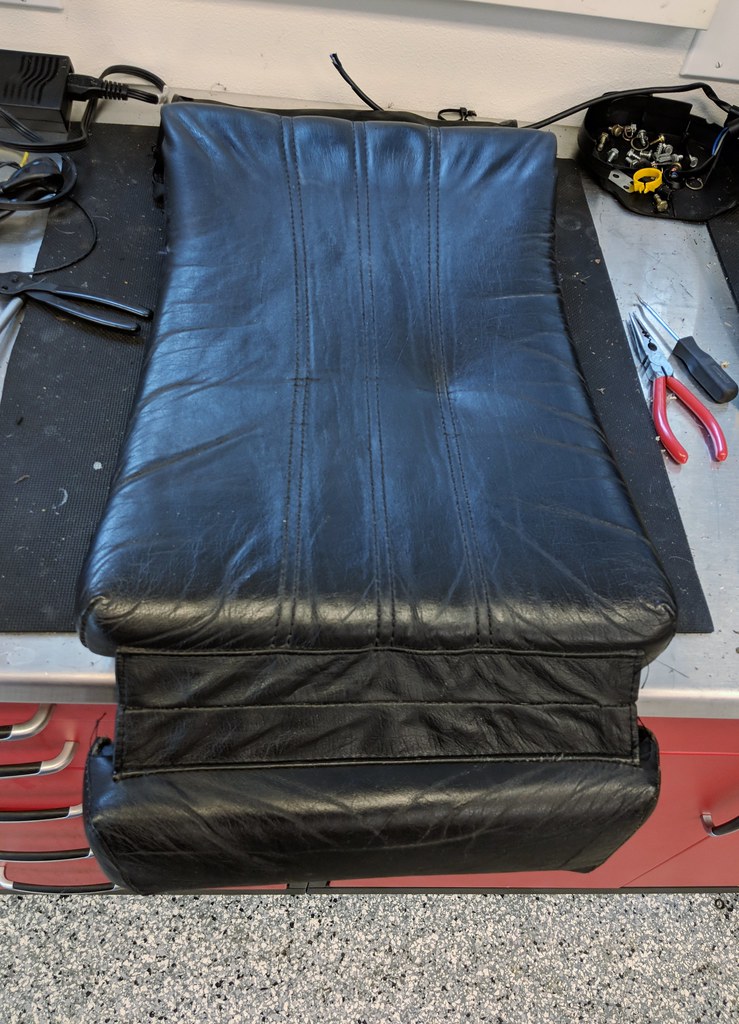
This is in even better shape. Totally using this as the back of the driver's seat:
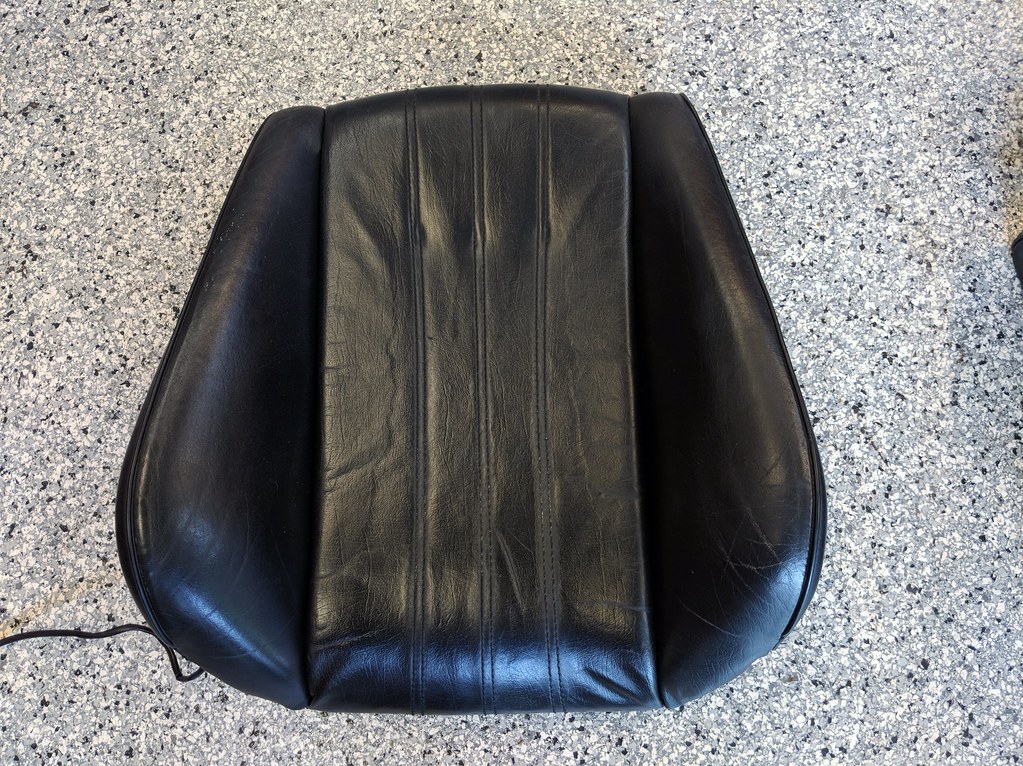
This center piece is in great shape.
There was a bunch of bare/slightly rusting metal on these bases, so I cleaned them up and shot them with a little paint.
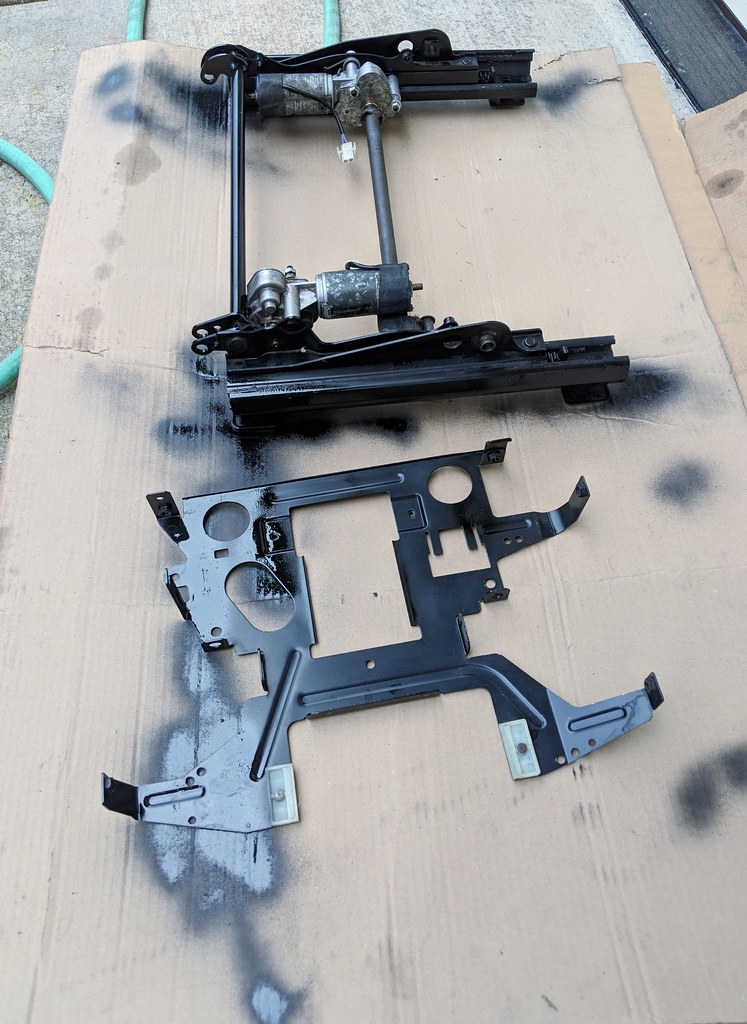
I'm going to try to fix both frames. The better one should be straight forward, because the welds are obvious.
However, I'm not sure how to fix the other one. I also am wondering if I should re-enforce the good one in the obvious places. I'd love to hear folks opinons on this.

Both seats have broken frames. I dug into the one above to get the bad leather off and immediately noticed the bolster support welds were broken.

It's odd because this seat (a) LOOKed to less wonky and (b) has almost no play in the mechanism. But it's actually broken in FOUR places.
As I pulled them apart, I was careful to photograph where at the hog-ties go.

Both bolster supports:


On the left side, behind the bolster support weld:

And, on the right side by the hinge. Yowza!

The 2nd seat was clearly the driver's seat and was DISGUSTING:

And had a broken wire:

It also had both bolster supports broken::


Both lower bolsters on this seat were bent way out of shape, so I'm not surprised these welds are broken. I am surprised that the rest of this seat's frame is perfectly fine.
This really shows how horked that passenger seat was!

Need to source one of these:

With a side piece from a good seat this is totally awesome for the driver's seat:

This is in even better shape. Totally using this as the back of the driver's seat:

This center piece is in great shape.

There was a bunch of bare/slightly rusting metal on these bases, so I cleaned them up and shot them with a little paint.


I'm going to try to fix both frames. The better one should be straight forward, because the welds are obvious.
However, I'm not sure how to fix the other one. I also am wondering if I should re-enforce the good one in the obvious places. I'd love to hear folks opinons on this.
Re: Maytag: The Alpine '87 527i
I just realized the car these seats came from had been rear ended.
I wonder if a large person was sitting in the passenger seat when this happened? That would explain that seat breaking like that at the hinge and on the side.
I wonder if a large person was sitting in the passenger seat when this happened? That would explain that seat breaking like that at the hinge and on the side.
Re: Maytag: The Alpine '87 527i
Doesn't look safe to me. You should definitely junk them and send the good leather to me.


The car you parted actually had been rear-ended? Yikes. I'm no metallurgist, but I'd be hesitant to try & fix those things. There are likely some other parts that were bent & slightly compromised. You might be better off finding a set of seats with bad leather and solid frames.

The car you parted actually had been rear-ended? Yikes. I'm no metallurgist, but I'd be hesitant to try & fix those things. There are likely some other parts that were bent & slightly compromised. You might be better off finding a set of seats with bad leather and solid frames.
Re: Maytag: The Alpine '87 527i
Just went through fixing the broken bolsters on an M6. It had both lower and one upper broken in the same fashion (no evidence of a wreck). I ended up grinding it all out, using a ratchet strap to pull it together and built up welds on both sides. Everything went back together correctly and works well.
Re: Maytag: The Alpine '87 528e Bench Player
Hang in there.... I will have something around October.ElGuappo wrote:I would love to have a metal version of this handle, probably half the E28s I've owned had either a broken handle or broken cable.
The E23/24 both use a metal lever...
Would you mind bringing this one to the vintage for me to take some measurements?cek wrote:Installed new hood release cable.
They go in a lot easier than I thought (Especially with the kick panel already removed). Pretty scary adjusting them though because if you get it wrong you are royally screwed. I took my time and care and amazingly didn't eff it up.
Interestingly the handle for the old one is fine. Just the cable snapped. On Minerva the handle is broken. I guess I'll keep this as a spare.
Re: Maytag: The Alpine '87 528e Bench Player
Sure!BenGerman wrote: Would you mind bringing this one to the vintage for me to take some measurements?
Re: Maytag: The Alpine '87 527i
I have a set of E21 Recaros whos driver seat took a 50mph rear-ending and my fat ass in the seat, ended up laying flat on the rear bench...
I've been avoiding tearing into them for over 6 years now because I know they're probably going to look worse than this...
I've been avoiding tearing into them for over 6 years now because I know they're probably going to look worse than this...
Re: Maytag: The Alpine '87 527i
Finally got the car back from being aligned and a few other things I used my checkbook wrench on. The car drives so fantasically now. Peppy, torque-y, high revving motor (but doesn't need revs to get torque). Great suspension (Spax + Billy Sports). M5 steering box.
First thing I did when I got the car back is set about cleaning it. I hate to admit this but I've not waxed this car since the first time I did it when I bought it. After clay bar + Speed Shine and P21S Paintwork Cleanser it's all back pretty. Debadged too. I'm going to do a polish with the DA and then ceramic coat it with GTechniq Crystal Serum Light per @occoupe. Stuff should show up Monday. This car's a bit tricky as it's part single-stage and part clear.
Before (so disgusting!):
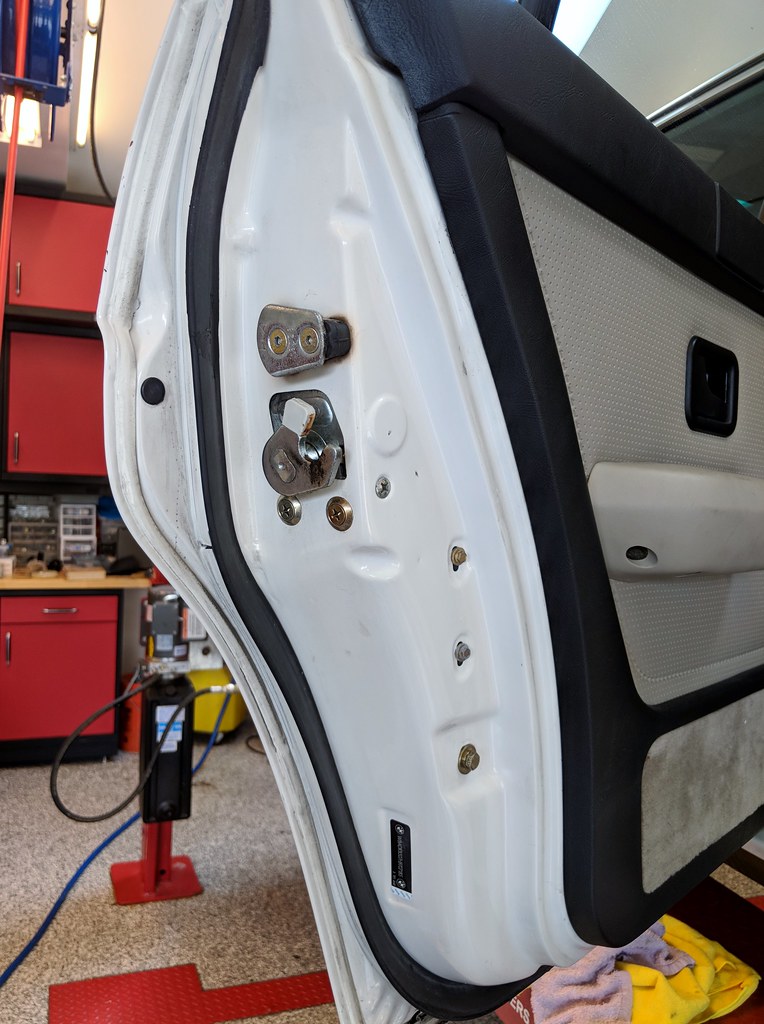
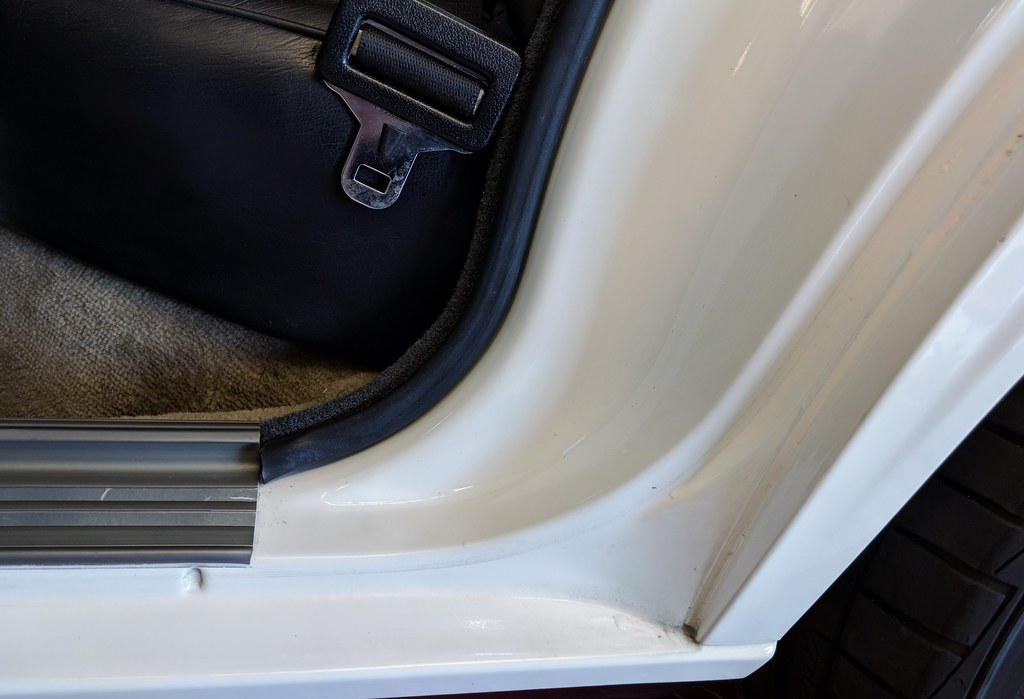
After (that's more like it!):
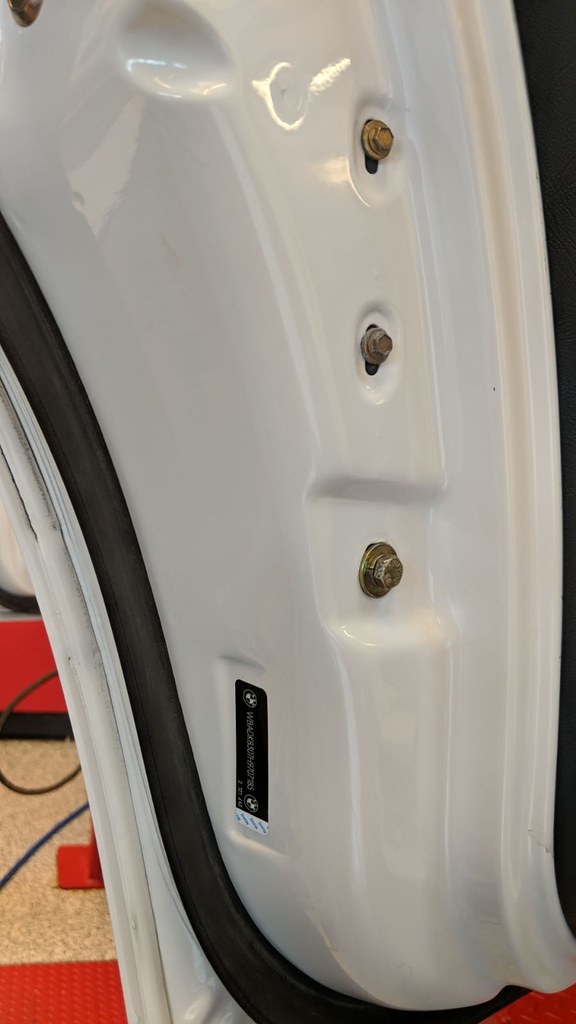
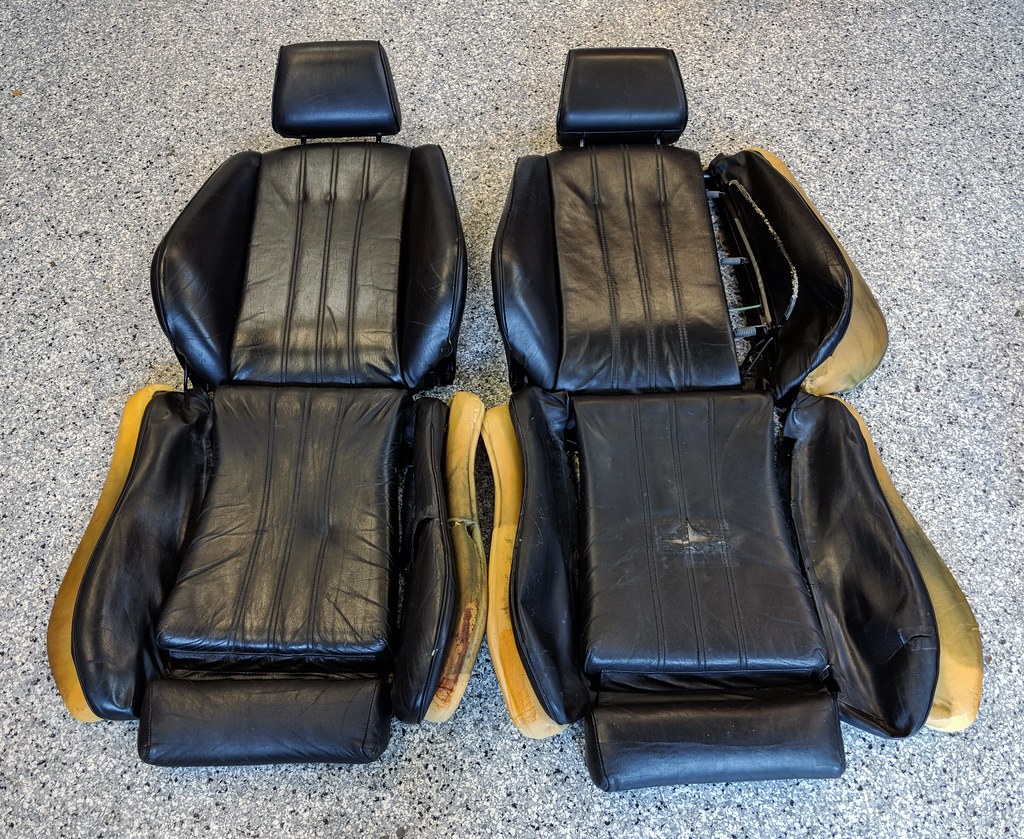
Since I had to wait until monday to get the ceramic stuff pulled the seats out and tore apart the passenger seat (formerly Vlad's driver seat) to see if any welds were broken (the left one is just starting to crack, so I'll fix that). The idea here is to make one really great set and one ok set (to sell).
I'm going to take them to an upholstery shop to get the bad parts replaced and fix all the piping.
This is when I noticed how big the cracks in the dash had gotten...This has led me down a big rabbit hole that I've actually wanted to go down for a long time... I'm finally ripping out all the Pearl Beige including the ratty carpet and going Anthracite.
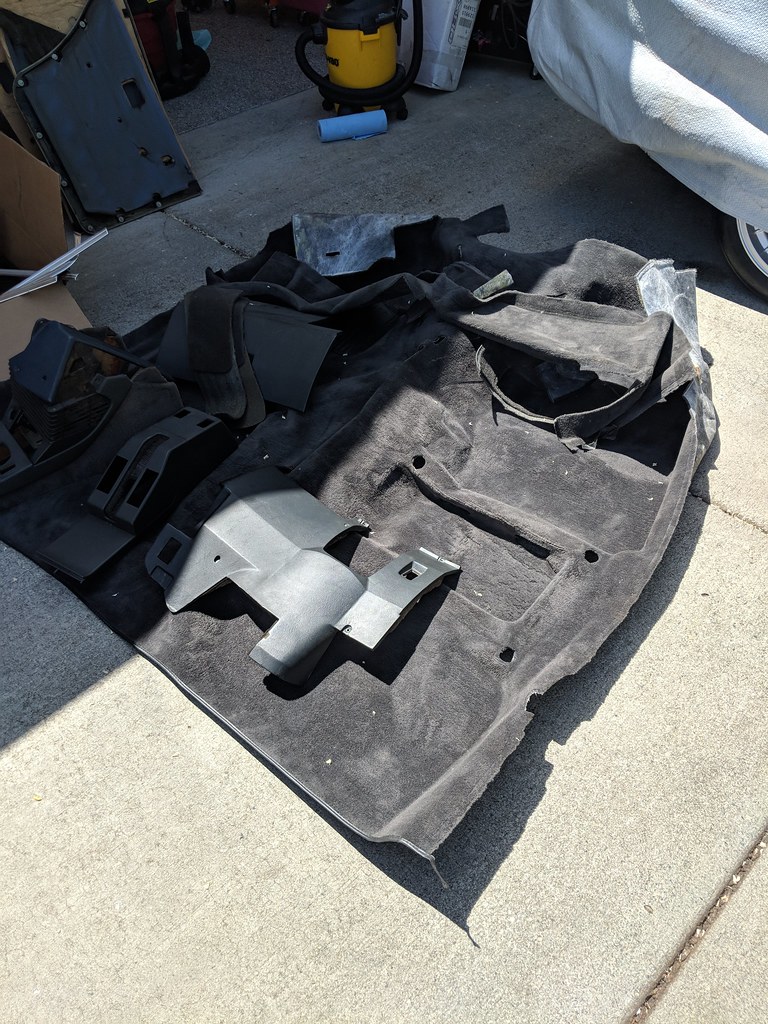
My buddy Doug came by today and he was a great help. We got er done quick.
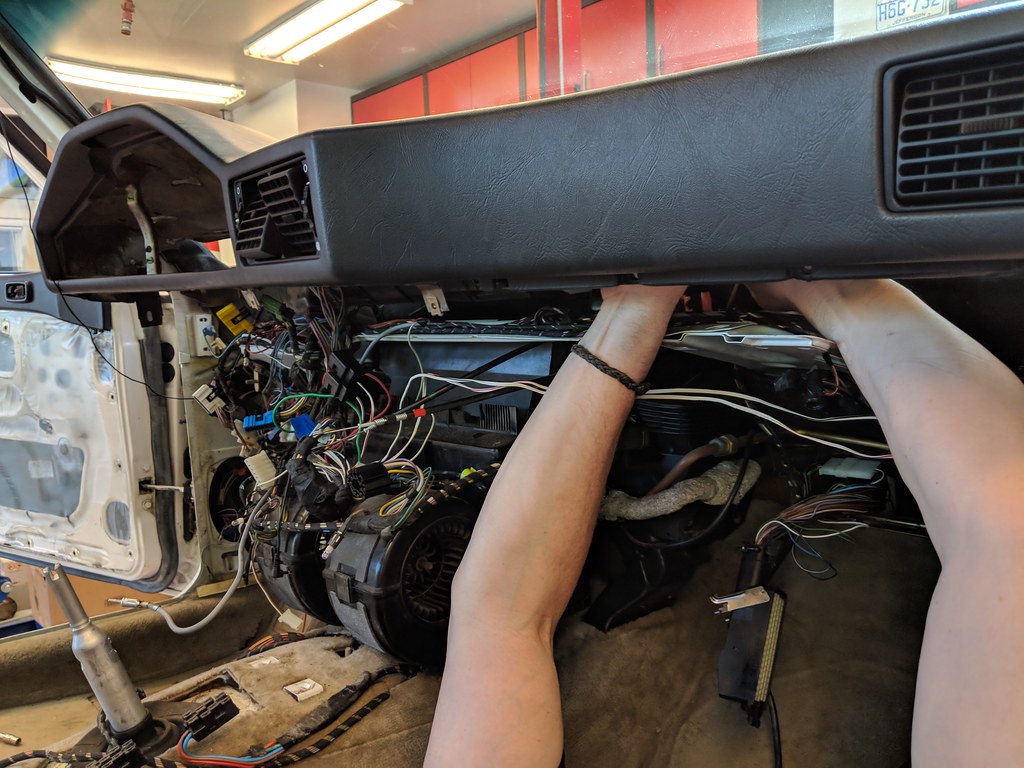
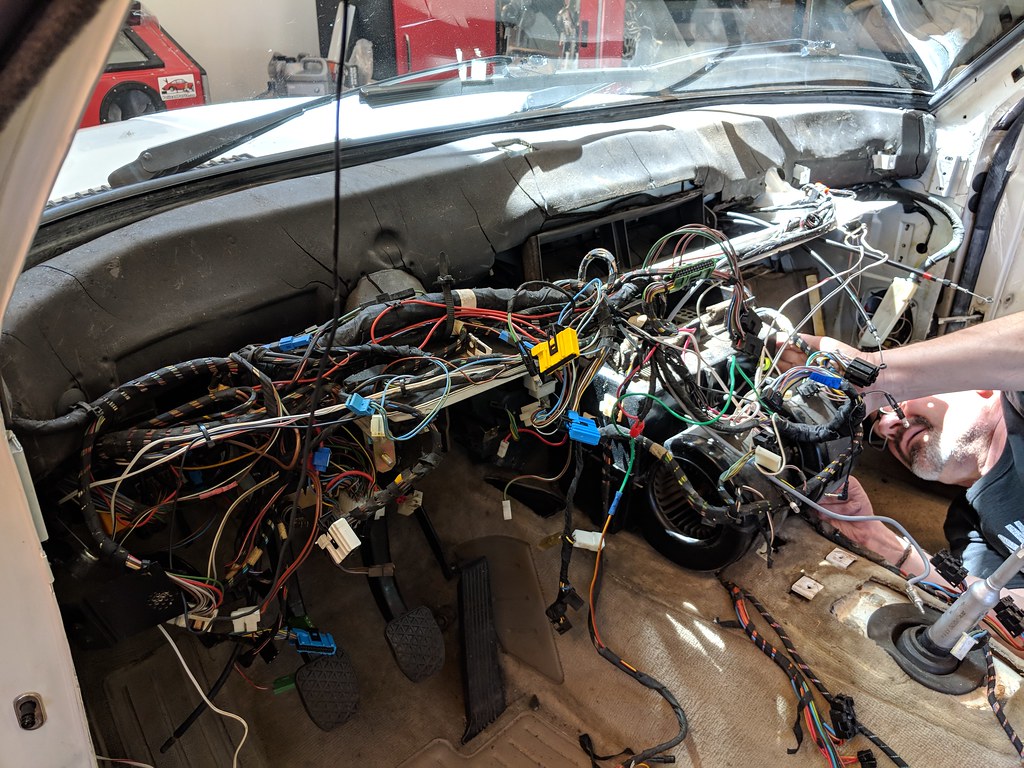
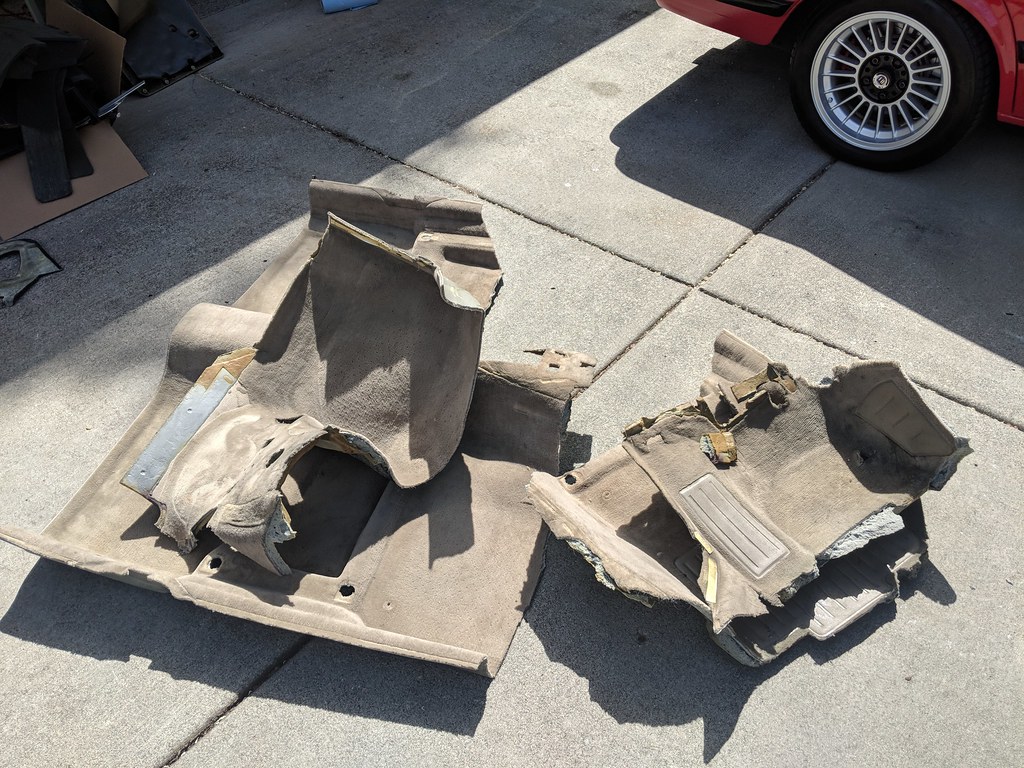
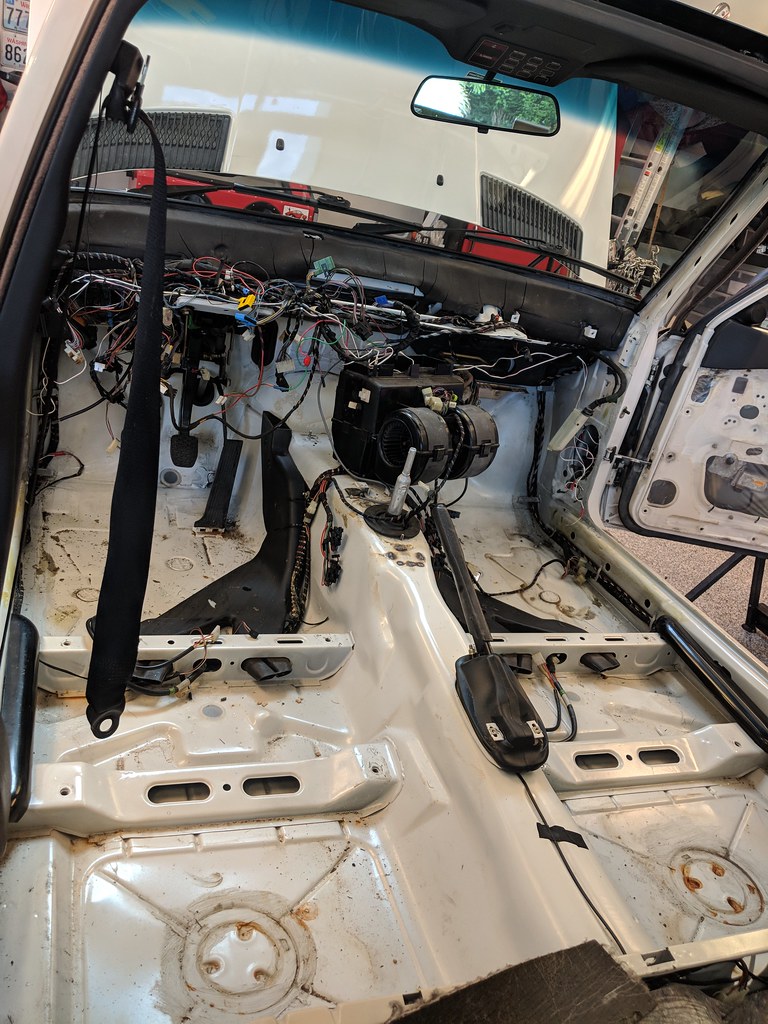
I only have one crack-free dash. This one was for whichever car needed it first. ISO at least two more because Minerva has no dash, and Vlad's is starting to crack.
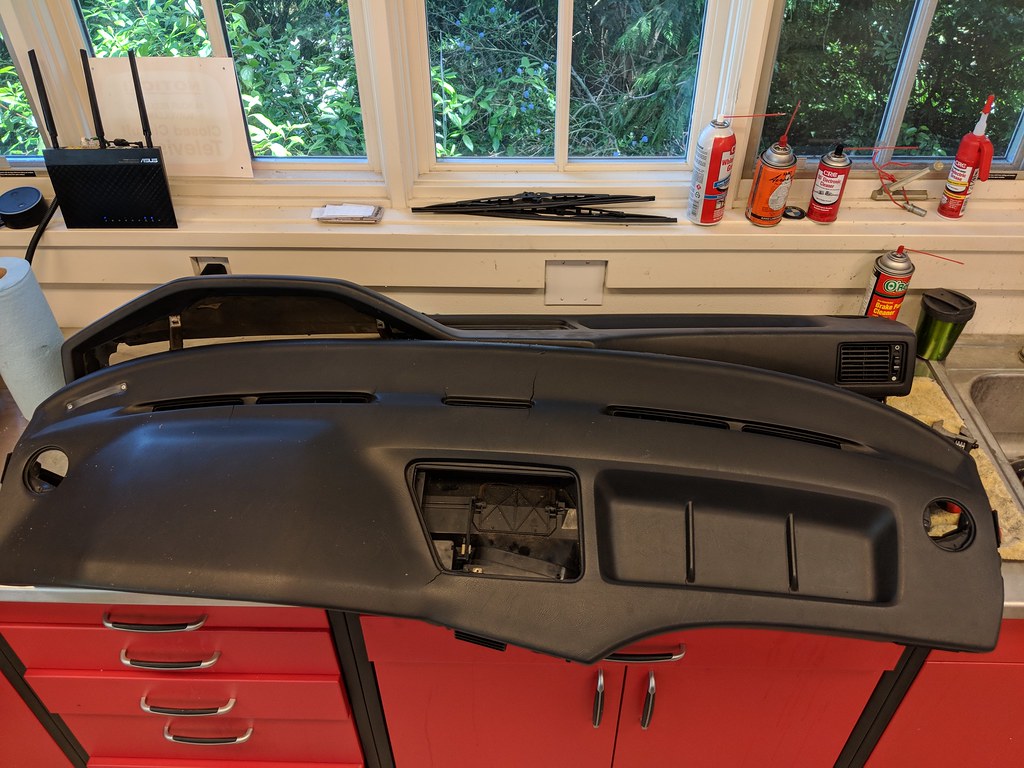
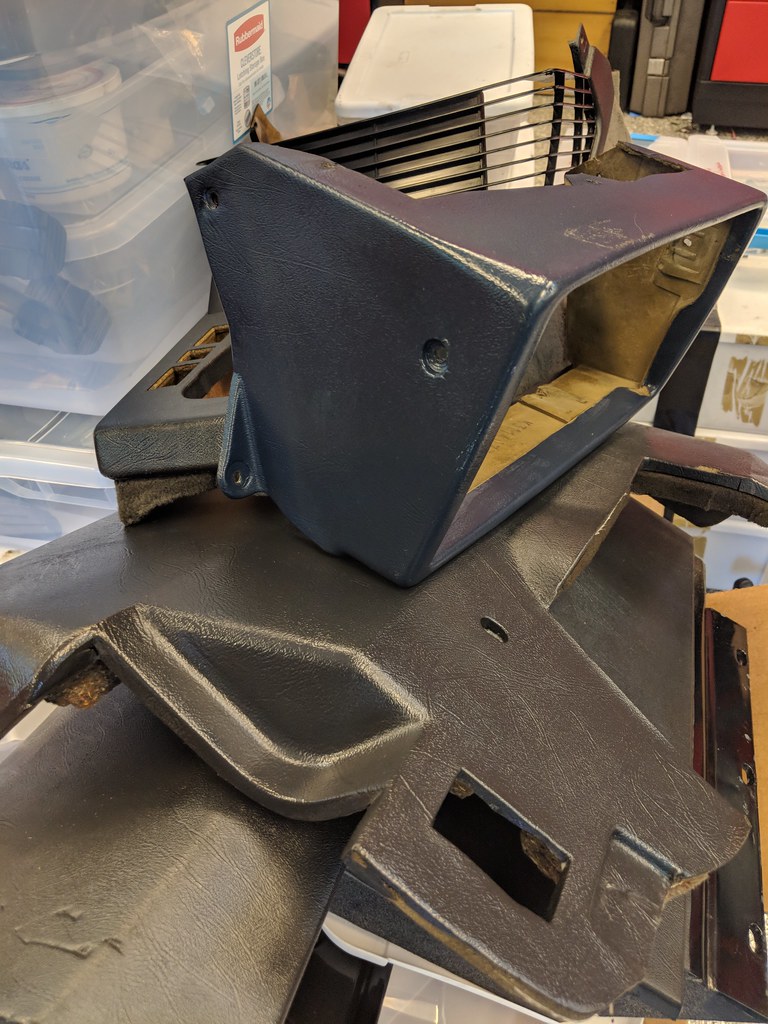
That's not Anthracite! Didn't even notice until I was cleaning them. Now ISO an Anthracite HVAC surround...
All ready for the new interior.
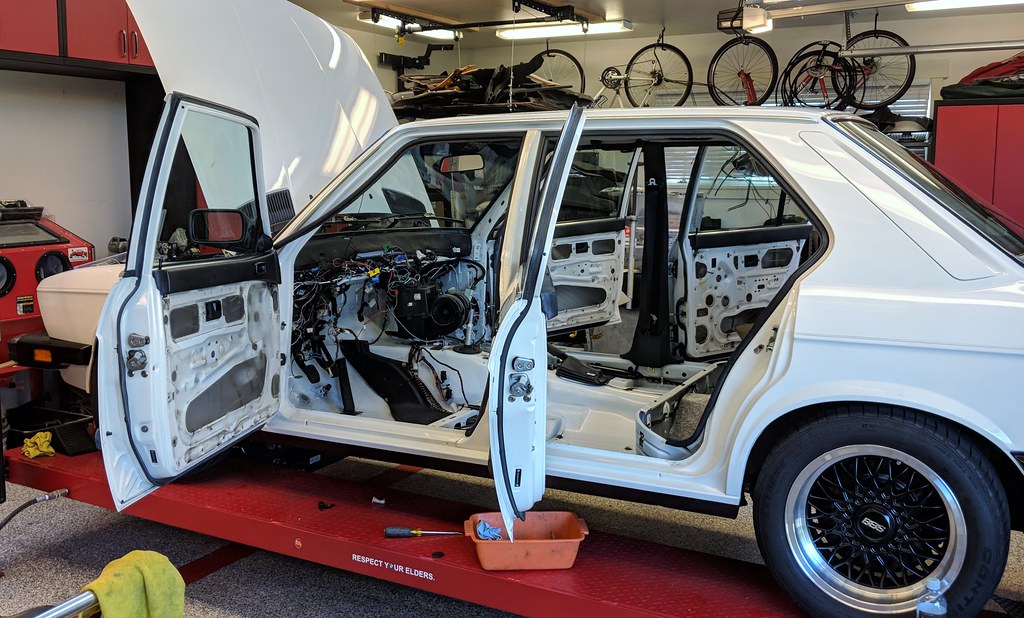
Need before it goes togehter:
- New heater core (ordered)
- Seats finished.
- Dynamat (or equiv. I have questions).
Questions:
My Anthracite carpet is pre-foam padding. Was there NO insulation or padding under these old school carpet sets? I'm considering putting down Dynamat (or a knock off equivalent). Seems really odd that the carpet just sits on top of the bumpy floor and plastic heater/AC vents.
Getting the old dash out was challenging. We left the vents attached. Should I attach them to the new dash before installing it, or after?
First thing I did when I got the car back is set about cleaning it. I hate to admit this but I've not waxed this car since the first time I did it when I bought it. After clay bar + Speed Shine and P21S Paintwork Cleanser it's all back pretty. Debadged too. I'm going to do a polish with the DA and then ceramic coat it with GTechniq Crystal Serum Light per @occoupe. Stuff should show up Monday. This car's a bit tricky as it's part single-stage and part clear.
Before (so disgusting!):


After (that's more like it!):

Since I had to wait until monday to get the ceramic stuff pulled the seats out and tore apart the passenger seat (formerly Vlad's driver seat) to see if any welds were broken (the left one is just starting to crack, so I'll fix that). The idea here is to make one really great set and one ok set (to sell).
I'm going to take them to an upholstery shop to get the bad parts replaced and fix all the piping.
This is when I noticed how big the cracks in the dash had gotten...This has led me down a big rabbit hole that I've actually wanted to go down for a long time... I'm finally ripping out all the Pearl Beige including the ratty carpet and going Anthracite.

My buddy Doug came by today and he was a great help. We got er done quick.


I only have one crack-free dash. This one was for whichever car needed it first. ISO at least two more because Minerva has no dash, and Vlad's is starting to crack.

That's not Anthracite! Didn't even notice until I was cleaning them. Now ISO an Anthracite HVAC surround...

All ready for the new interior.

Need before it goes togehter:
- New heater core (ordered)
- Seats finished.
- Dynamat (or equiv. I have questions).
Questions:
My Anthracite carpet is pre-foam padding. Was there NO insulation or padding under these old school carpet sets? I'm considering putting down Dynamat (or a knock off equivalent). Seems really odd that the carpet just sits on top of the bumpy floor and plastic heater/AC vents.
Getting the old dash out was challenging. We left the vents attached. Should I attach them to the new dash before installing it, or after?
Re: Maytag: The Alpine '87 527i
There are separate lay down pads under the earlier carpet. Kind of rubber backed and lay in the foot wells and 1 or 2 that drape over the tunnel.
I always leave the vents in place to R&R the dash. The left side is tricky to get back over the cross bar. I do it alone, so it should be a lot easier with help. I detach all of the wiring to make sure I am not pushing on it and zip tie back on before bolting down. Watch the right side, so it does not interfere with the center vent servo arm, and so it does not dig into the firewall sound deadening. Everything fits as a unit, so if something does not fit right, just loosen and adjust (dash, center console, glove box). Put the gauges in last.
I always leave the vents in place to R&R the dash. The left side is tricky to get back over the cross bar. I do it alone, so it should be a lot easier with help. I detach all of the wiring to make sure I am not pushing on it and zip tie back on before bolting down. Watch the right side, so it does not interfere with the center vent servo arm, and so it does not dig into the firewall sound deadening. Everything fits as a unit, so if something does not fit right, just loosen and adjust (dash, center console, glove box). Put the gauges in last.
Re: Maytag: The Alpine '87 527i
Anyone got pictures of these? How thick are they?dsmith wrote:There are separate lay down pads under the earlier carpet. Kind of rubber backed and lay in the foot wells and 1 or 2 that drape over the tunnel.
.

