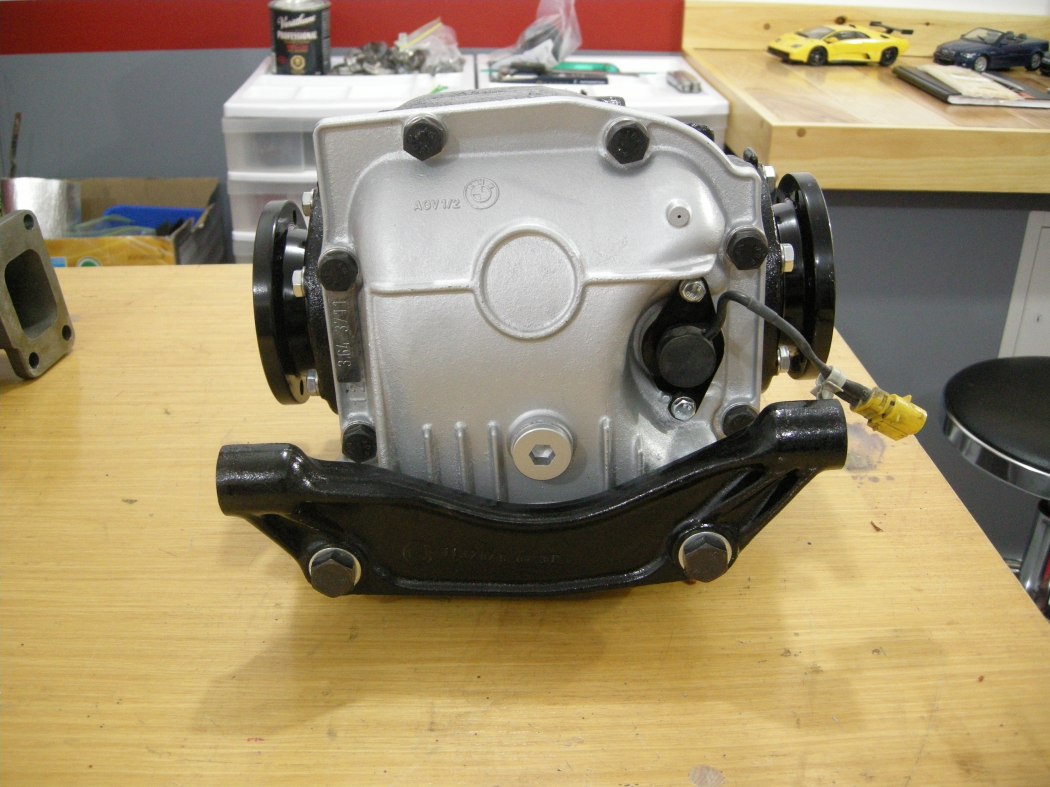
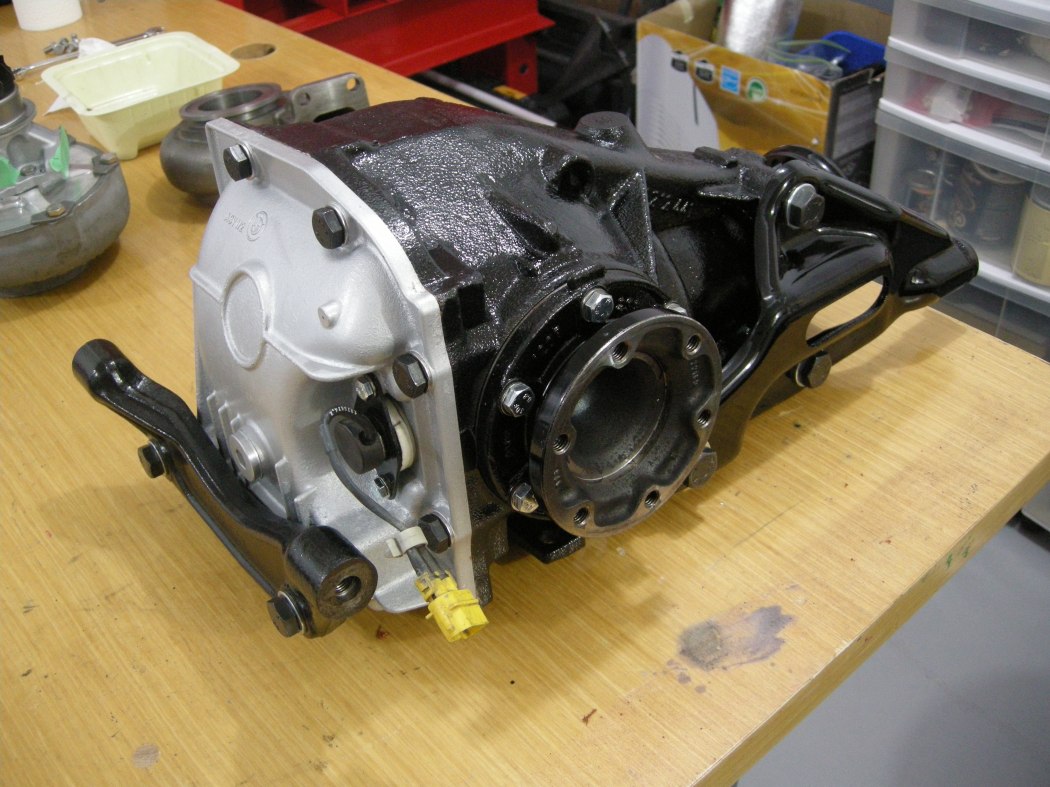
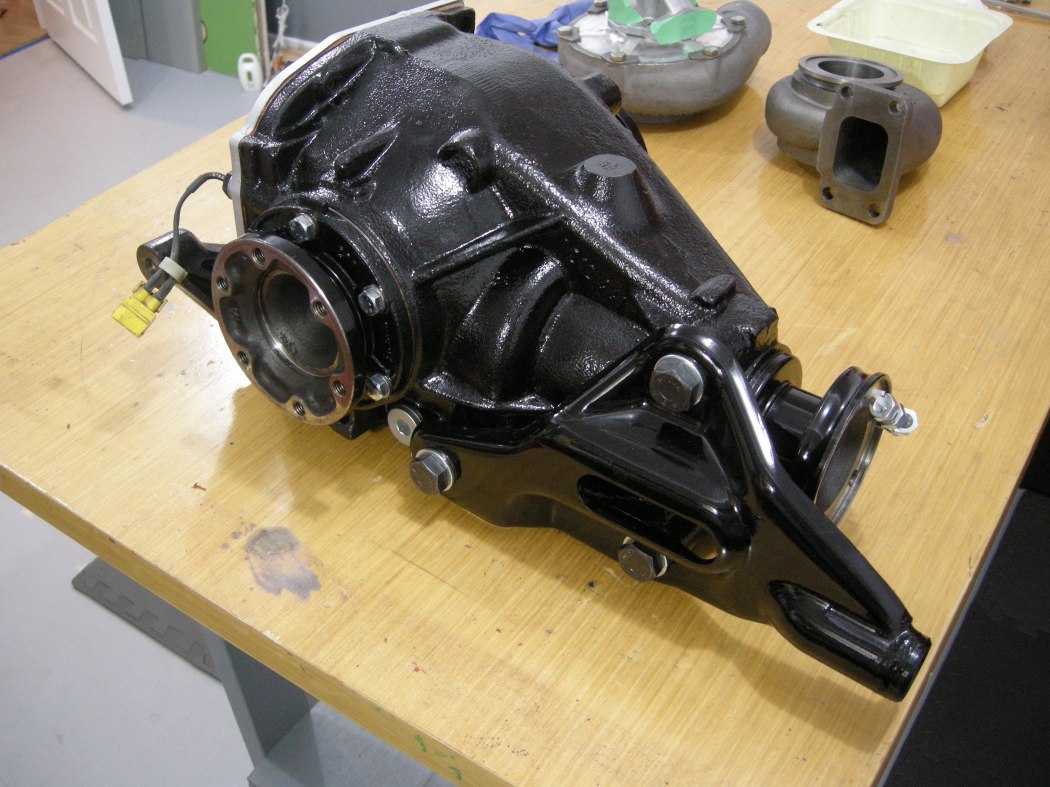
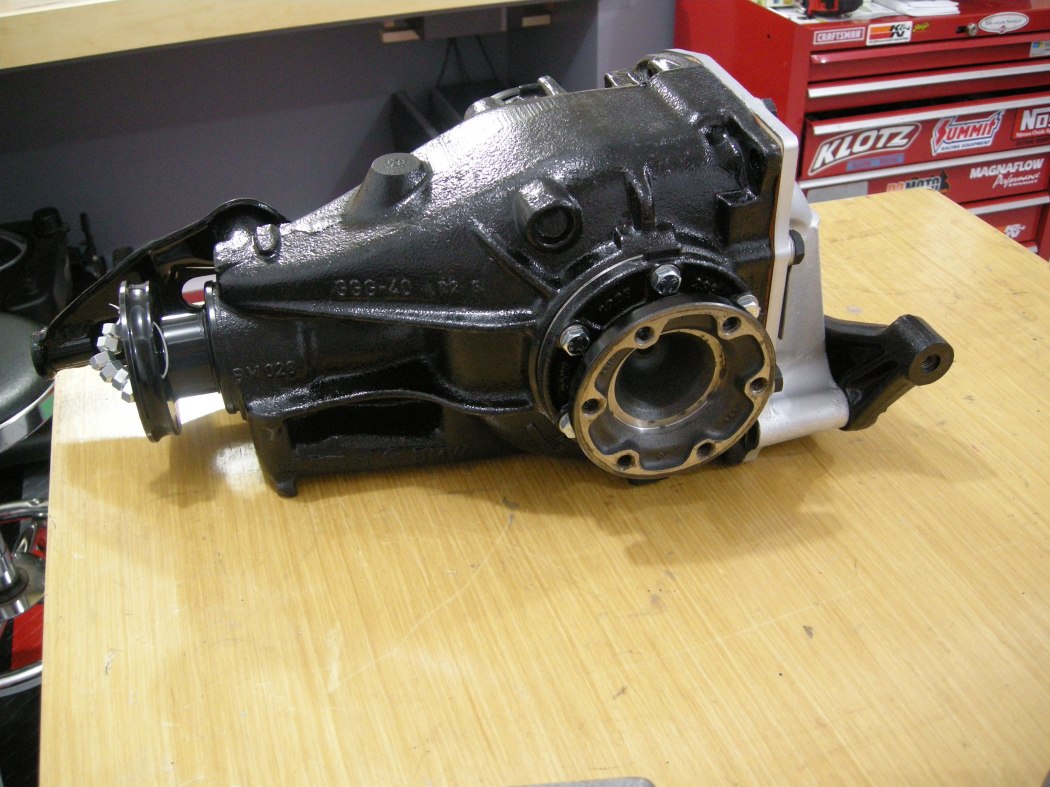
FAQ Medium Case Diff Rebuild
*** FAQ FOR REVIEW / COMMENT ***
Problem: Cabin noise and/or vibration that is not affected by engine RPM or cornering, but is affected by vehicle speed.
Cause: Differential Pinion and/or Carrier Bearing failure
How to fix: Change the Diff Pinion and Carrier Bearings, see below.
Applicability: Generally this procedure can likely be applied to any rear differential, although the Pinion Bearing preload setting and fastener toque values may vary.
Tools required:
- Shop press
- Various sized mandrels. I used a variety of 'round' things from around the shop. This kit (or similar) came in handy:
OTC 4507 Bearing Race and Seal Driver (I bought my generic kit at Princess Auto (CDN) - try Harbour Freight in US)
https://www.amazon.ca/OTC-4507-Bearing- ... B000O824Y8
I have not included specific sizes in the procedure below since I simply don't know if all variants of BMW diffs use the exact same size bearings. Use good judgment here.
- Bearing splitter (1/2" - 3" size), example:
http://www.princessauto.com/en/detail/1 ... -p2990103e
- Impact gun
- 1/4" drive Beam Torque Wrench
- 3/8" drive Click-type torque wrench
- Large breaker bar
- Pinion Yoke Holding Tool
- Various typical shop supplies
Parts List:
Pelican Parts (USD):
33131213893 $20 Tapered Roller Bearing (carrier) (2 required)
23211490120 $3.25 Securing Plate (1 required, good to order a spare)
33107505602 $7.25 Shaft Seal (output) (2 required)
33111214144 $4.25 O-Ring (2 required)
33131207280 $0.50 Lock Ring (2 required)
33111211708 $5.50 Diff Cover Gasket
33121744368 $7.25 Crush Sleeve (1 required, good to order a spare. One came with the Pinion bearings from Thayer below)
Thayer Motorsports:
Pinion Brgs w/seal/crush collar $65.00
Pinion Nut (about $5.00)
Other Suppliers:
- Fasteners, see below.
- O-ring for the Speed Sensor, available from a hardware store. Here is the size:
w. 3/32"
ID. 1 5/16"
OD. 1 1/8"
Torque Values*: (unlubricated, no thread lock)
Bearing Cap Bolts:
12-off M8x25 - Gr 8.8 - 15 lb-ft*
Diff Cover Bolts:
8-off M10x25 - Gr 8.8 - 30 lb-ft*
Rear Horizontal Support Bracket
2-off M12 x 1.5 x 50 - Gr 10.9 - 100 lb-ft*
Front Support Bracket
3-off M14 x 1.5 x 25 - Gr 10.9 - 150 lb-ft*
* Not from BMW or Bentley, derived using best practice. Use at your own discretion.
Diagnosis:
For the past few years I've been noticing a cabin noise that sounded very similar to a wheel bearing on its way out, increasing slowly over time. A couple years ago I changed the front wheel bearings and while it got a bit better the noise was still there. At this point it's enough to vibrate the dash while driving a certain speeds and while it's still not 'loud', when the car stops rolling and things are quite you kind of feel like you just woke up from a Metallica concert the night before. Anyway, on a few occasion I've had the chance to isolate the noise to the diff. This past summer I had the axles out for a rebuild and was able to spin the diff alone and it was obvious this is where the sound was coming from.
Other details:
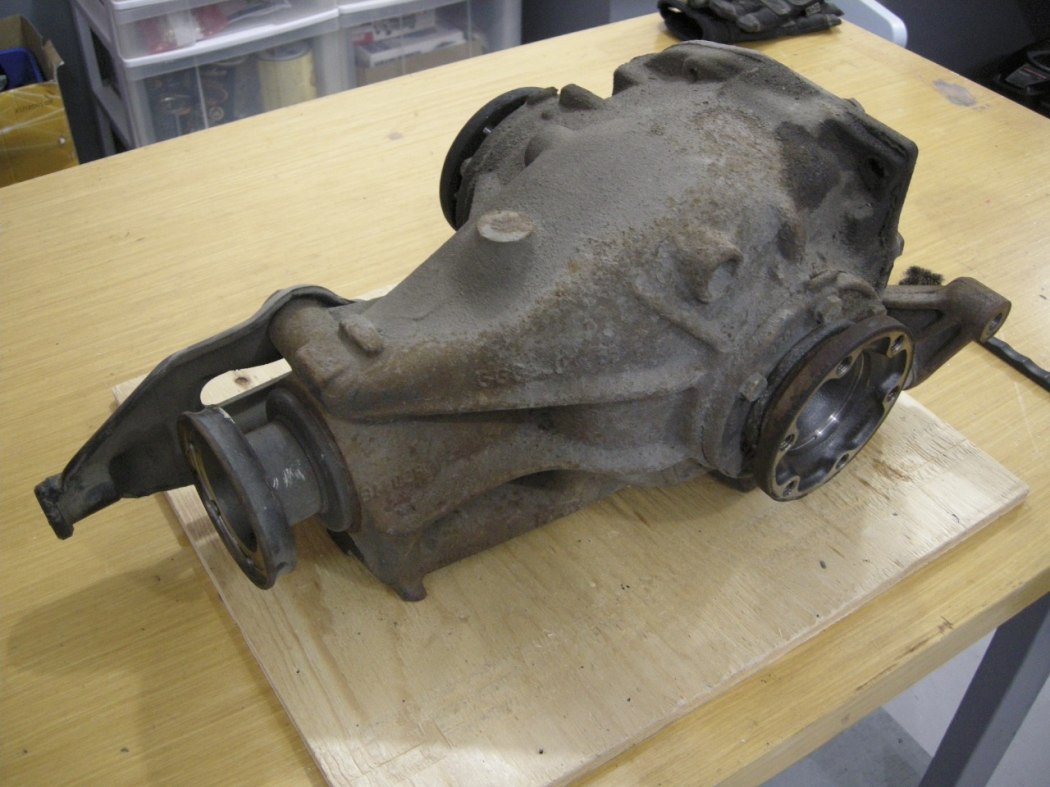
The diff is a BMW Medium188mm open type with a ratio of 3.64:1. It has roughly 190,000 KM on it and I would imagine it had its first oil change when I bought the car ~6 years ago (168,000 km). I just drained this 6 yr old fluid for the rebuild and even it came out black, obviously I should have done a better job flushing it 6 yrs ago. The outside of the diff was dirty but not really rusty.
For the most part the pictures do the talking. I assume anyone tackling this has enough experience to know the basics, i.e. pressing things in/out straight, how much force to use, what surfaces to apply pressure on and how to support properly. I have a bunch of random round parts, like old wheel bearing races and seal drivers, which made the job go smoothly. I've seen people use a slide hammer on some of the races, but with the right sized mandrels for the press the slide hammer isn't required.
References:
- While I found bits and pieces all over the net, I generally just dove in.
- This link has good tear down / rebuild documentation that I found:
https://www.bimmerforums.com/forum/show ... Pic-heavy)
- Forum member cek has successfully rebuilt / documented his diff rebuild here (wish I had seen this before starting mine!):
http://www.mye28.com/viewtopic.php?f=3&t=127886
- If you want to check / set gear backlash, there is a section in this link that covers it (courtesy of cek):
https://www.bmw2002faq.com/articles.htm ... -build-r74
Procedure:
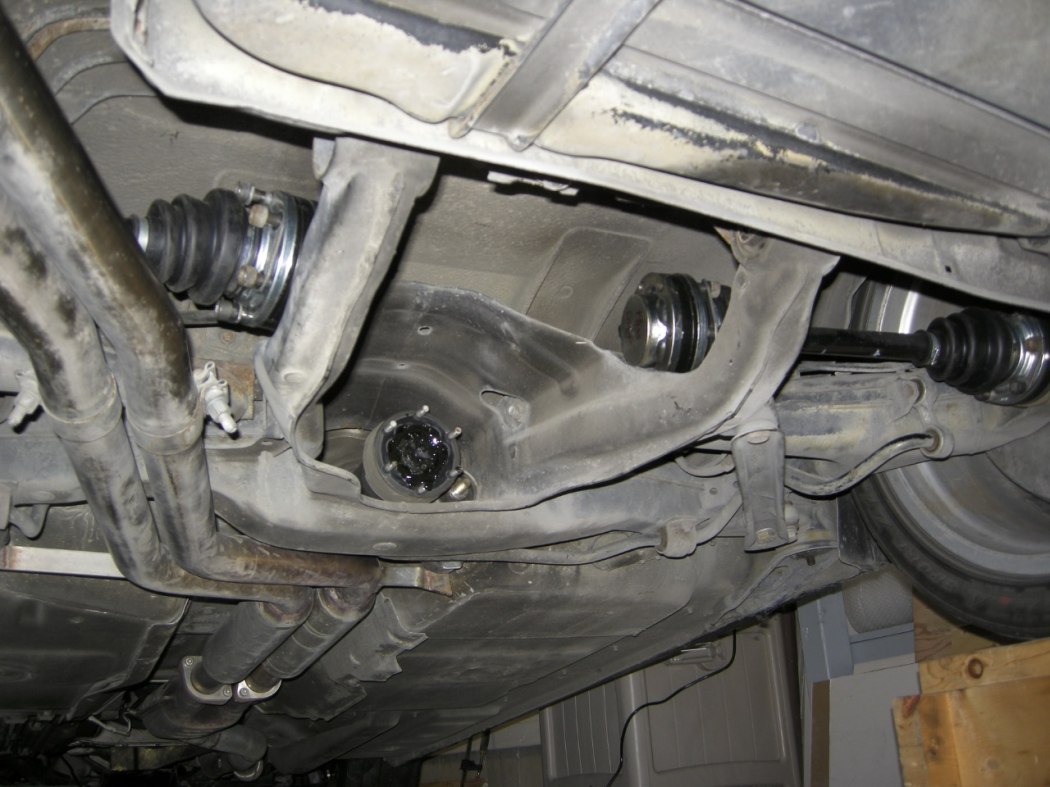
I have not covered the diff removal from the car, I assume anyone tackling this project knows how to do this.
Disassembly:
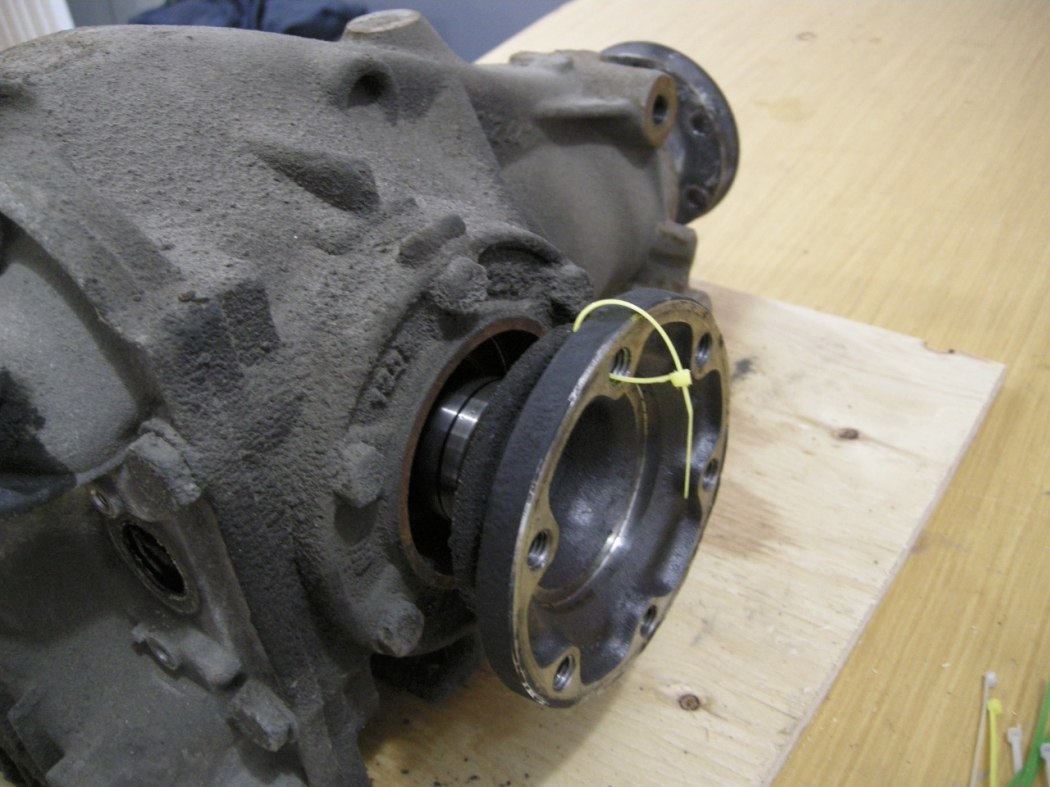
The Output Drive Flanges simply pop out. Use a screw driver for leverage if they are a bit stubborn but they shouldn't be.
Tag one side with a zip tie or similar. This particular part could be installed on either side I believe, but it's better to be safe than sorry.
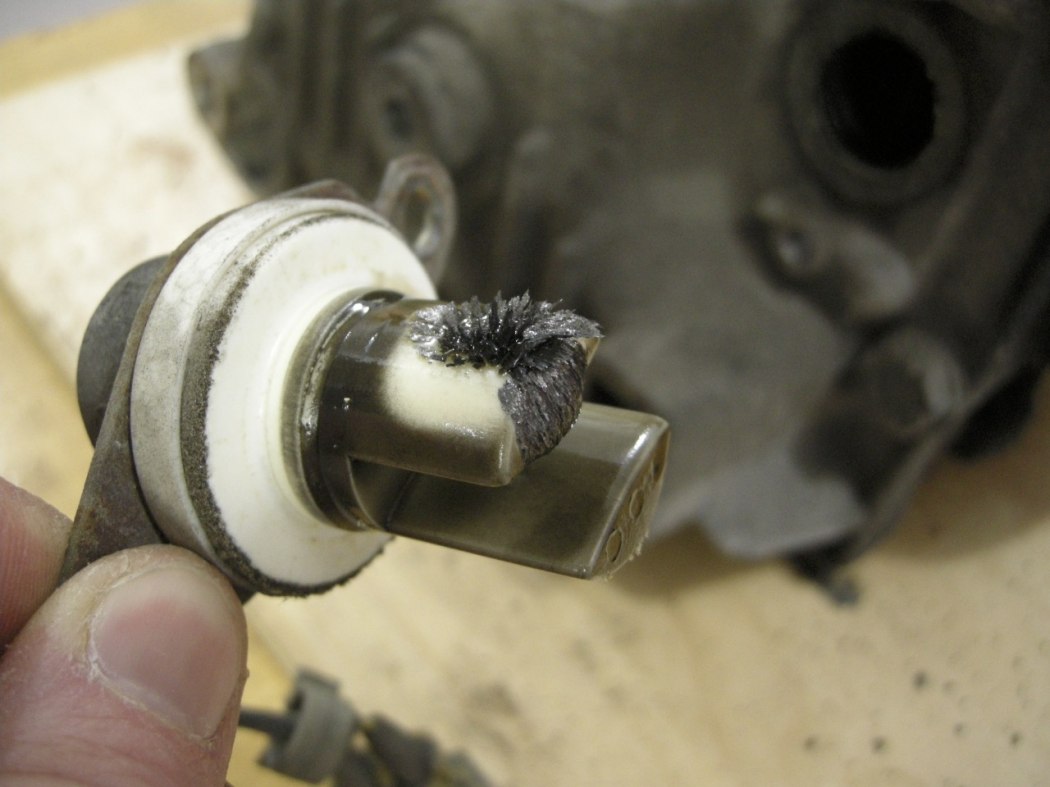
The Speed Sensor is easily removed by first removing the 2-off M6x10 screws. The sensor just pulls out, there is an o-ring that seals it to the diff cover. Notice the metal shaving that were attracted to the sensor.
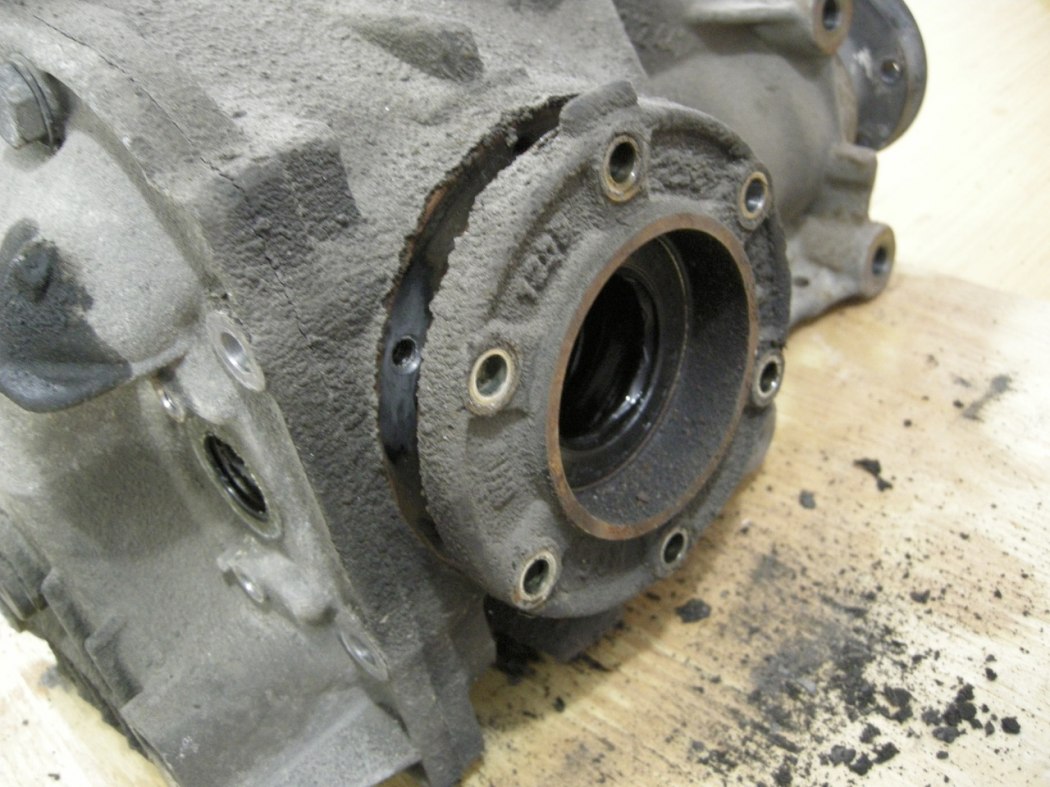
The Bearing Caps are next, and using a flat blade screw driver for leverage helps here. Again, doesn't take much to pop these out. There is a specifically sized (thickness) shim under each bearing cap. Tag these so they go back on the same side. This is extremely important.
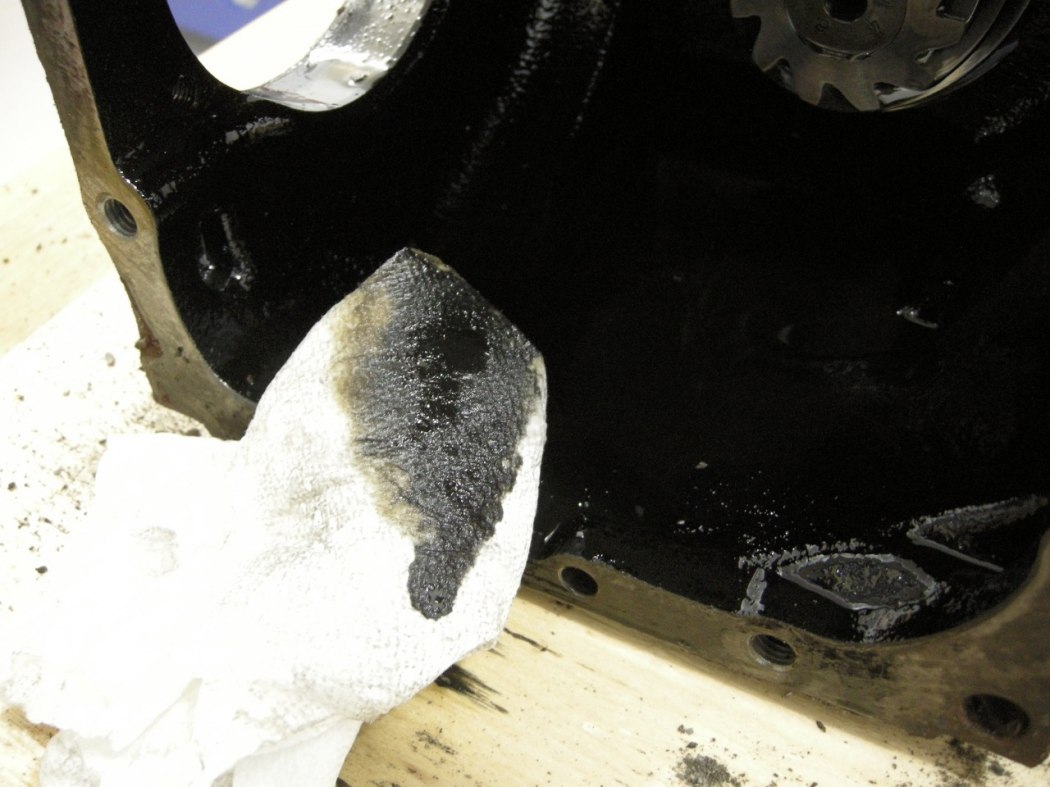
Also notice the witness patch from the OE assembly, where they used sealant on that (and another) particular threaded hole. These 4 holes (2 for each Bearing Cap) are through holes into the Diff Case.
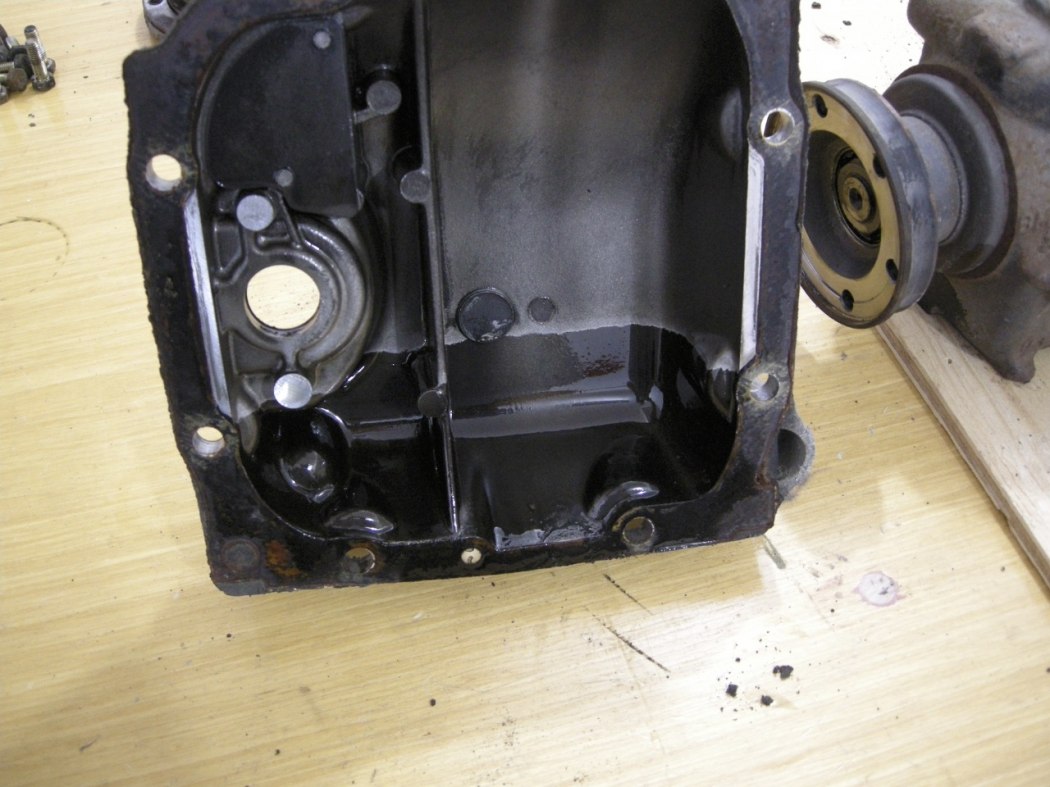
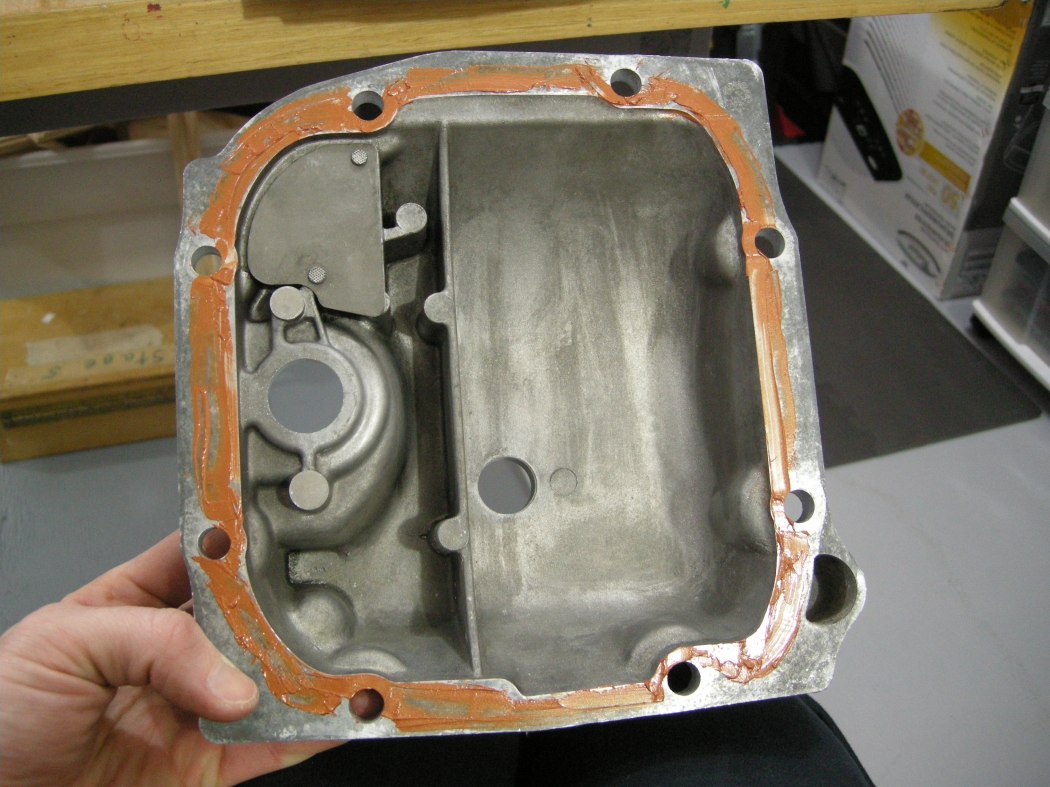
Remove the 8-off M10x25 bolts holding the Diff Cover on and remove the Diff Cover. Notice the fluid level witness line left behind by the contaminated oil.
The Diff itself just drops out the back. Keep things organized and in tagged so that all pieces go back on the same side / where they belong. Nothing worse than getting it all back together and it's too tight or loose.
Pinion Removal:
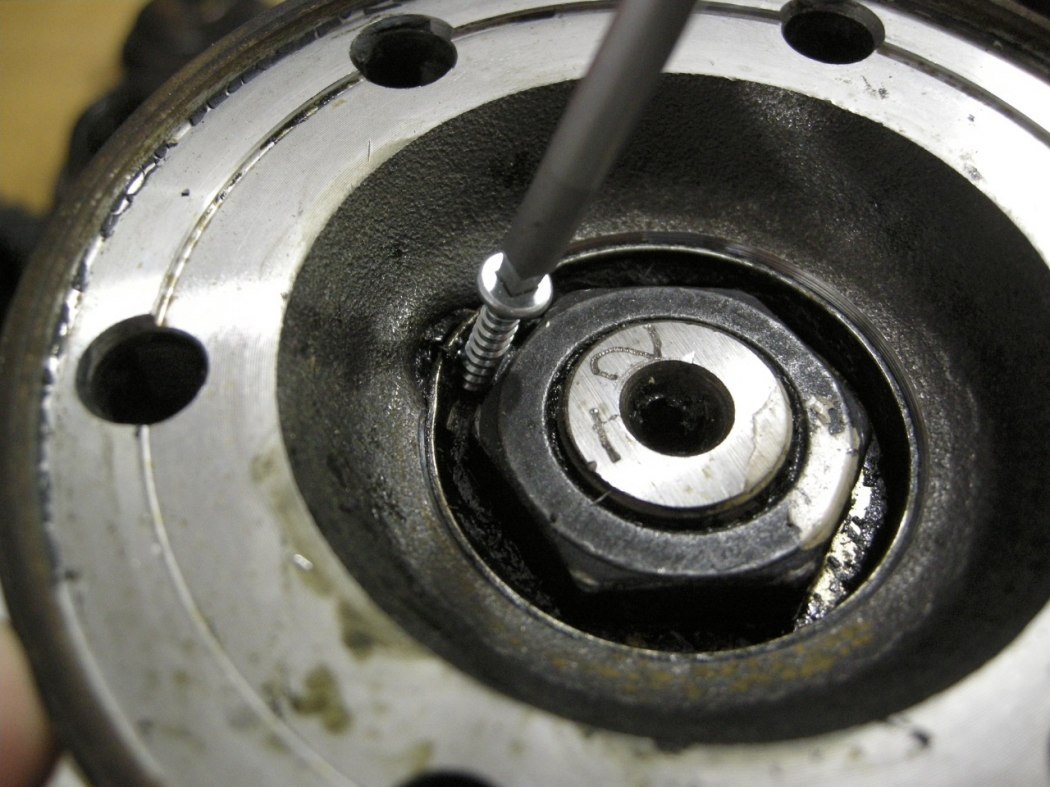
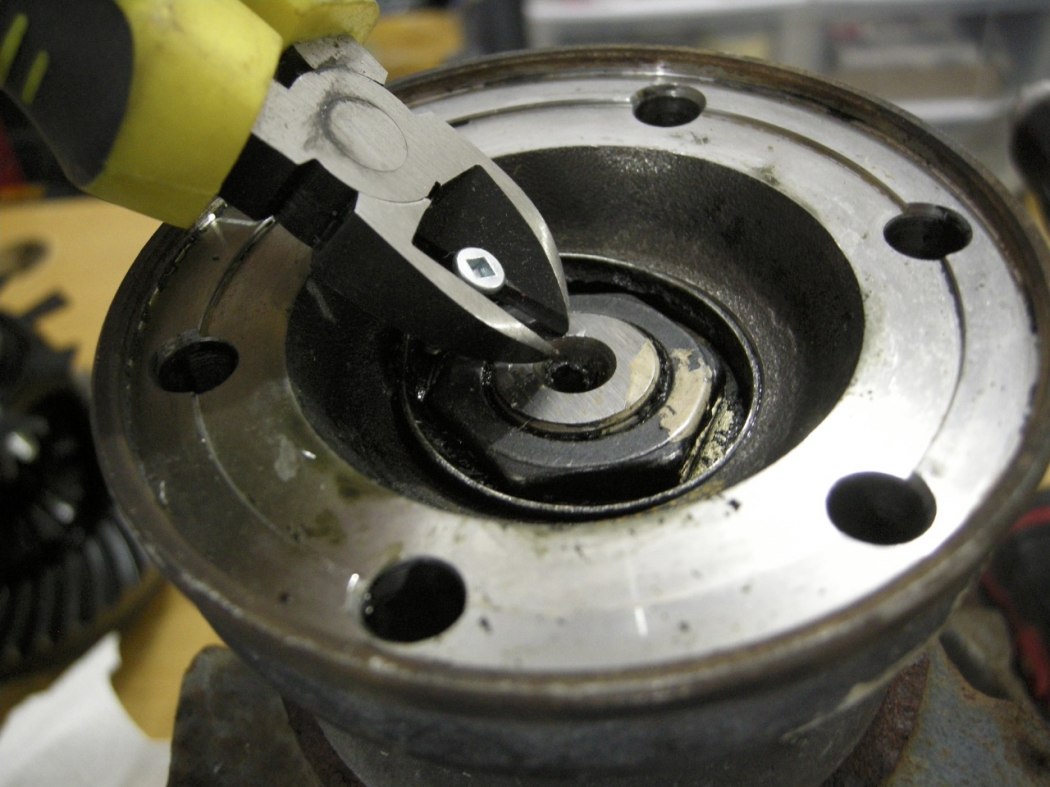
The Pinion Nut is prevented from loosening by a Securing Plate. Drill a small hole in this, partially drive a sheet metal screw into it, and pry it out.
Then using an impact gun, zip the nut off. It helps to hold the Pinion gear on the inside of the Diff Case to prevent it from spinning. Because we're using an impact the Pinion gear does not need to be held very tight.
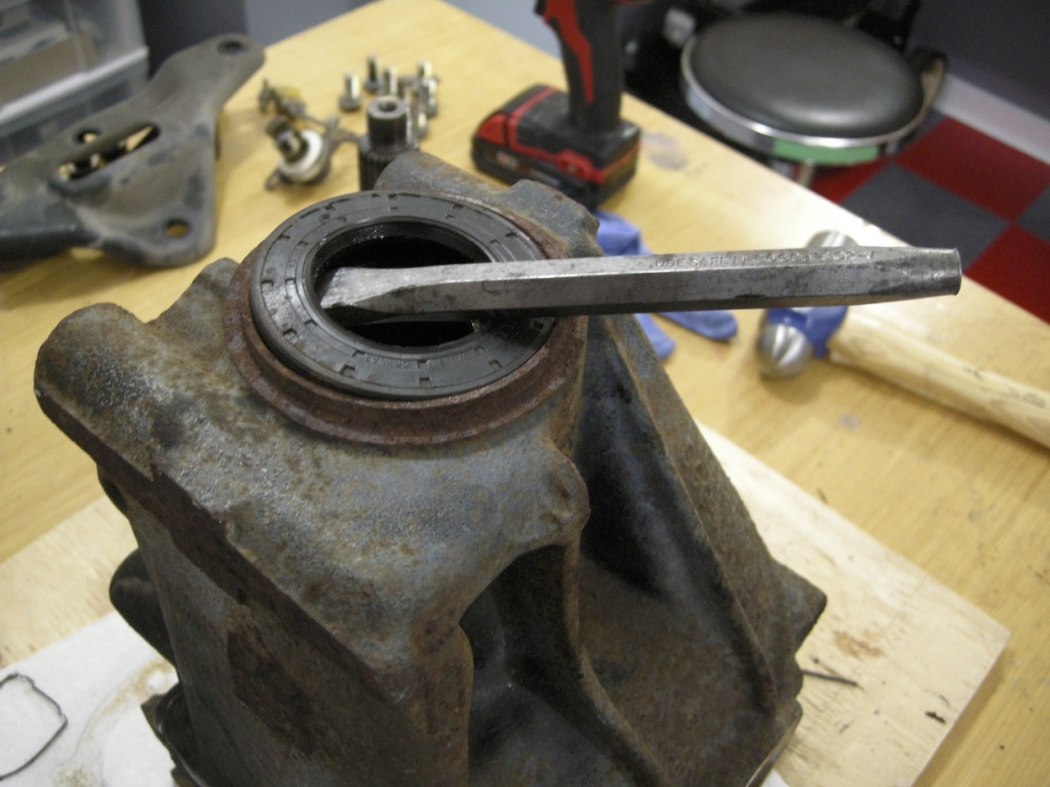
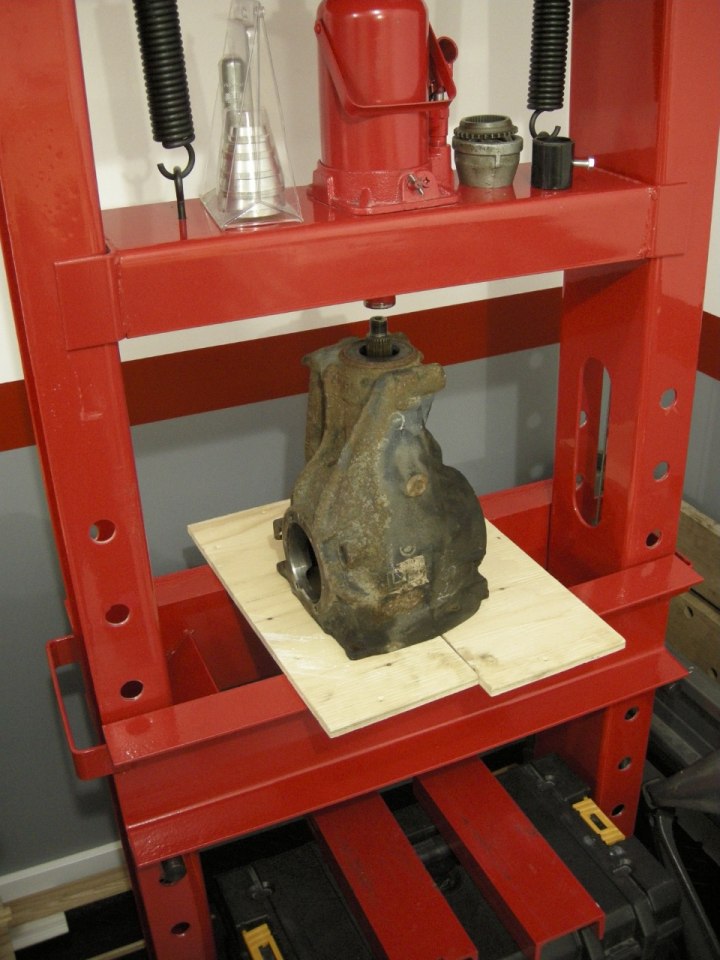
Jump on the press and drive out the Pinion. Now you can pry the Pinion Seal out with a seal pry bar or anything else. The Small (outside) Pinion Bearing will now be free and can be removed / discarded.
Pinion Bearing Race Removal:
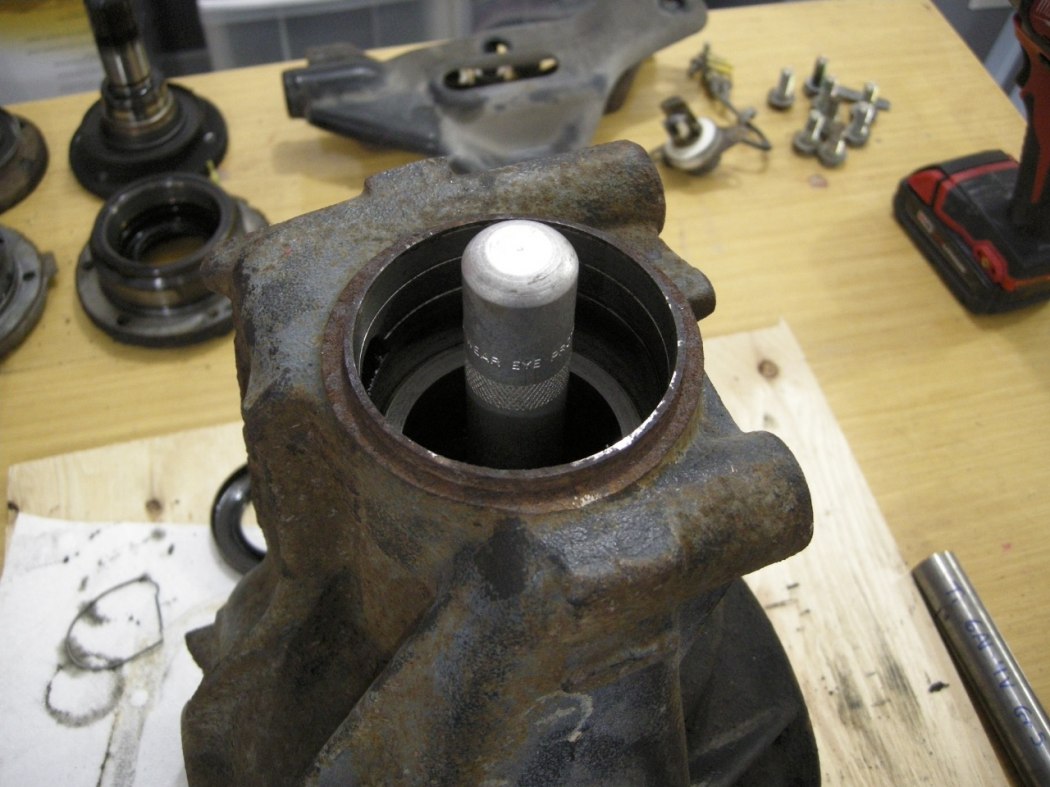
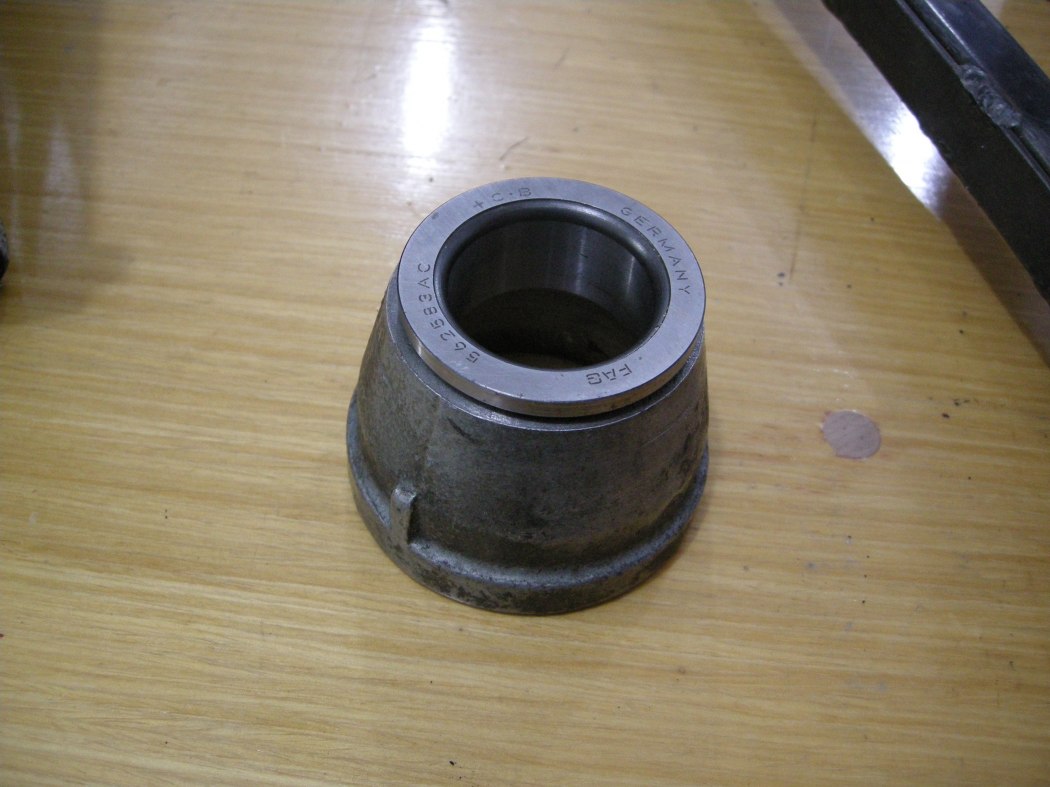
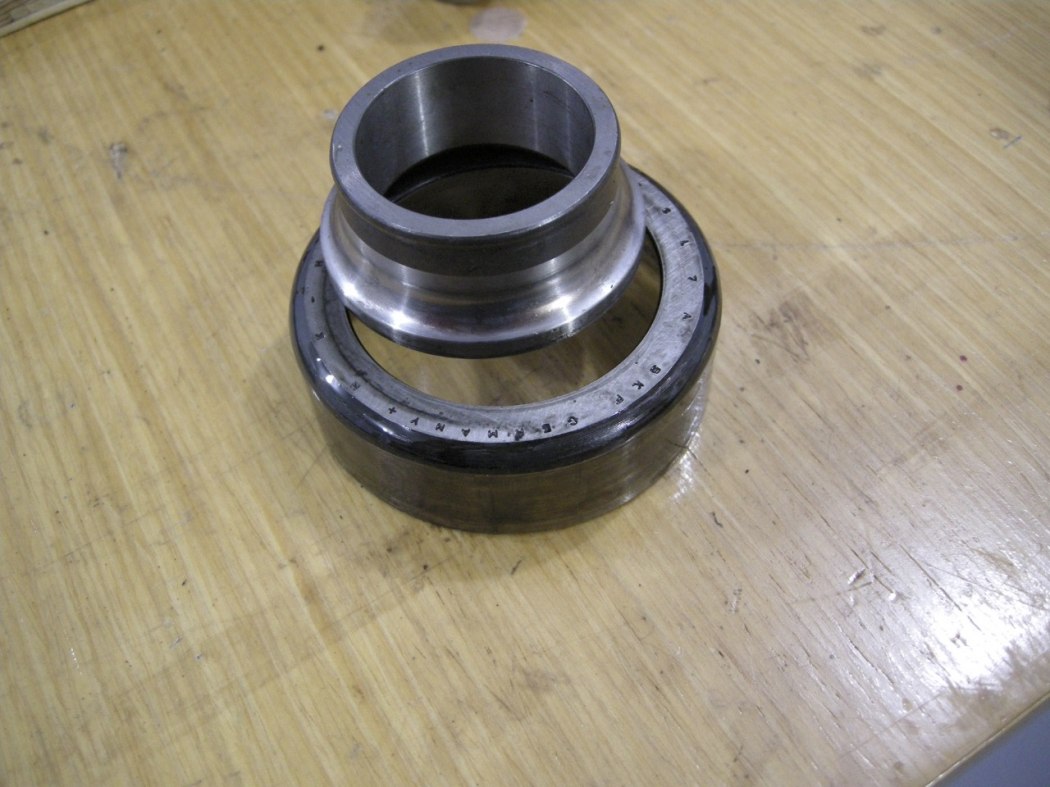
The outside Pinion Bearing is slightly small than the inside Pinion Bearing. I used an old Audi wheel bearing race that just fit through the inside bearing race to remove the outer (smaller) race from the inside - out. I hope that wasn’t too confusing.
This picture shows the small pinion bearing race removed and the 2 pieces I used to get it out - an old Audi wheel bearing inner race and a piece of hardware. These 2 pieces are placed against the Pinion bearing race from within the Diff.
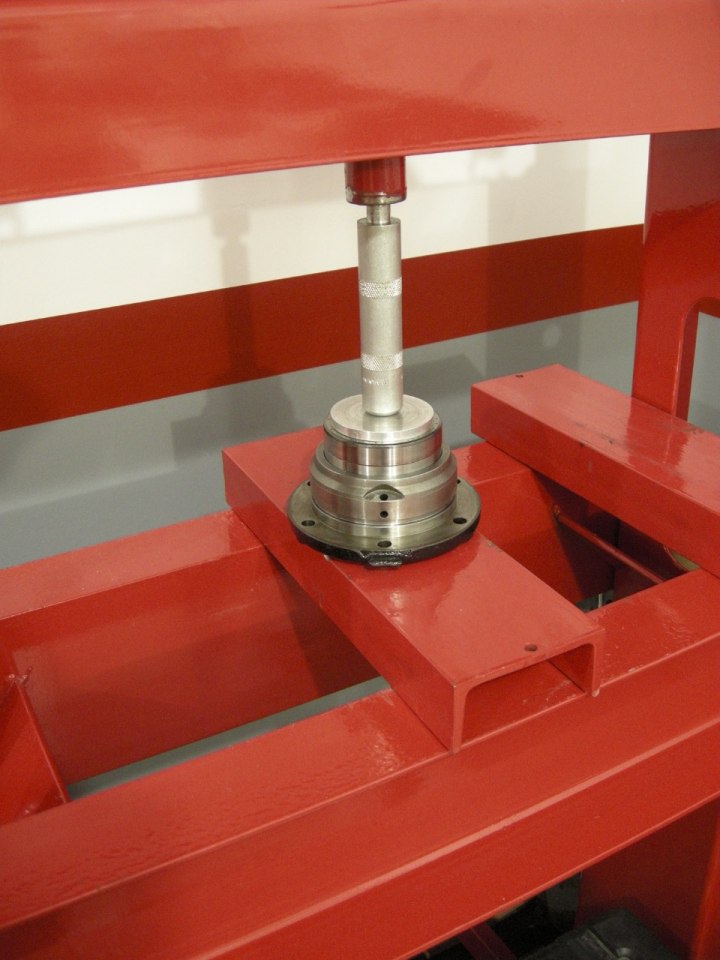
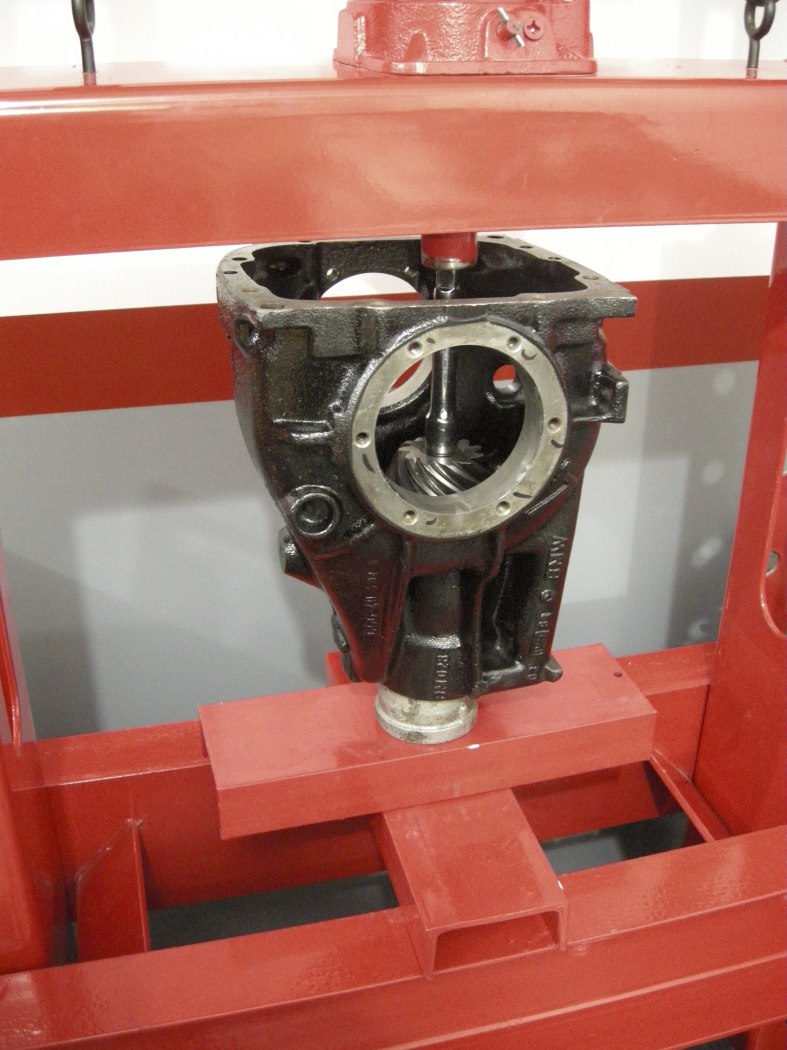
This picture shows the extension bar required to reach inside the diff case with the press.
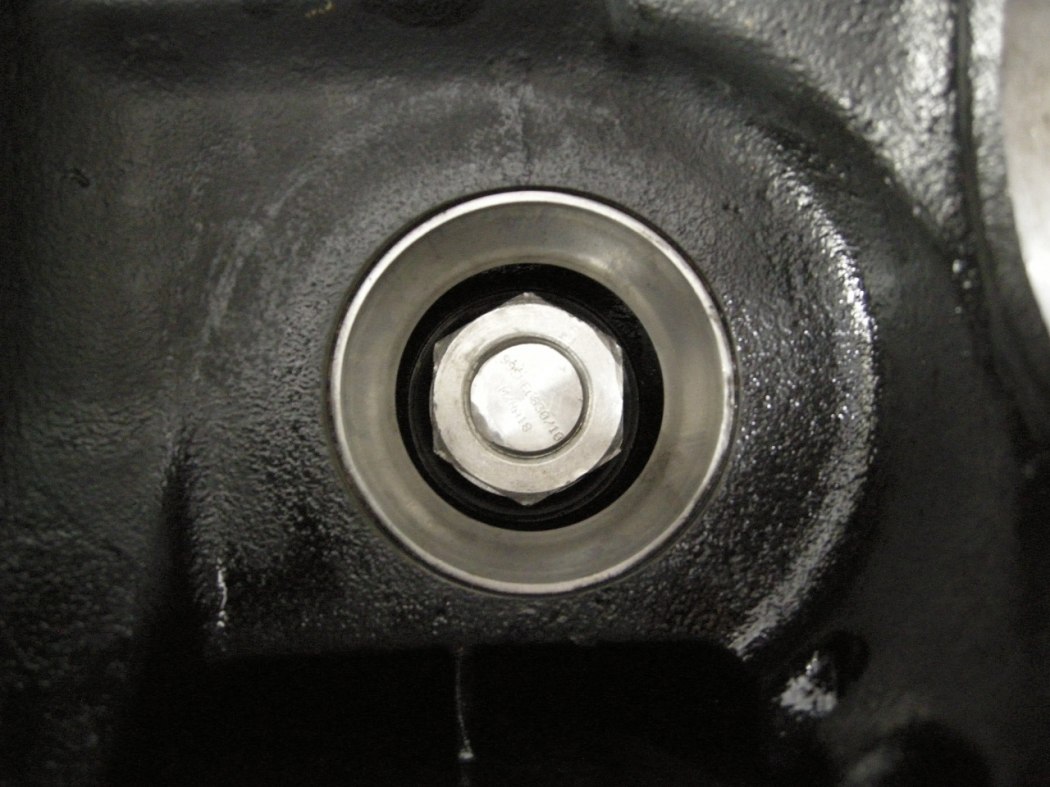
This picture shows the 2 pieces dropped in from inside the diff case, on top of the small pinion bearing race ready to press out.
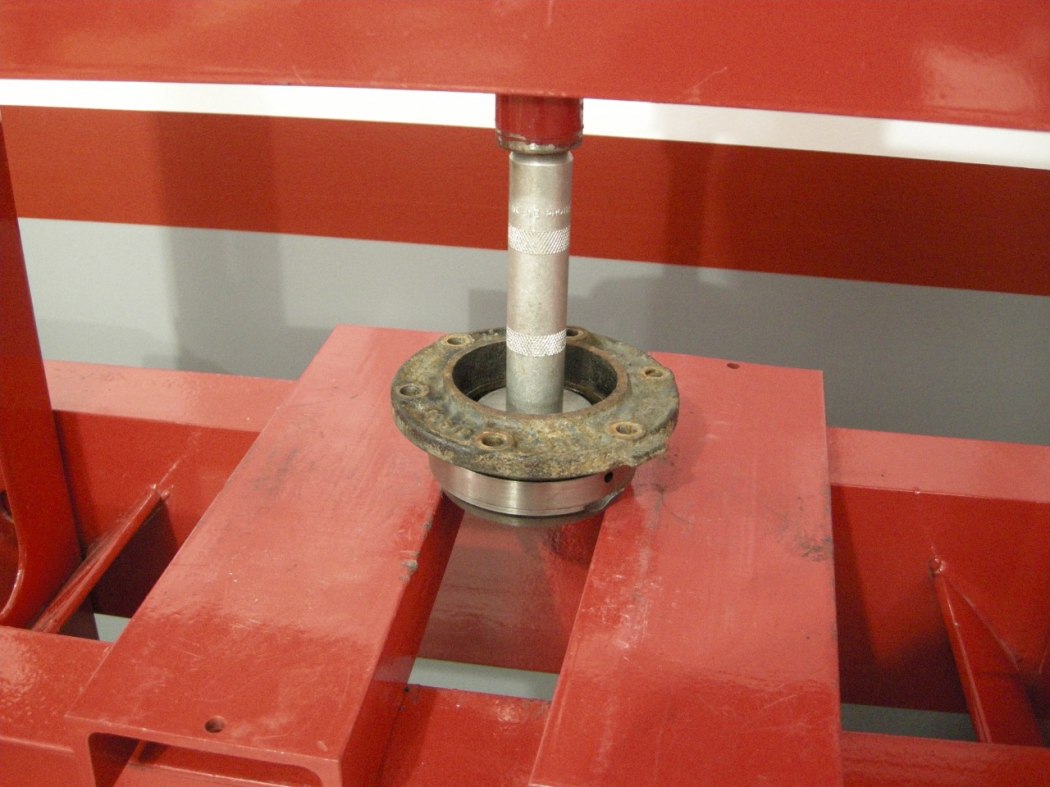
This picture shows the diff case supported in the press; the small pinion bearing race drops out the bottom.
Next is the large (inside) pinion bearing race.
Drive it out with the press in the configuration shown. Fairly straight forward if you’ve made it this far.
Worn Parts:
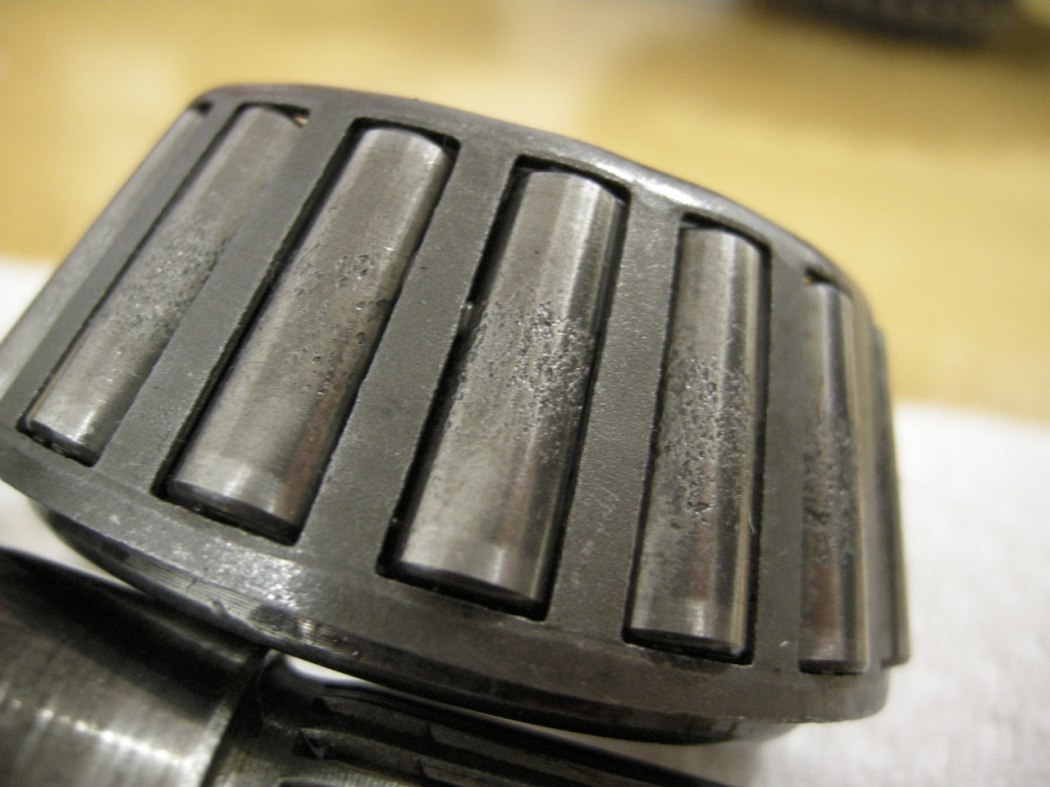
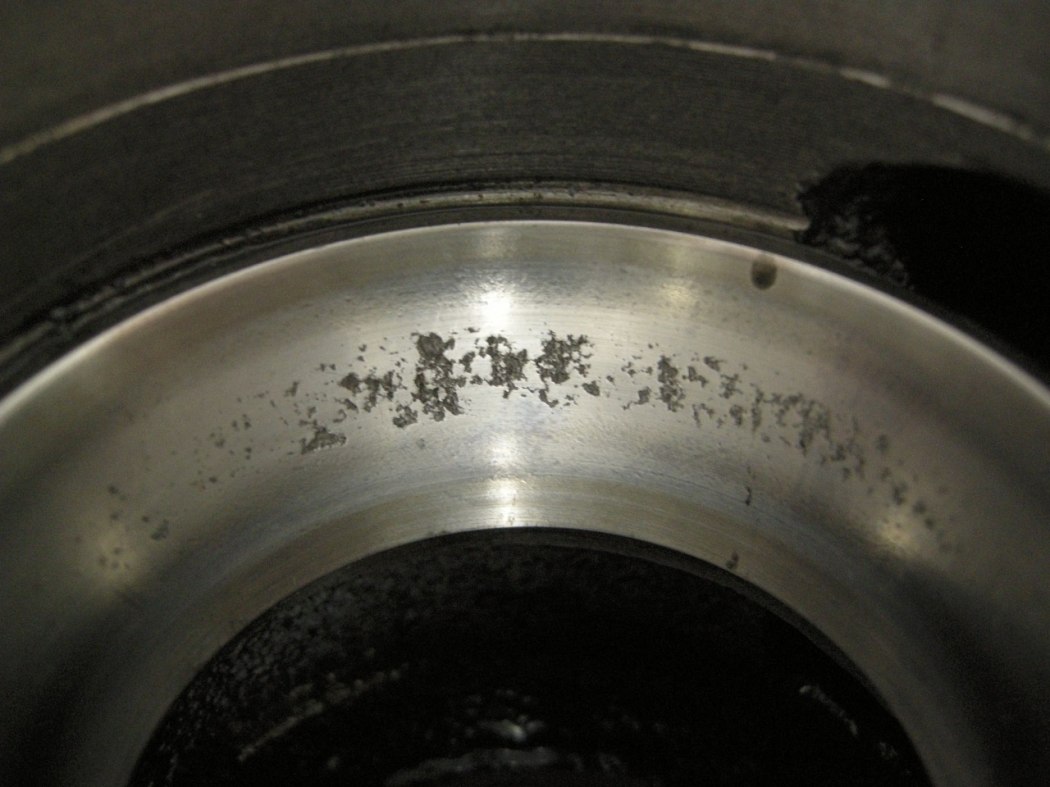
Take a look at your Pinion Bearing rollers and the outer races. Mine were very badly pitted and very noisy when spun in my hand. Definitely the smoking gun in my driveline noise issue.
At this point we are almost completely disassembled... keep reading.
Large (inner) Pinion Bearing Removal:
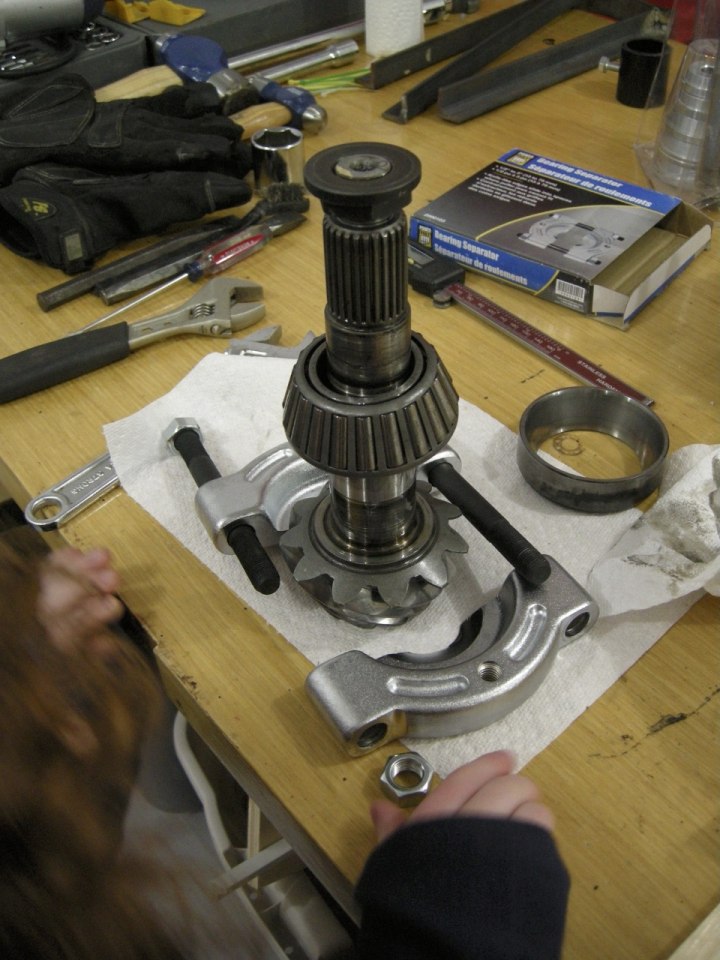
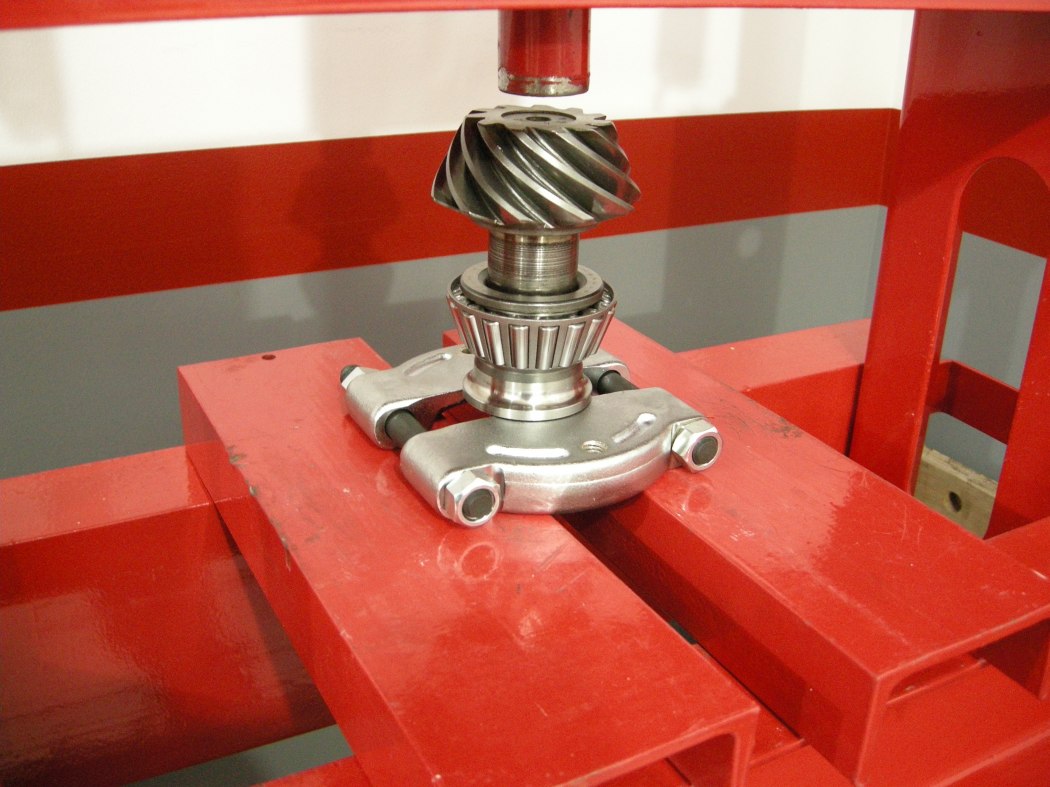
Setup the Bearing Splitter as shown by Sarah.
Drive the Large (inner) Pinion Bearing off the shaft with the press.
Carrier Bearing Removal:
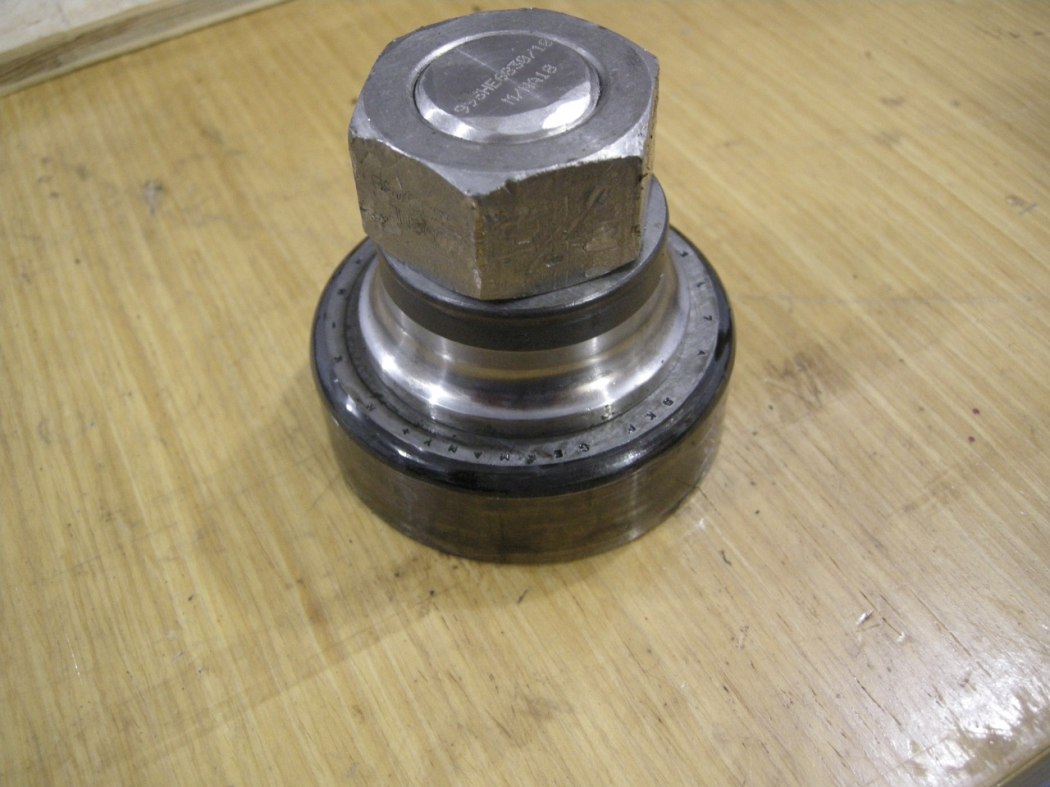
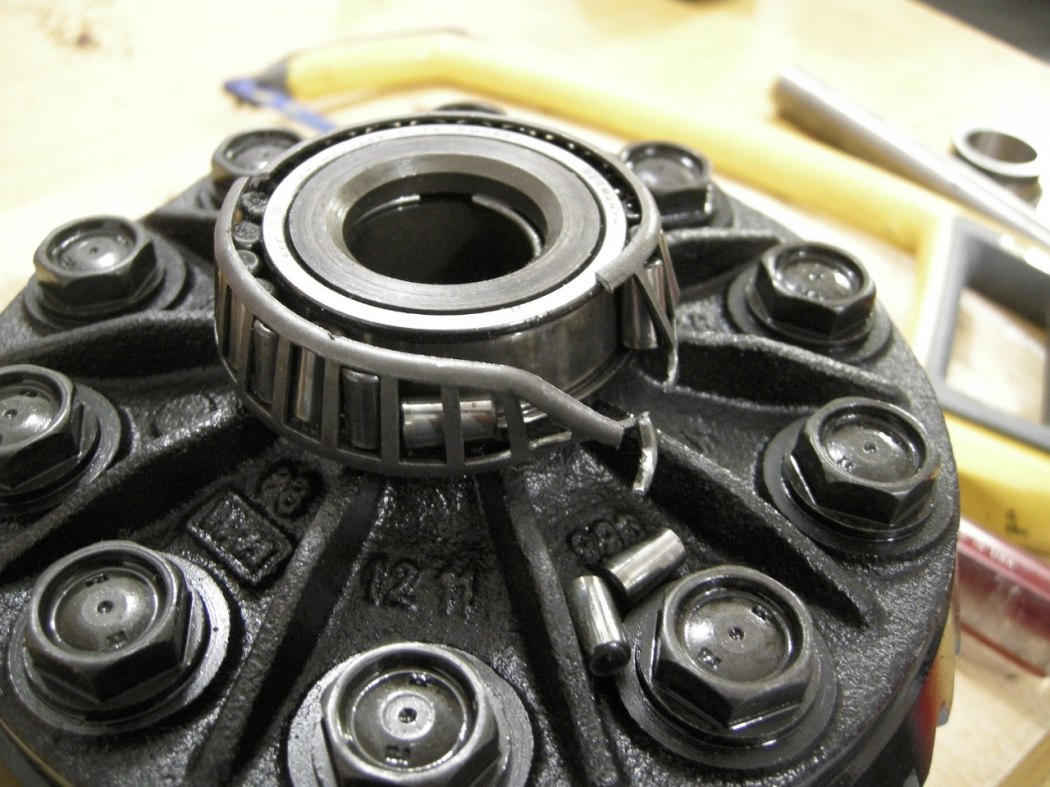
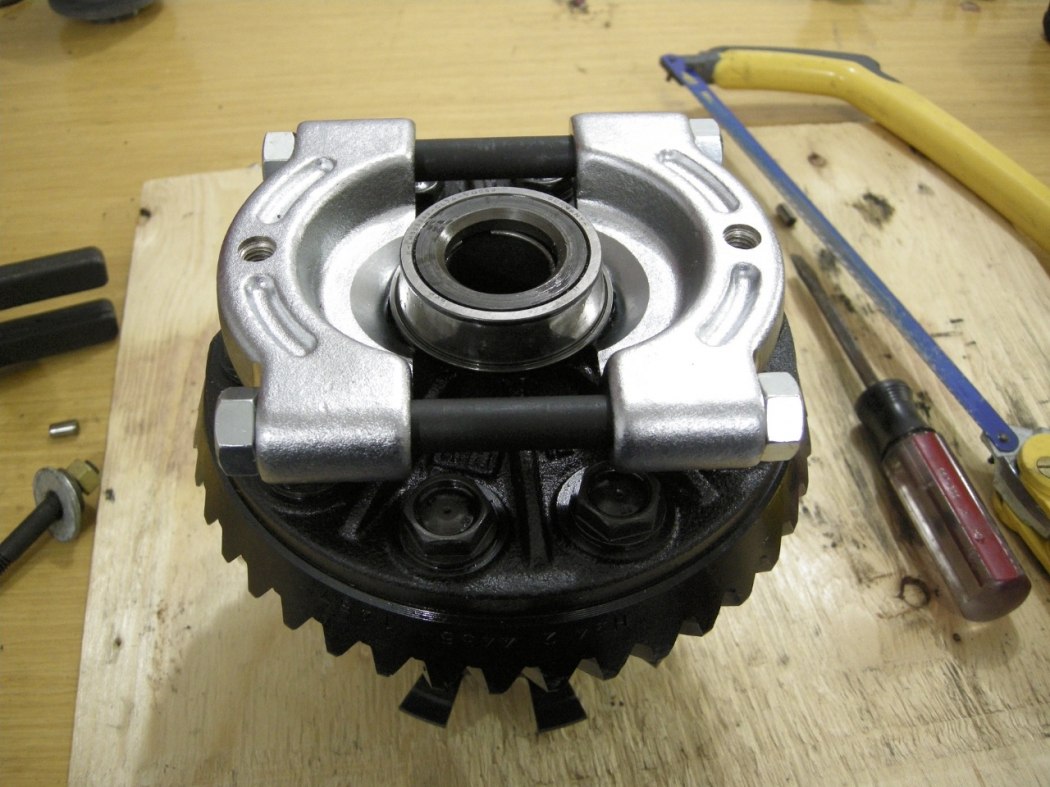
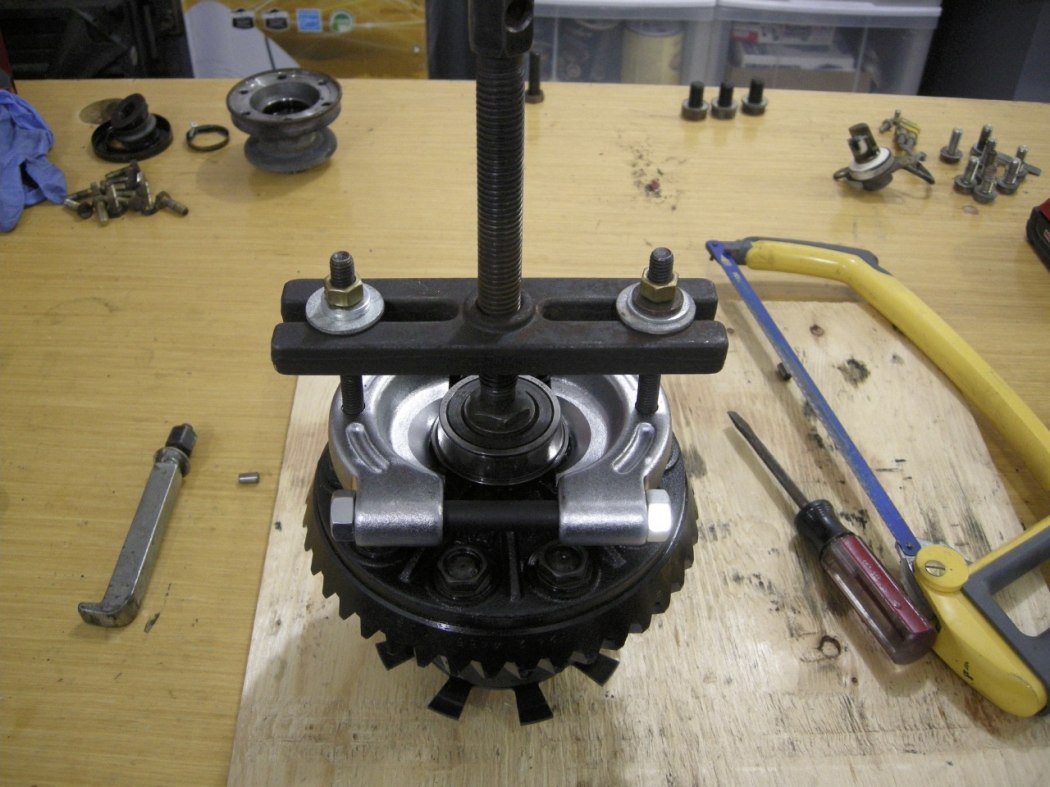
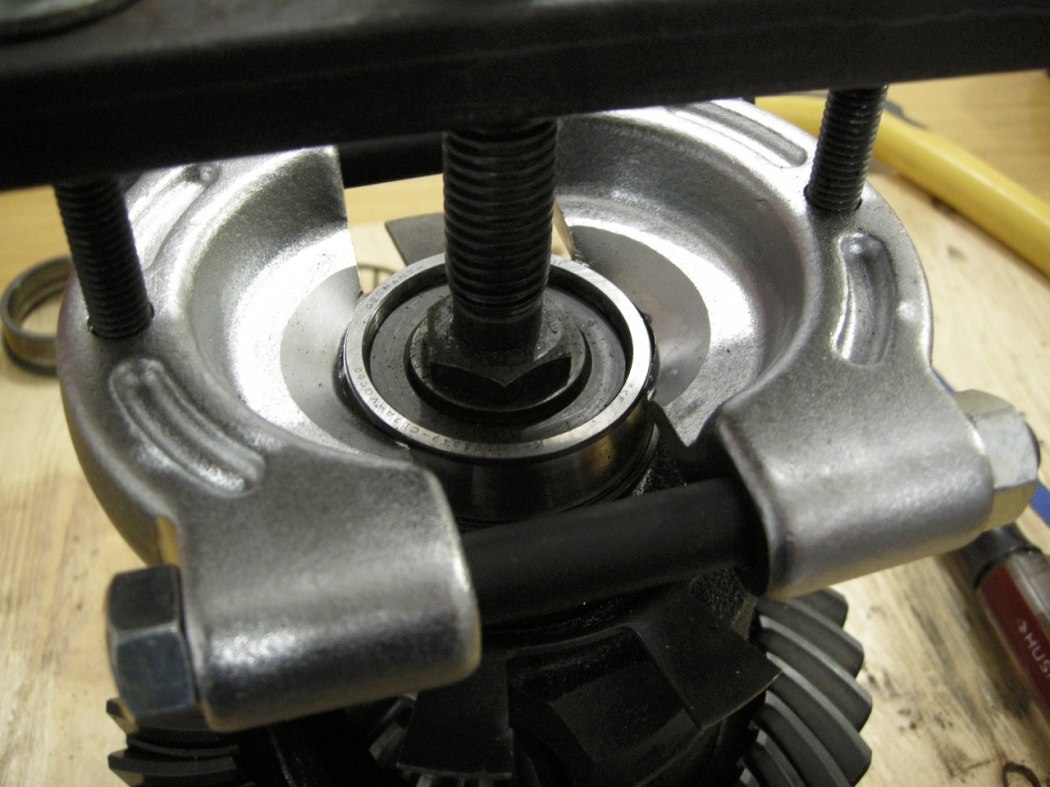
The Carrier bearings require the use of a bearing splitter for removal. I also used a large bolt to fill the space in the center, to serve as a platform for the puller.
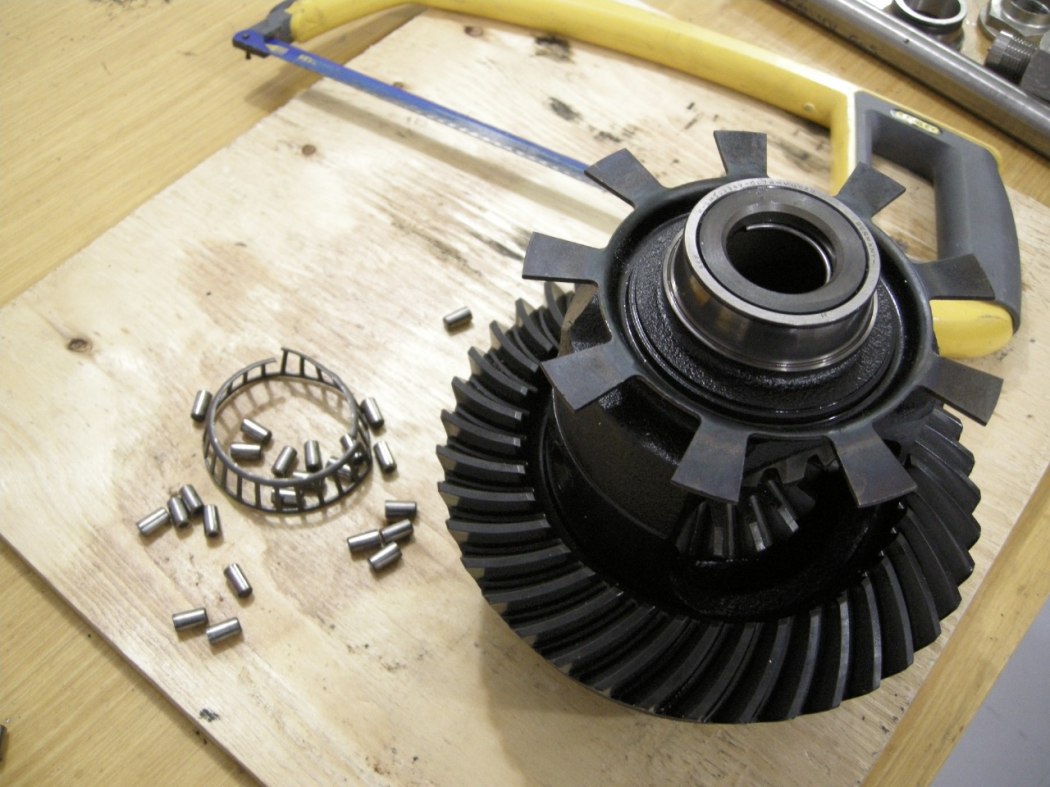
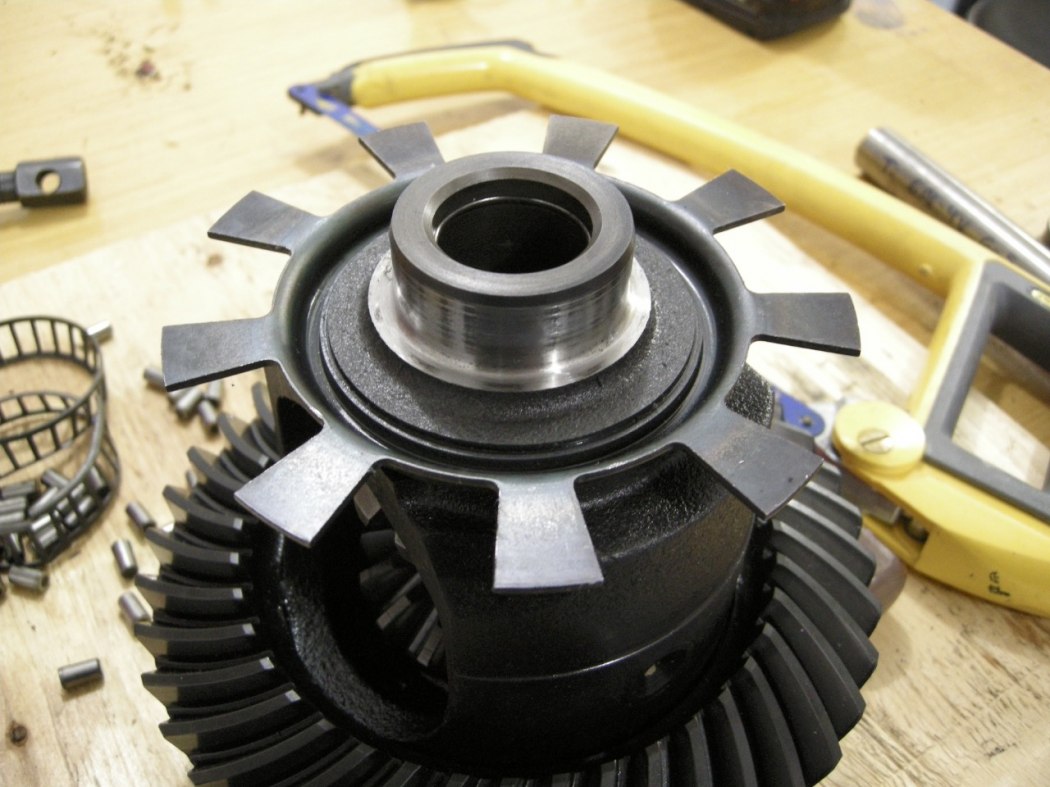
Start with the Bearing on the Ring Gear side. Cut through the roller cage and pry it off. This leaves the inner race on the Diff.
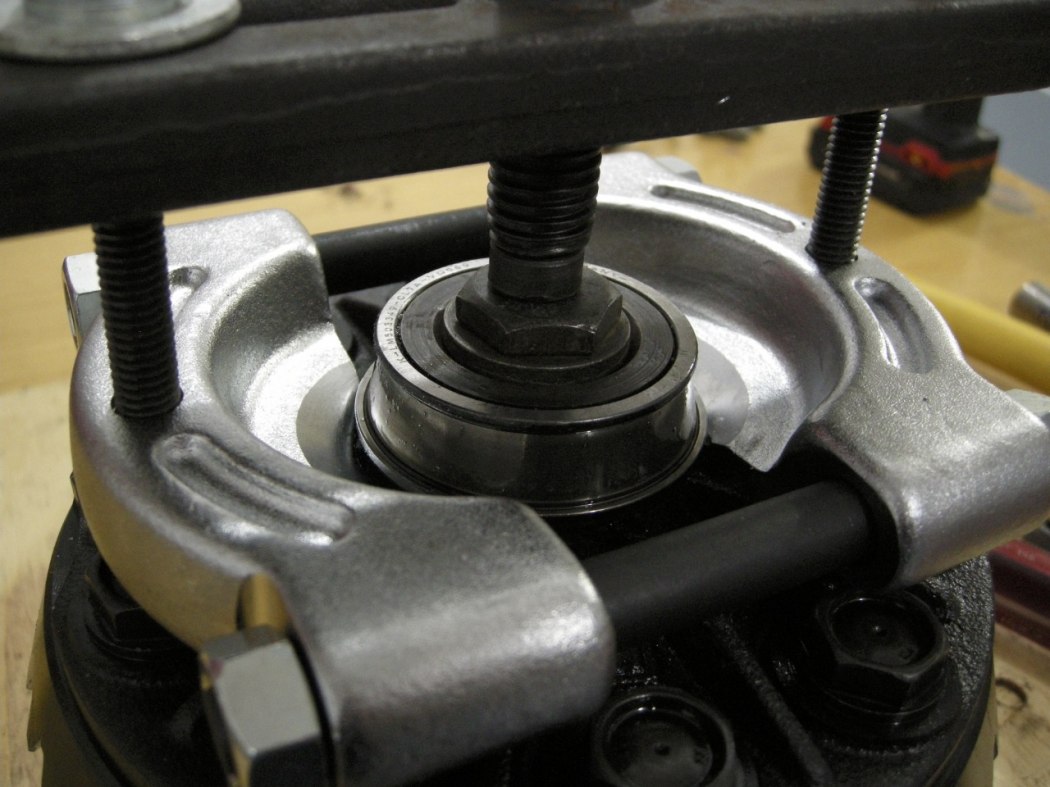
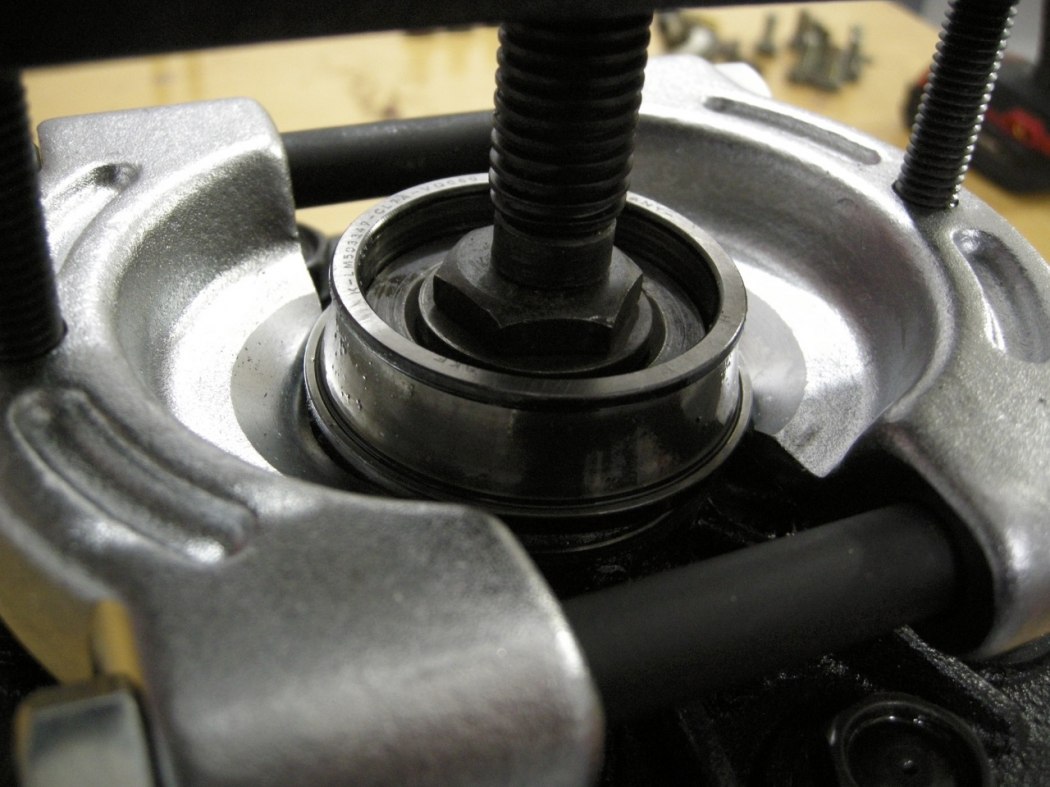
The press cannot be used for this operation because it is impossible to support the bearing splitter on the press plates. I converted a 2-jaw puller to interface with the bearing splitter, using some 3/8" studs and nuts. Start cranking and the bearing race will slip off.
For the other side of the Diff with the speed sensor toothed ring, perform the same operation as the previous Carrier Bearing except the Bearing Splitter will engage with the top lip of the bearing race. There isn't much for the splitter to catch on so make sure the splitter is tightened up enough.
Bearing Cap Seals and Carrier Races:
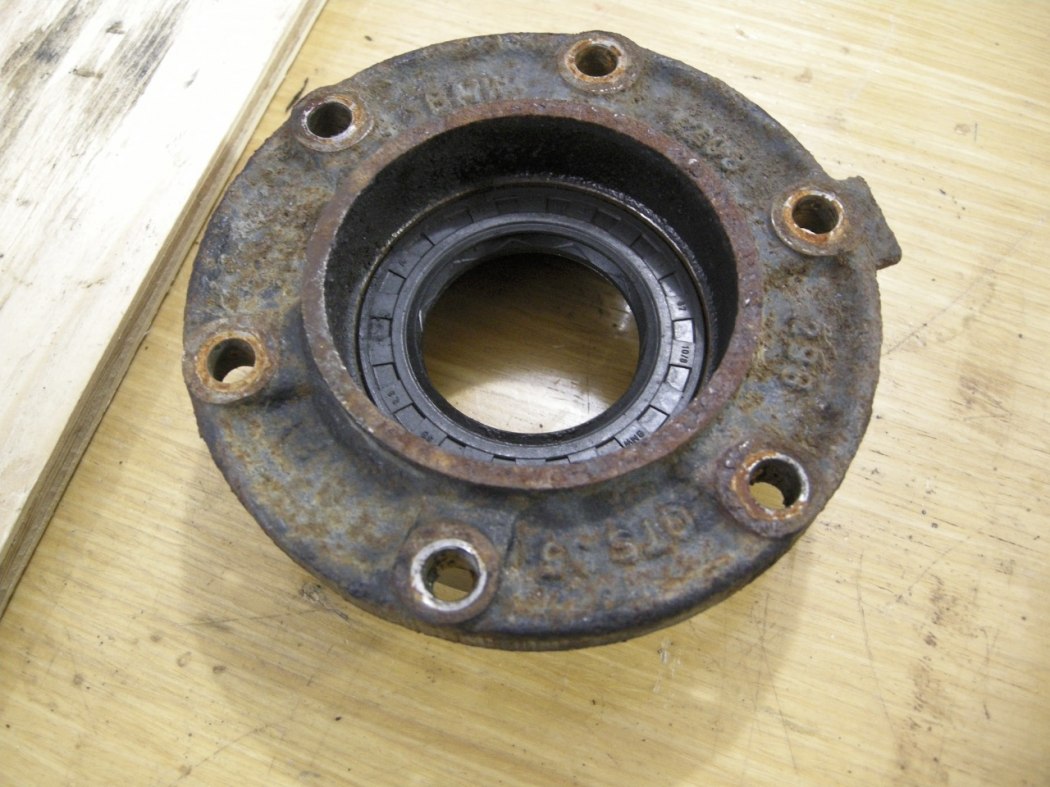
Last but not least, the Bearing Cap Seals and bearing races.
Simply drive the Seals out using the appropriate driver, and same for the bearing race.
Half way point:
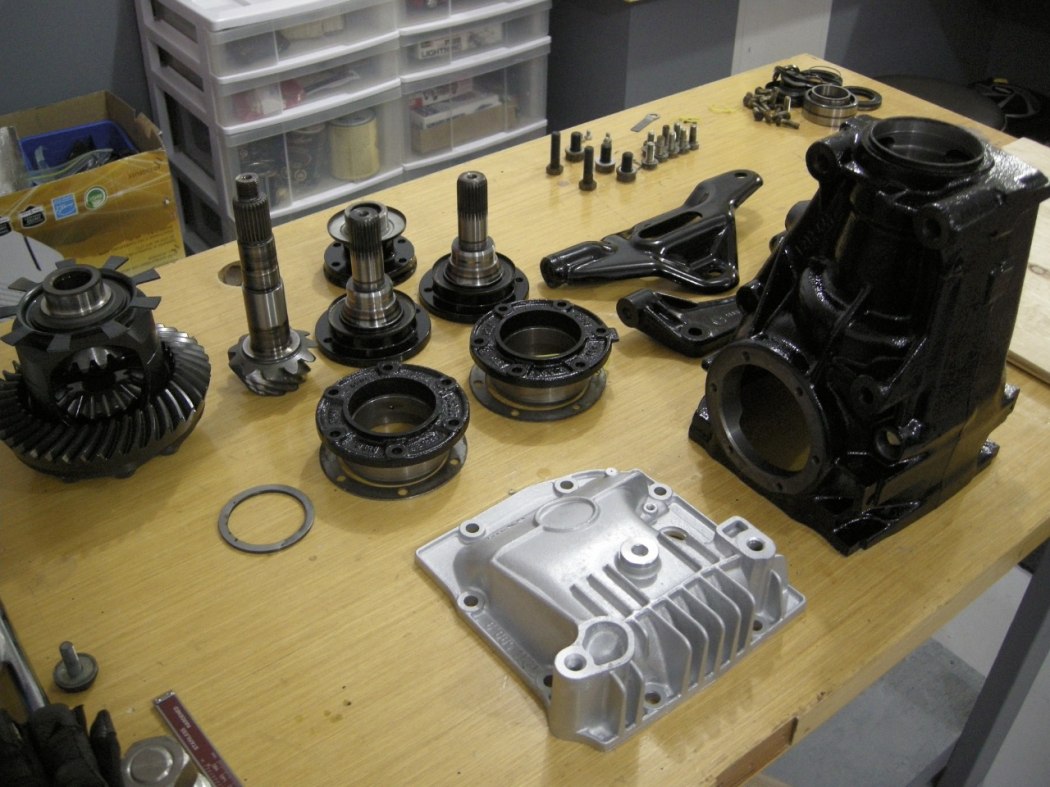
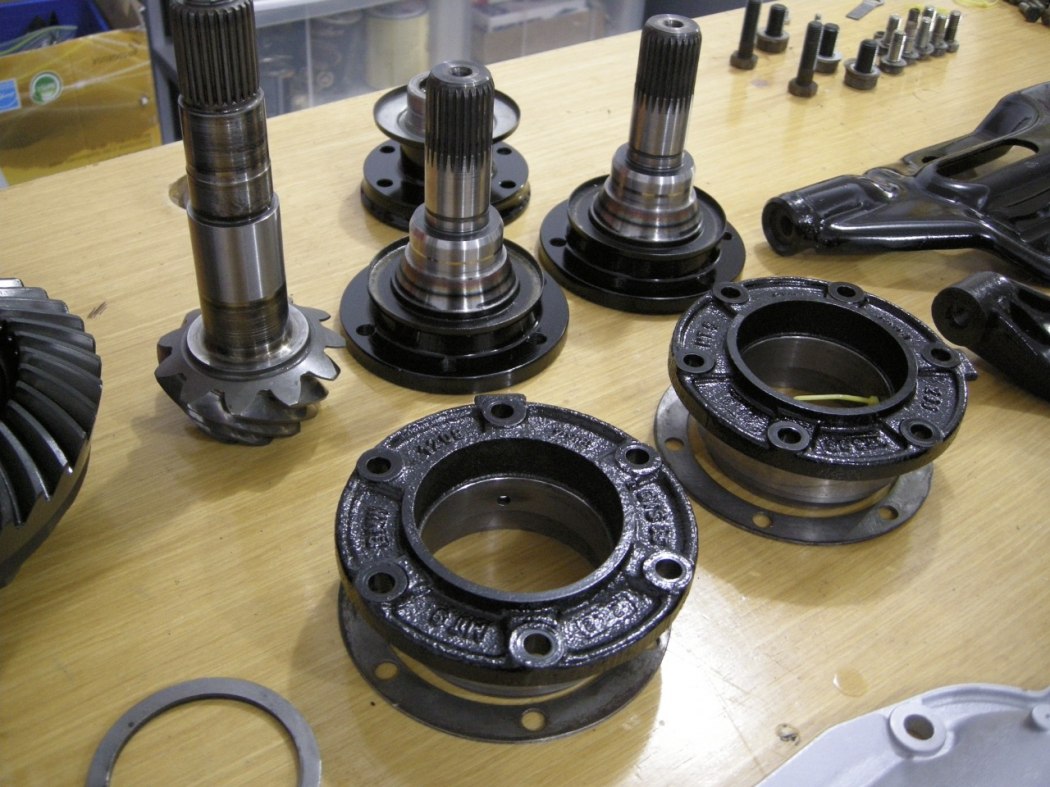
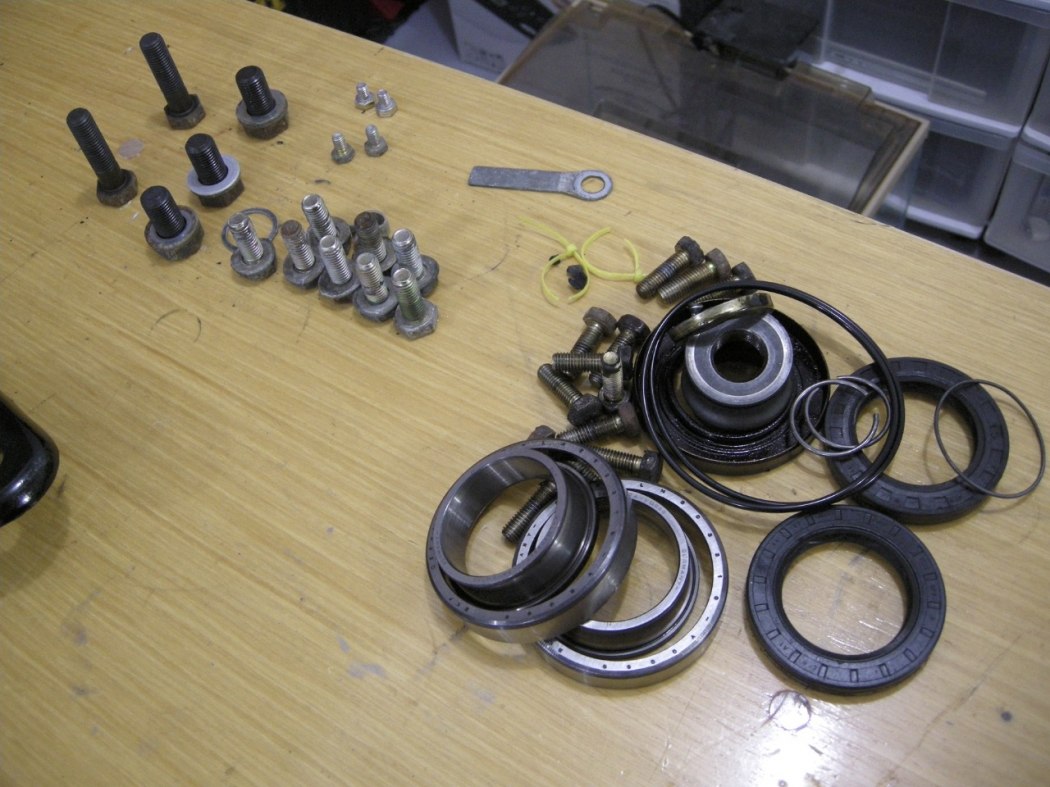
At this stage the diff is 100% disassembled. Consider how much time you've spent up until now and the pile of scrap parts can almost fit in one hand.
Clean clean clean and paint:
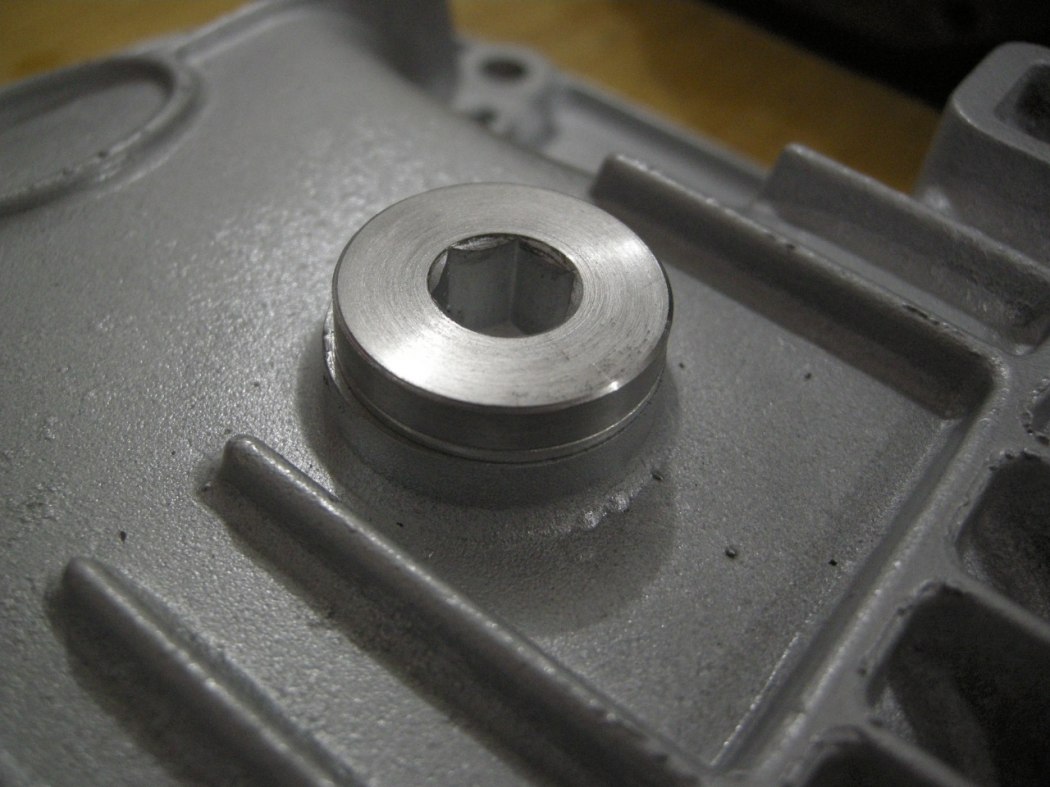
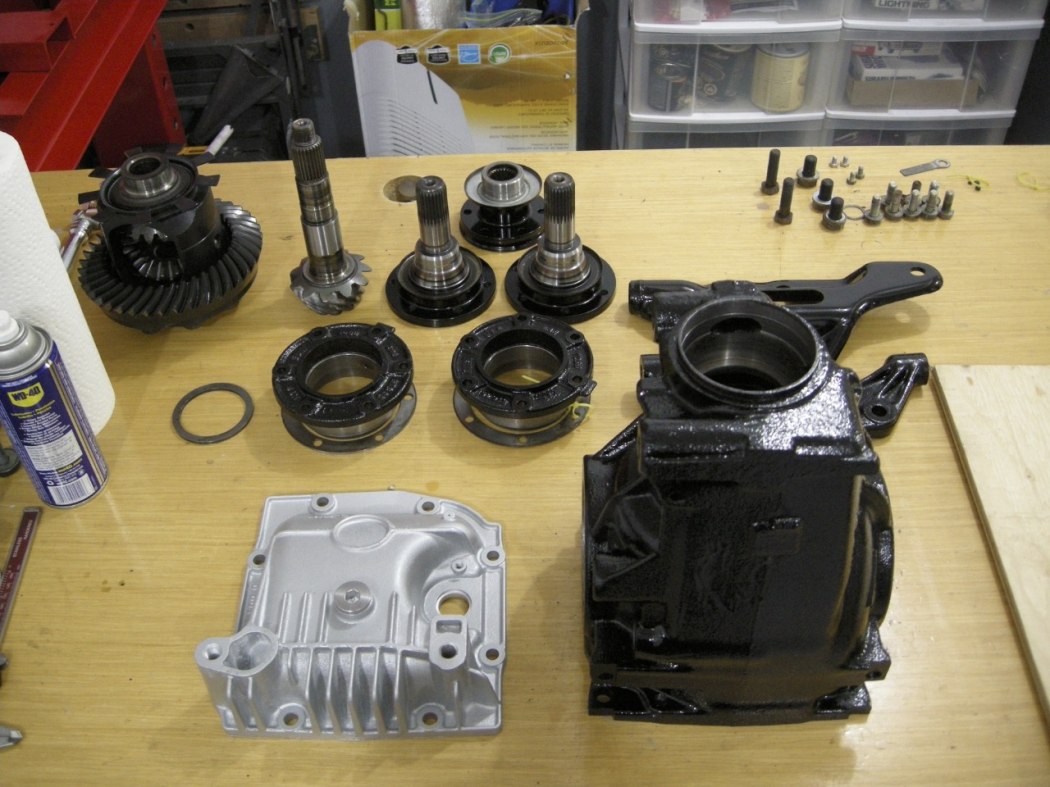
Now is the time to clean and paint everything. The amount of effort you exert here is up to you. I don't have an operational sand blaster so I stripped everything by hand. Took a bit of time but was worth it. I even turned the drain / fill plugs on the lathe to remove the surface rust. In the end I painted them silver to somewhat prevent them from rusting. Because I used a hacksaw to cut the Carrier Bearing cage, make sure to really flush out the diff of any metal particles. Same goes for the diff case. Flush everything thoroughly.
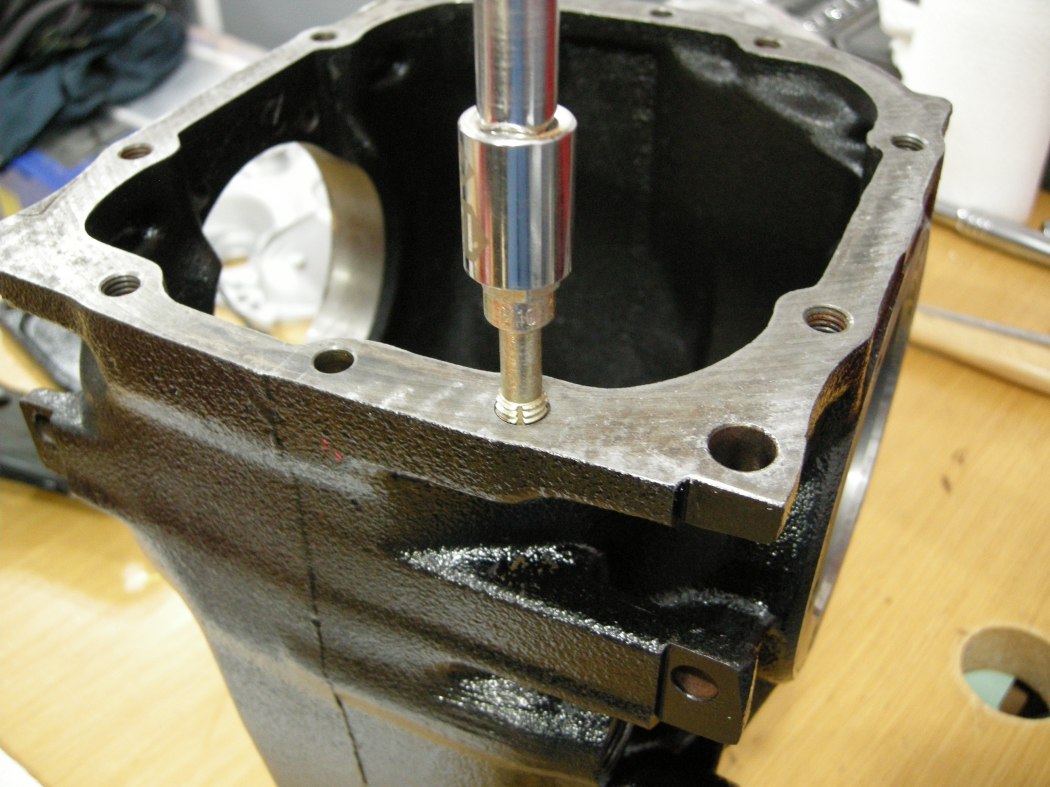
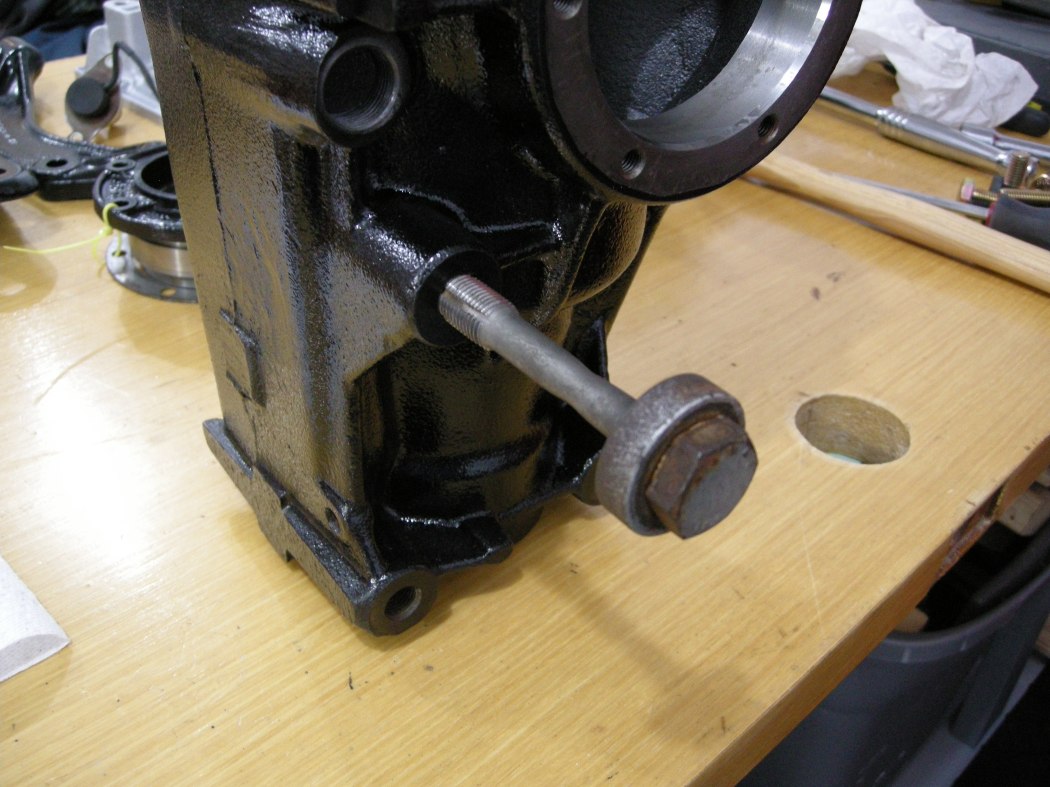
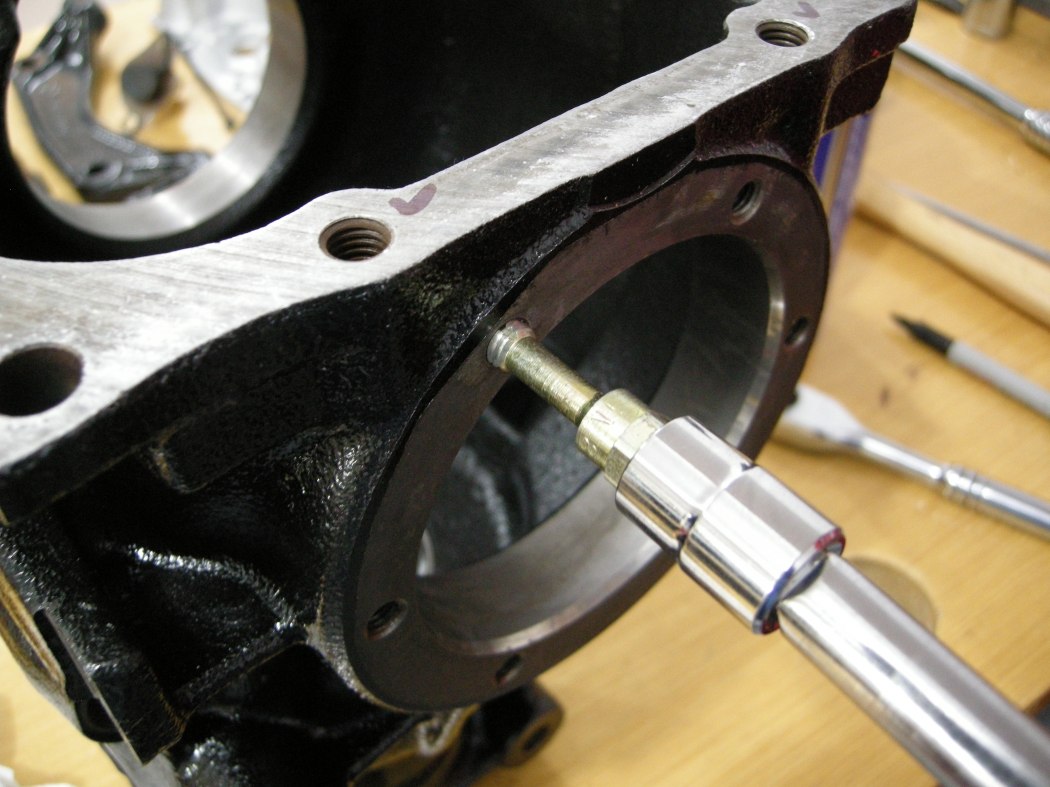
I chased all the treads to clean them up. This may be overkill to some but the devil is in the detail.
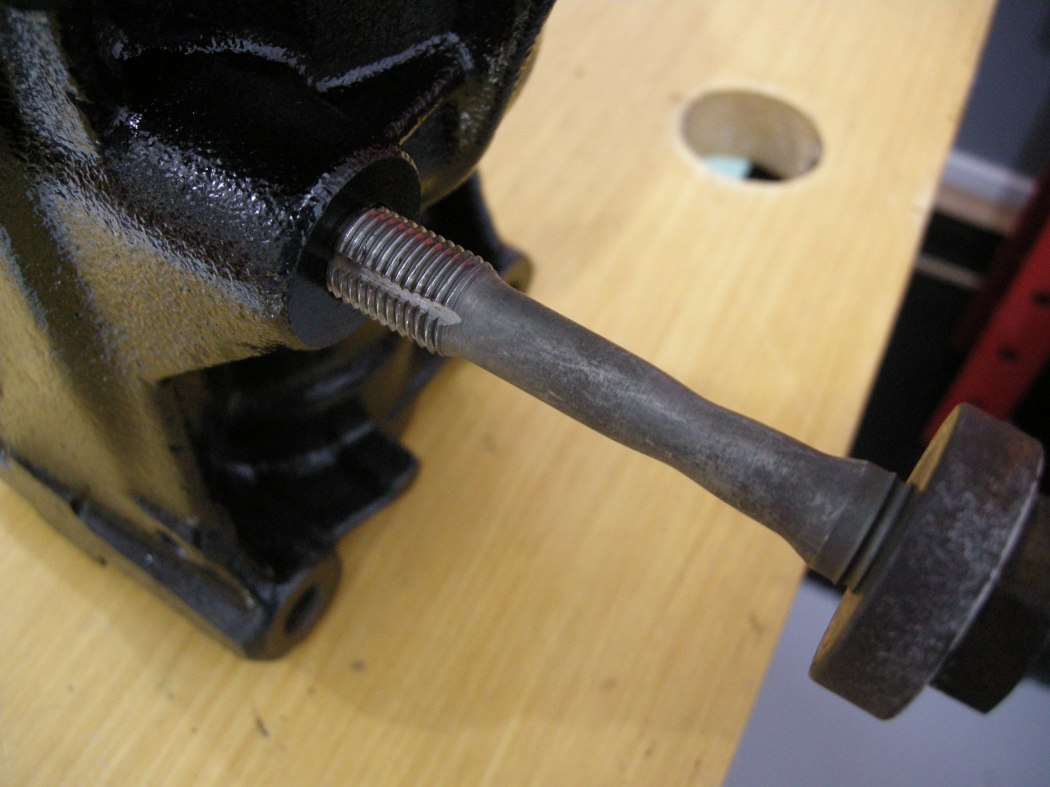
I had made an M14 thread chaser a while ago using an old axle bolt. Just cut some grooves in the thread with an angle grinder or Dremel. I have a few of these of different sizes.
Re-assembly:
Great service from Thayer Motorsport for some of the parts. I had overlooked the Pinion Nut and Securing Plate and Clay double checked to make sure I had these. I already ordered the Securing Plate from Pelican but figured a spare wouldn't hurt.. ended up needing it.
The final chapters below follow the "installation is the reverse of disassembly" mentality.
Bearing Caps:
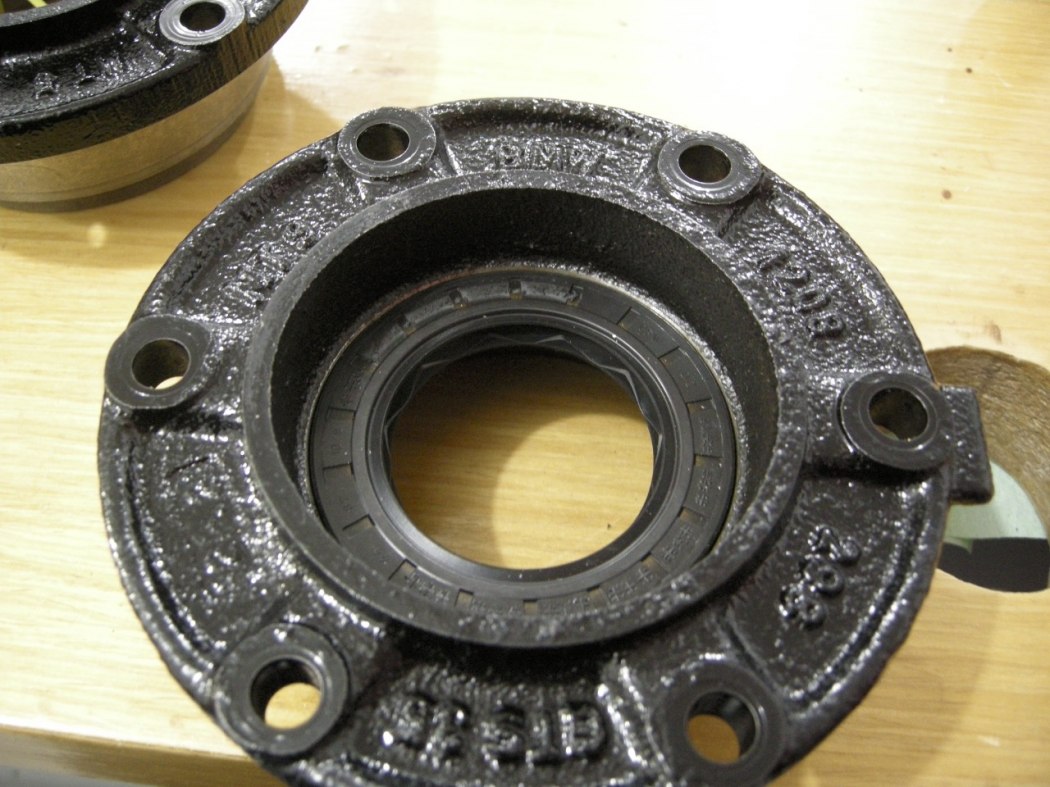
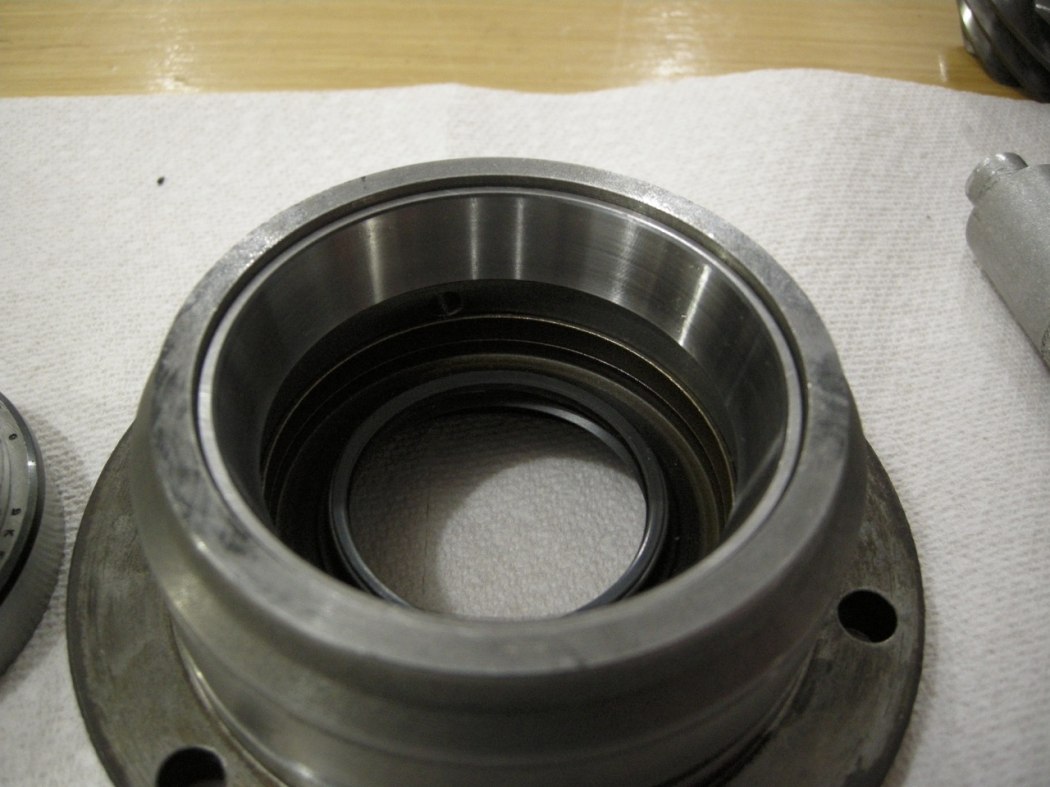
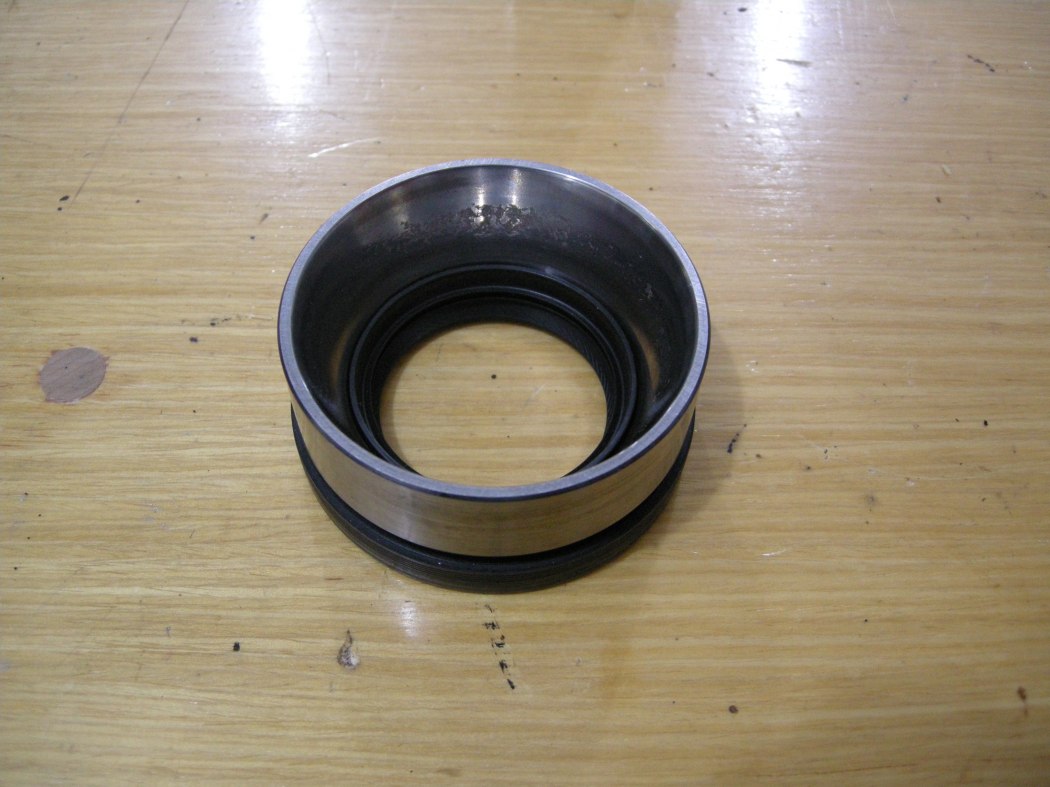
Starting with the Bearing Caps, press the new seals in to the same depth as the old ones. Use a light smear of oil on the outside of the seal.
Flip the Caps over and drive in the Bearing races using one of the old races, as shown.
Pinion Bearing Races:
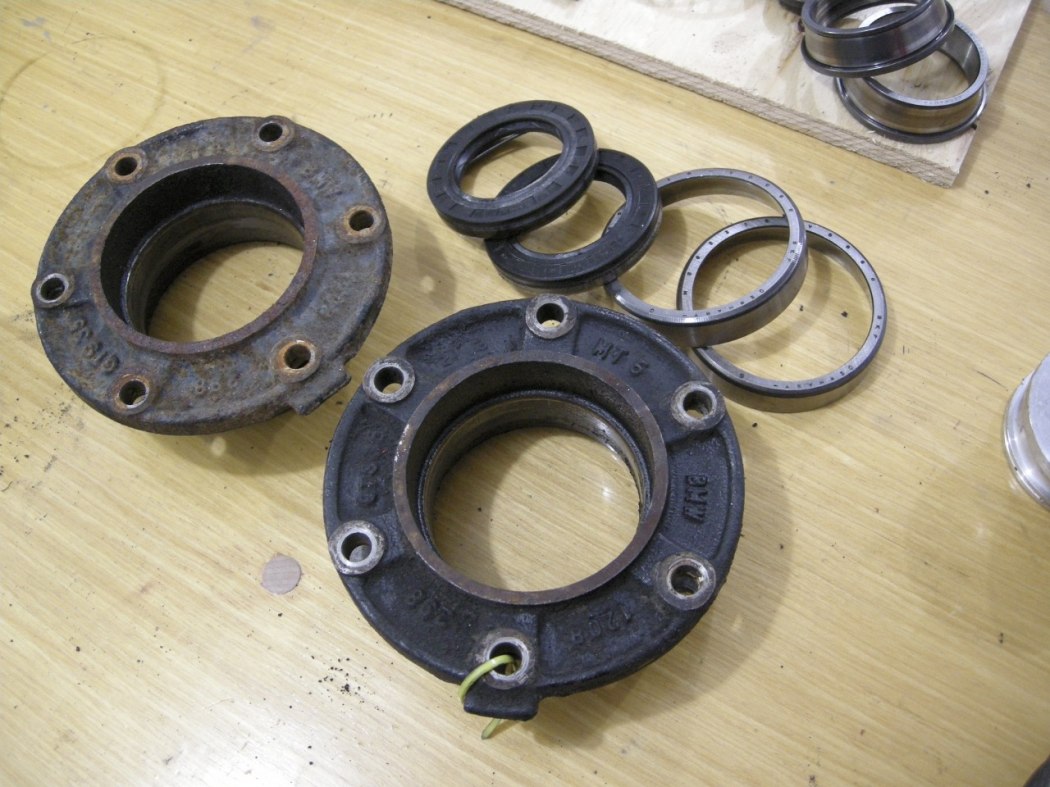
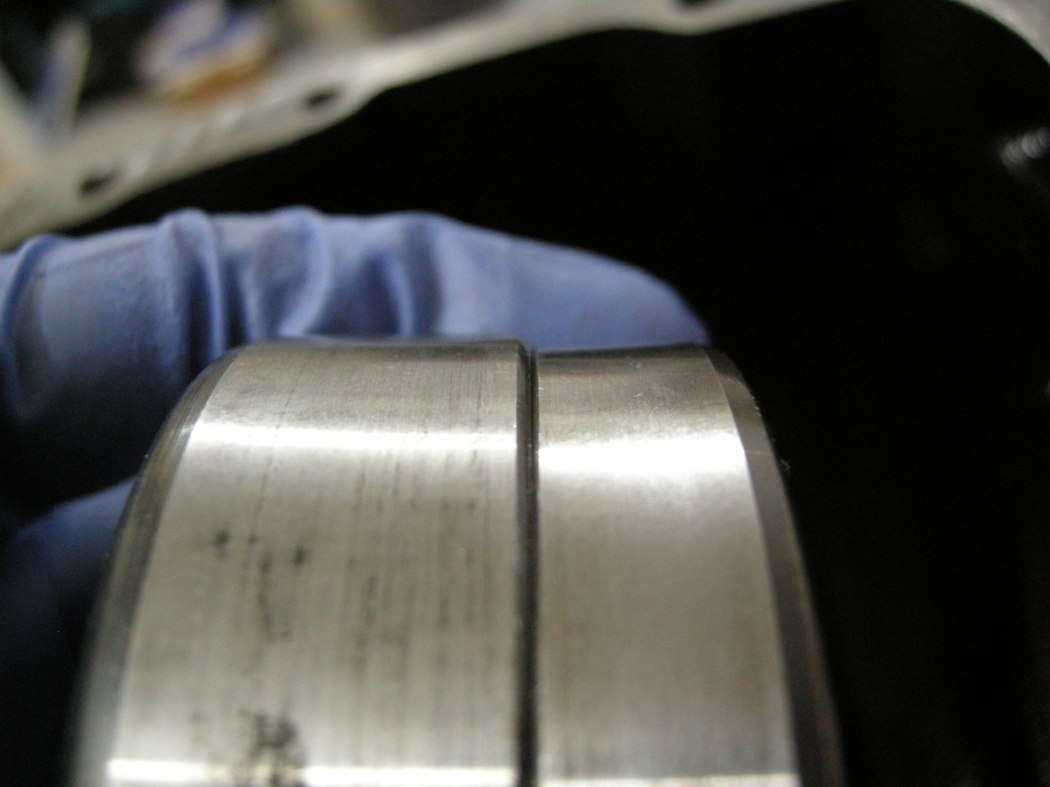
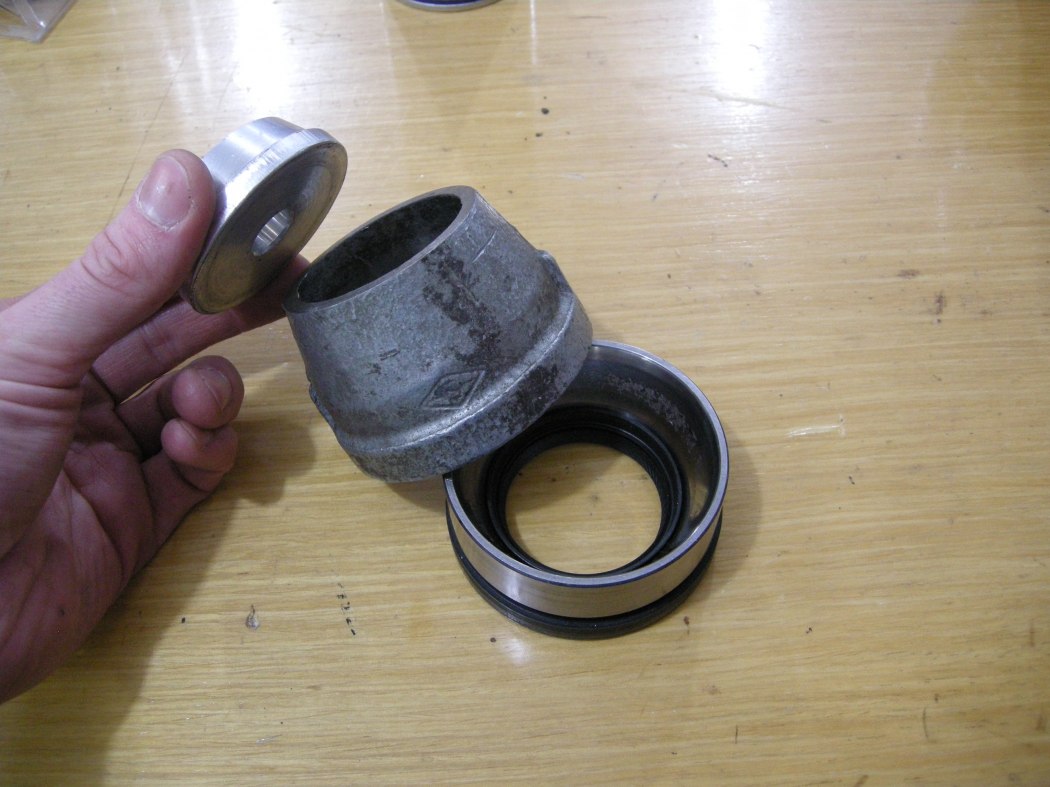
Old (left) vs new (right)
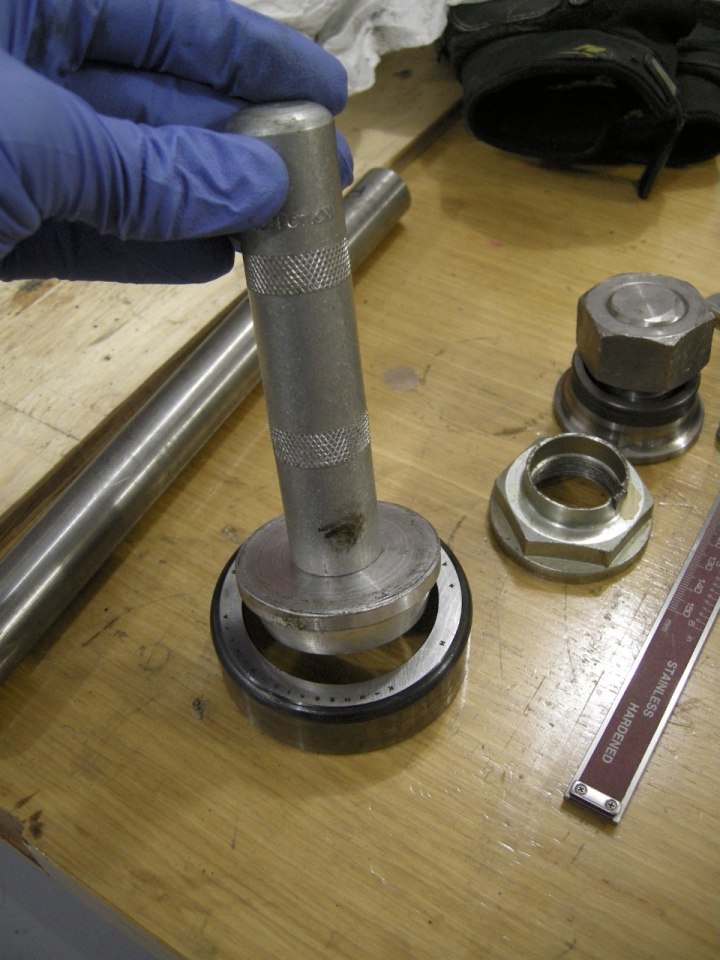
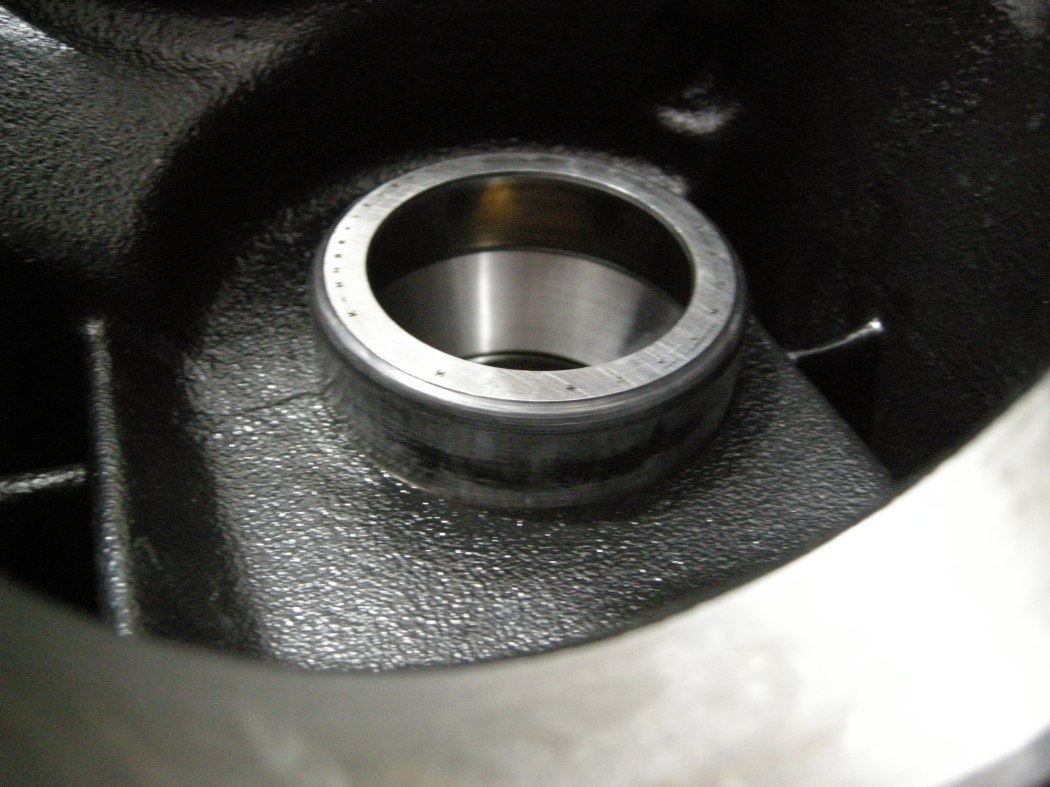
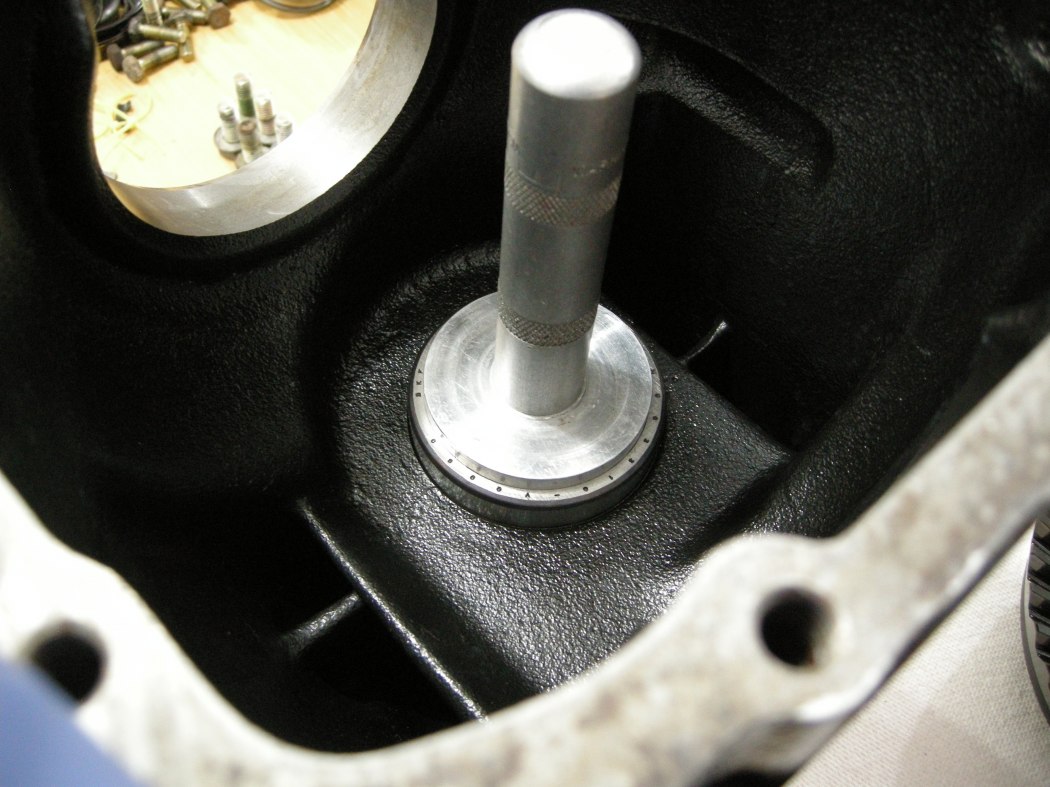
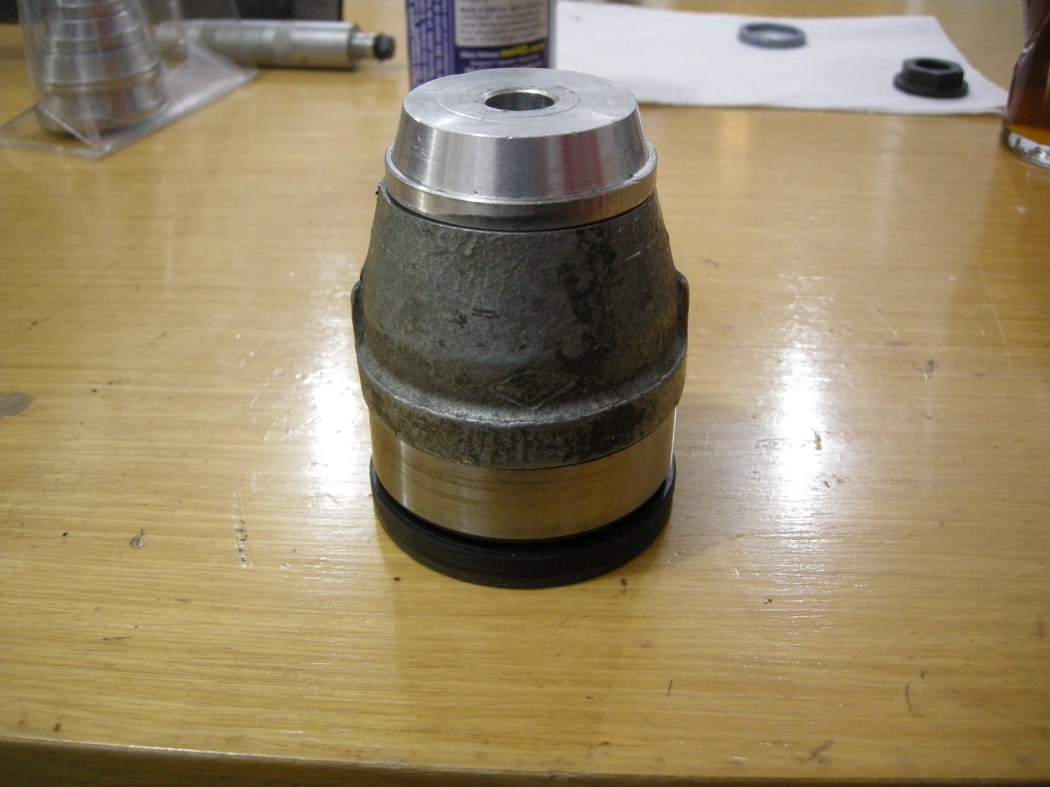
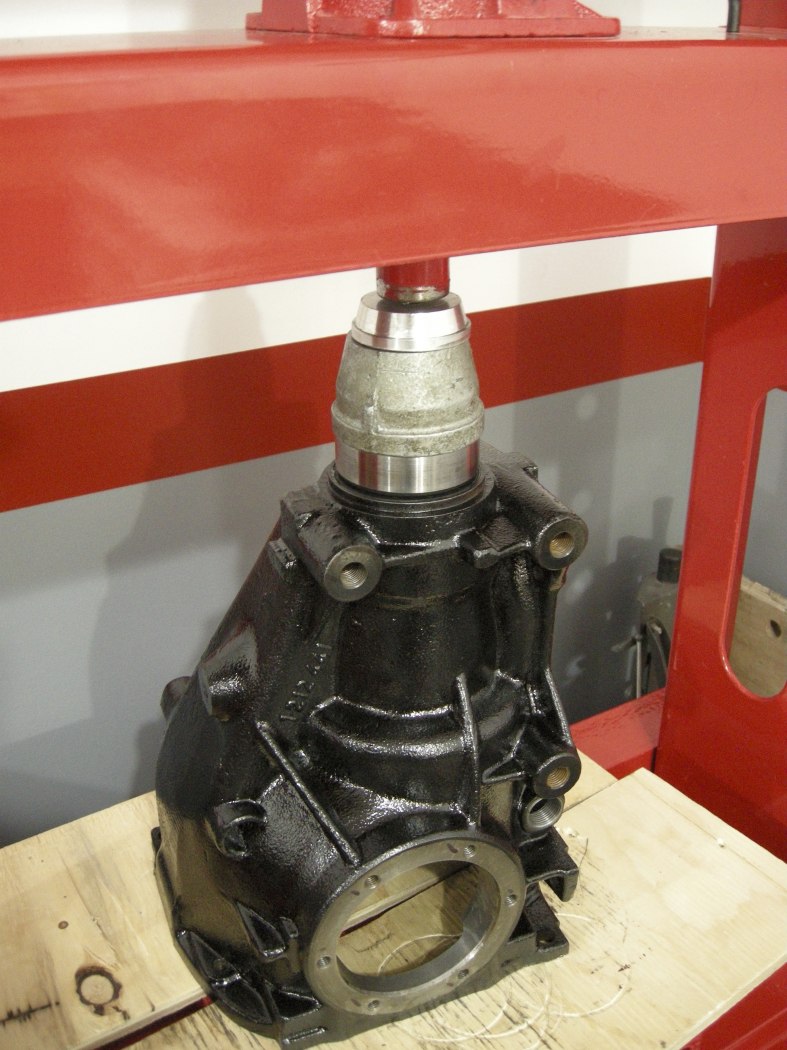
The Pinion Bearing Races are pressed into the Diff Case using the old races.
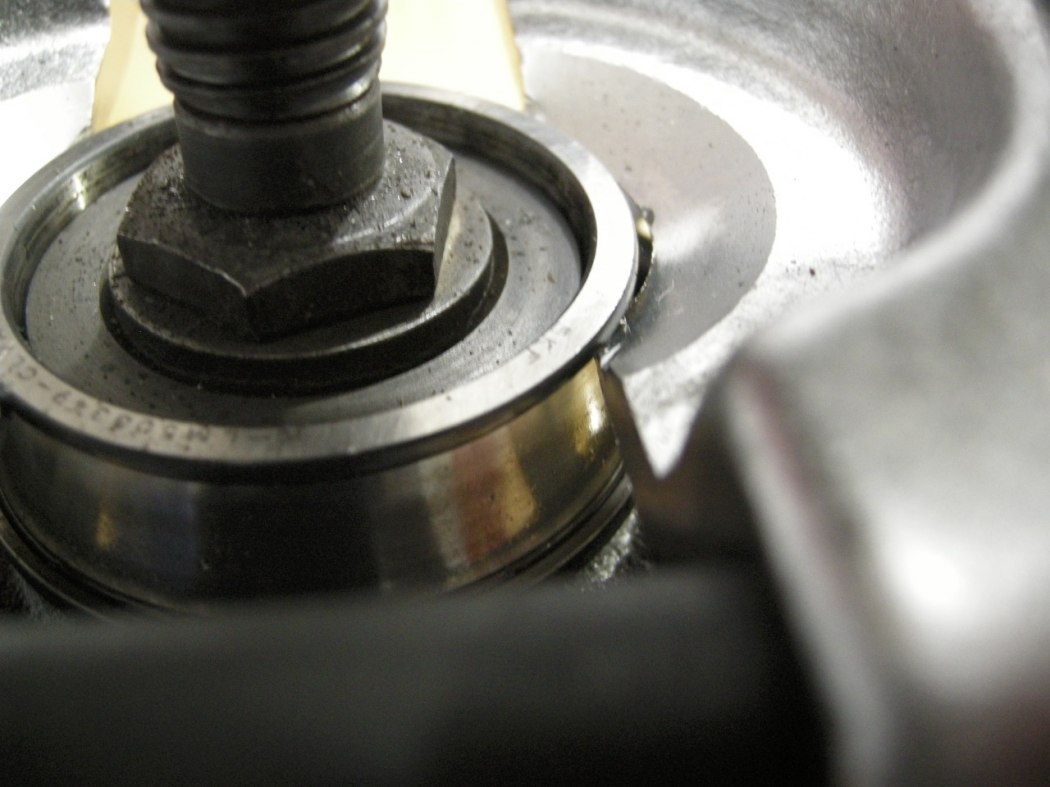
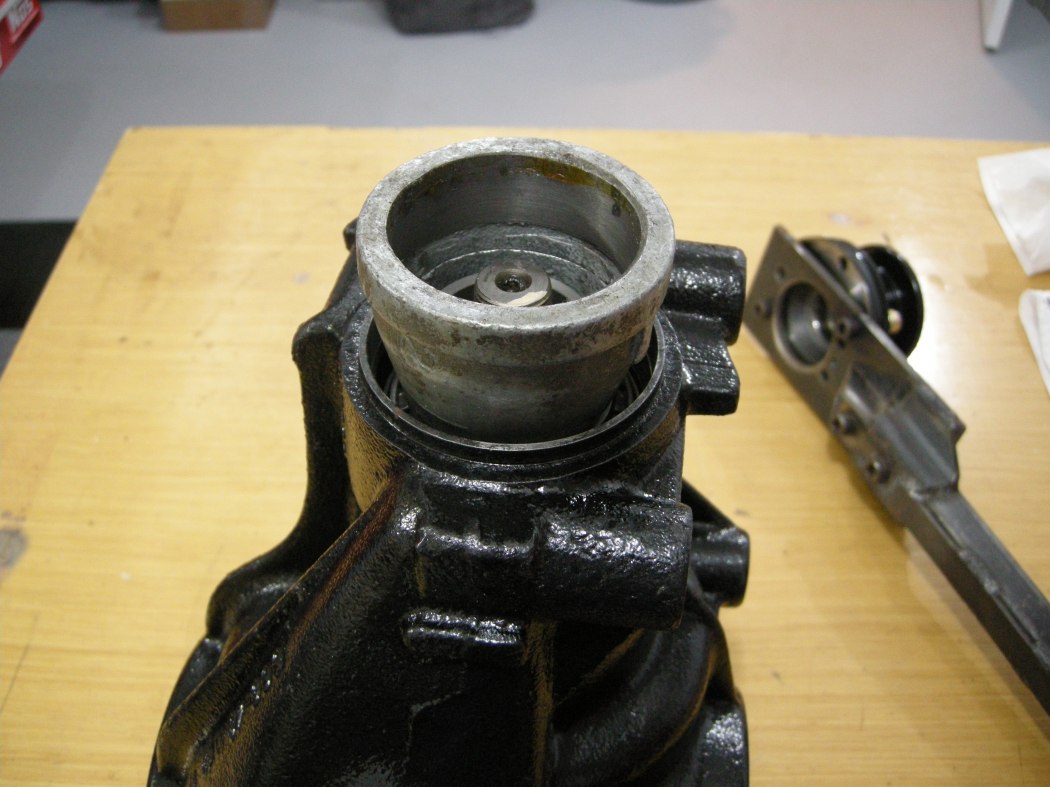
Special note for the Large Pinion race, there is a spacer that goes in first. Don't forget to drop this in. Also, I made the mistake of using the old bearing race for the Large Bearing, and it got stuck in the case! See picture. I had take a couple steps back to get it out. I ended up using one of the old Carrier Races to drive it in, which was a bit smaller.
Large Pinion Bearing:
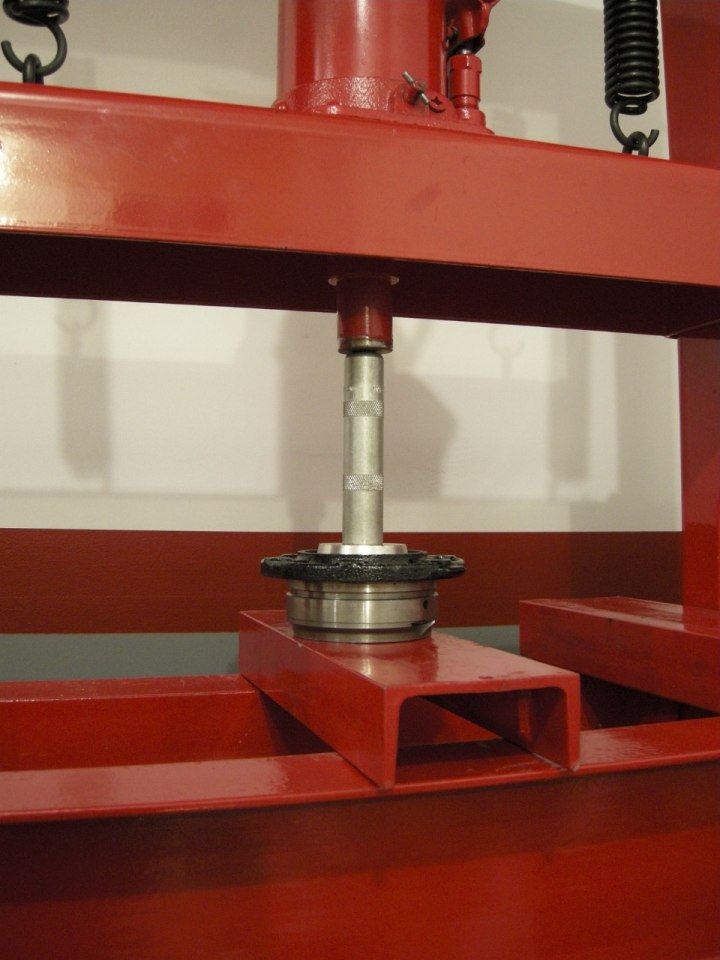
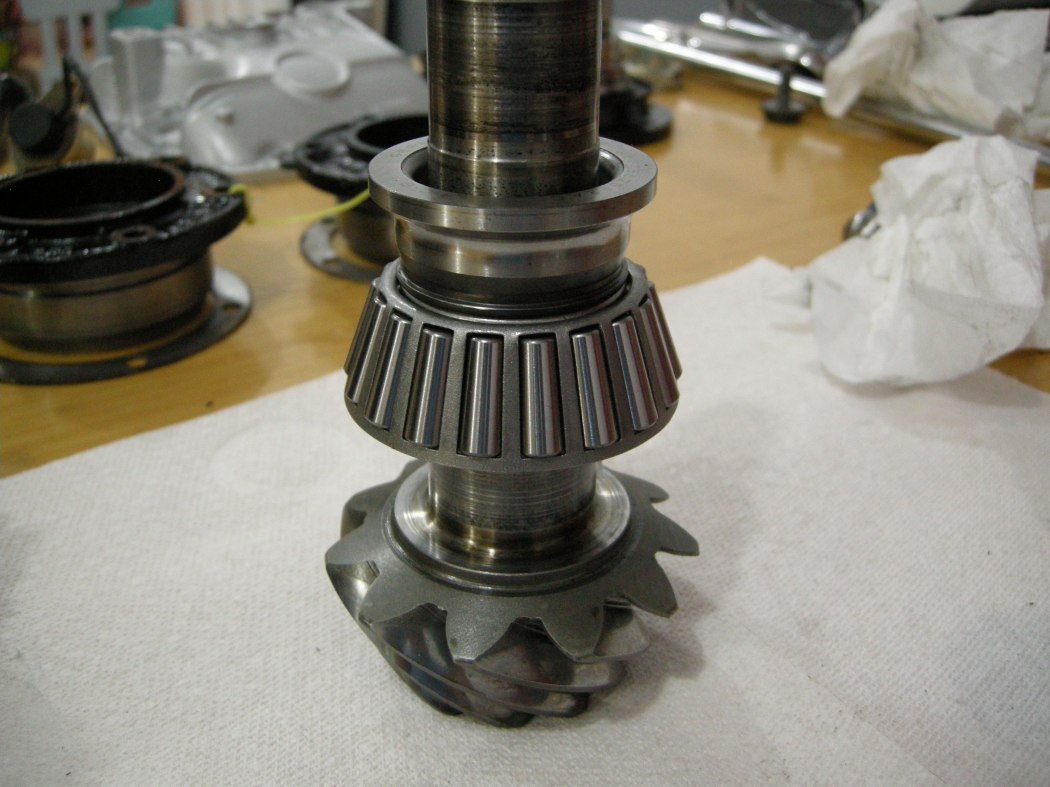
Press the Large Pinion Bearing on the Pinion shaft, using the old bearing or in my case, an Audi wheel bearing inner race, and the Bearing Splitter for support.
Carrier Bearings:
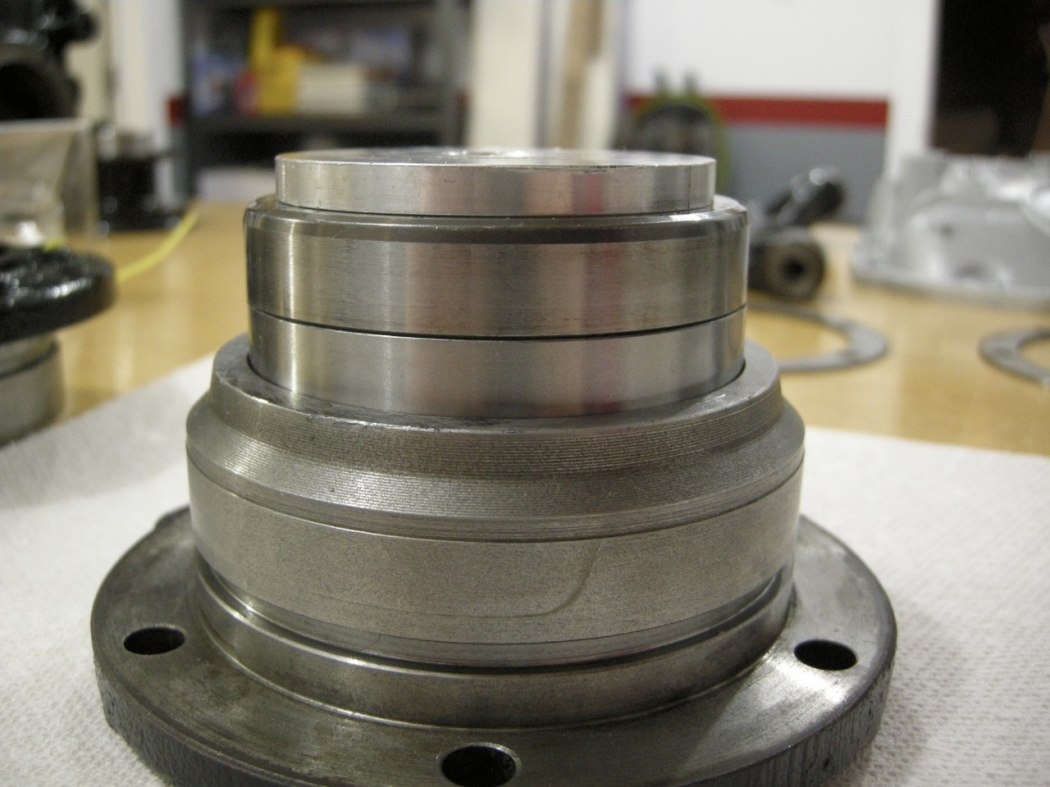
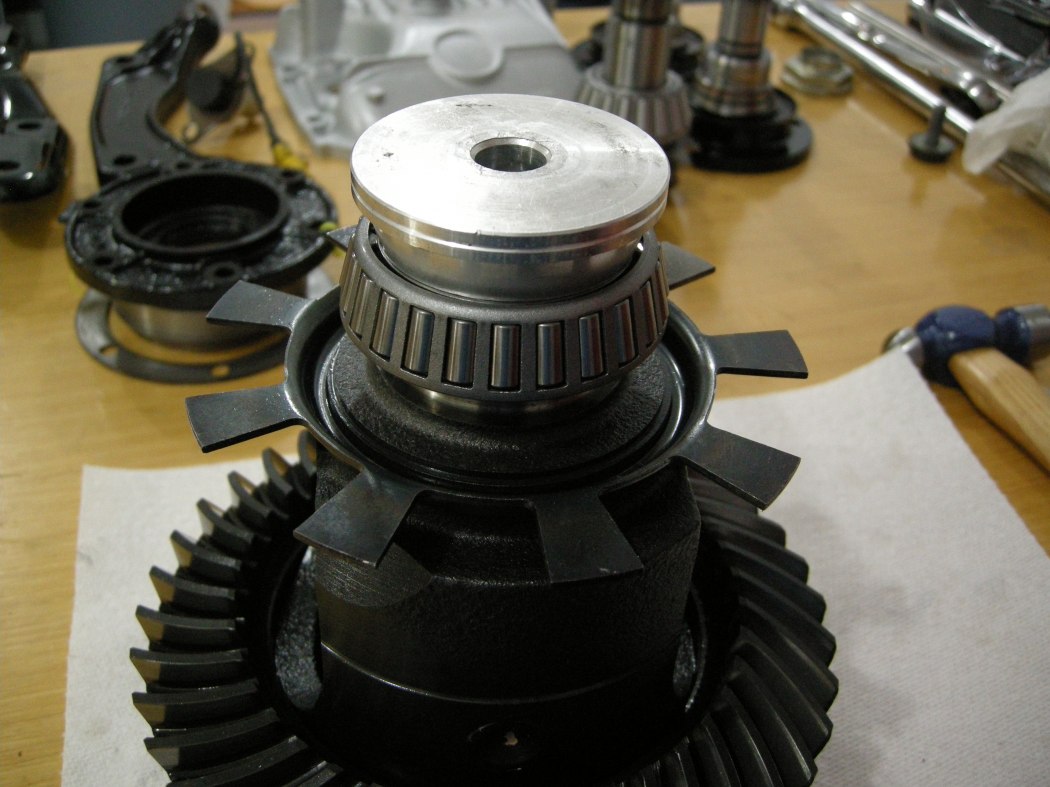
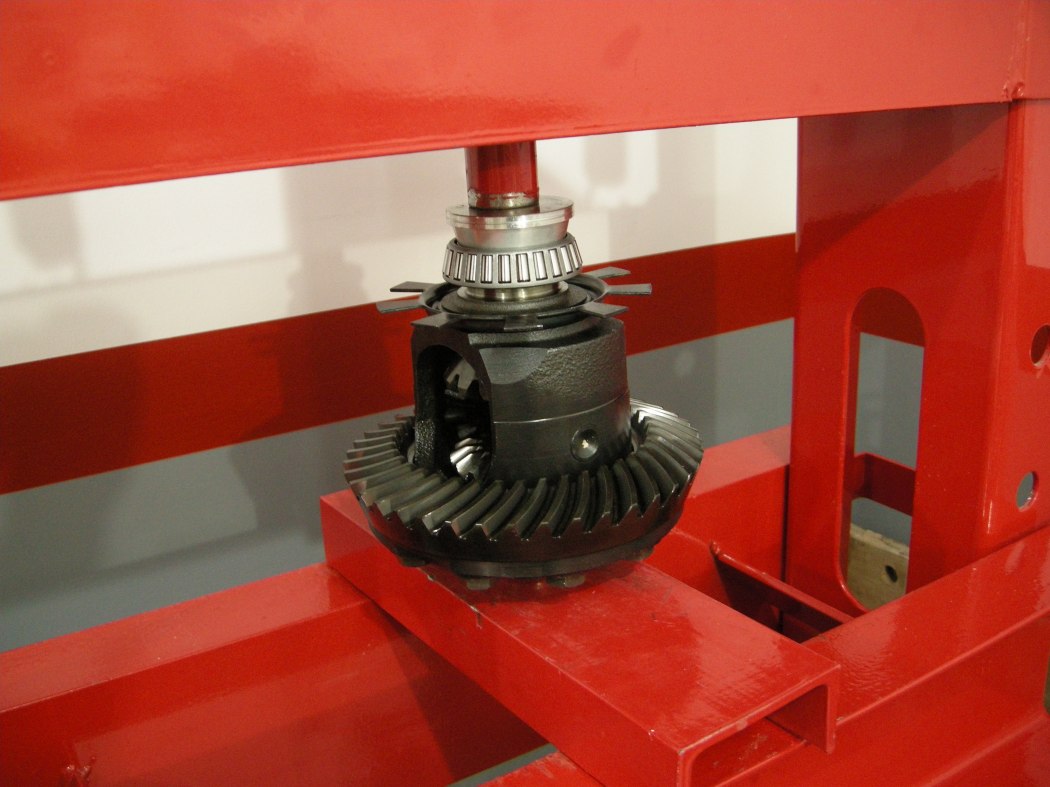
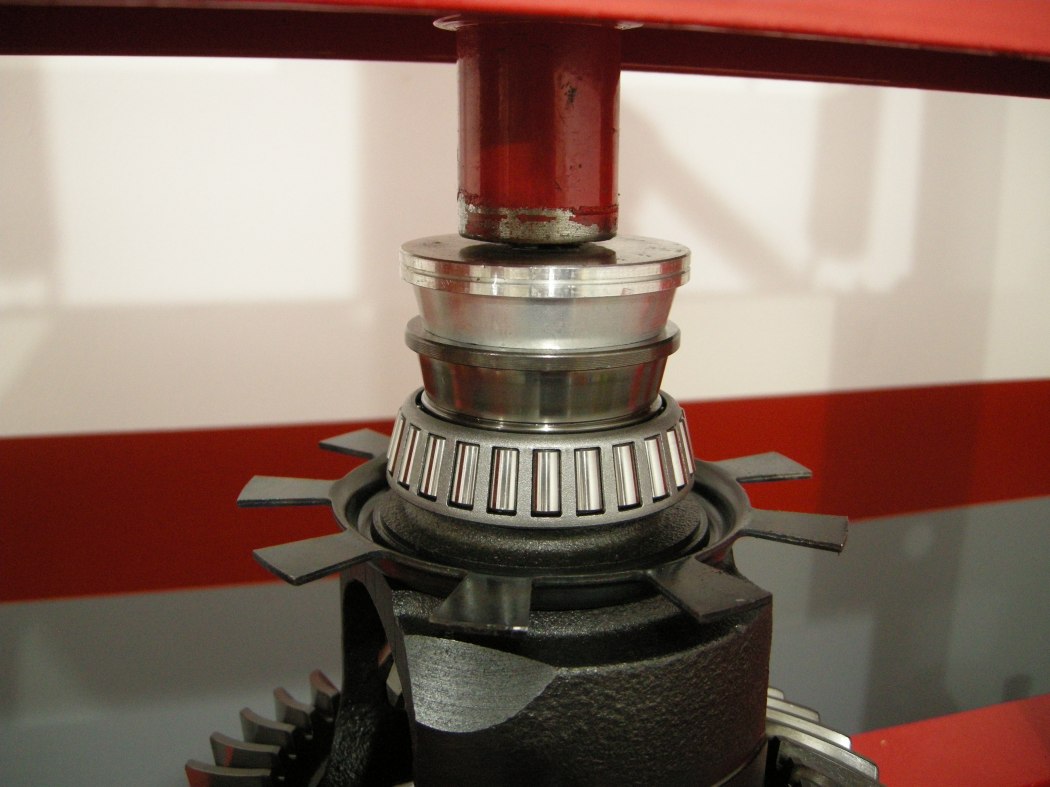
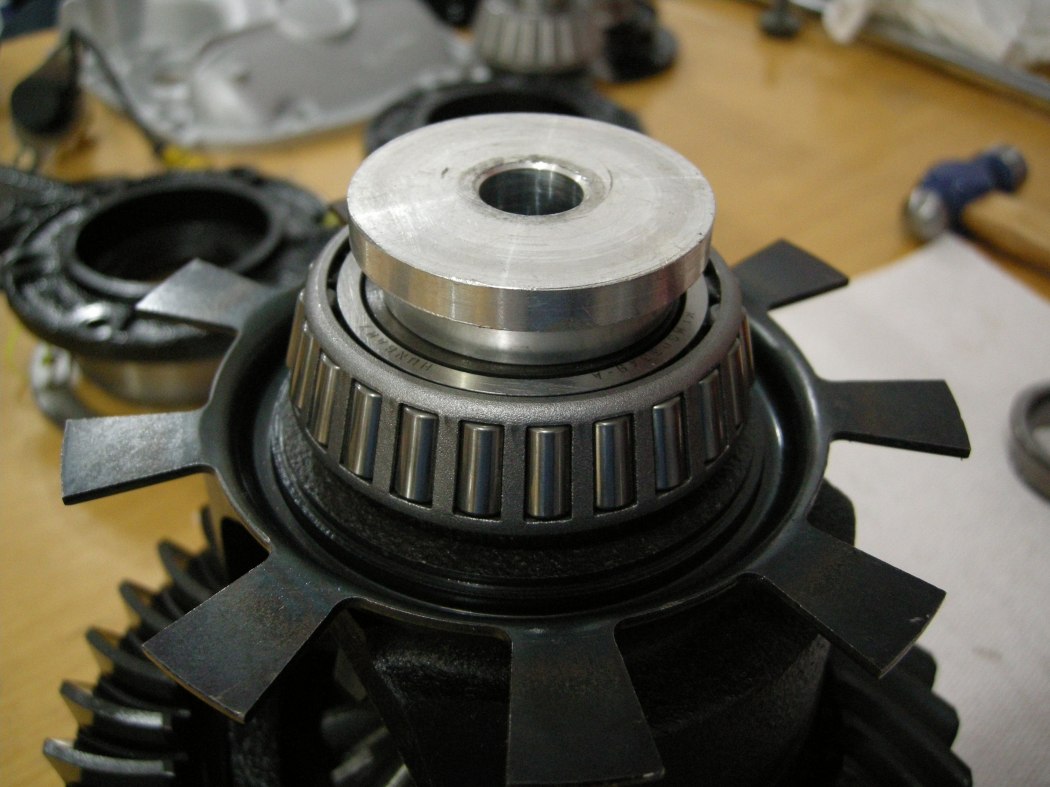
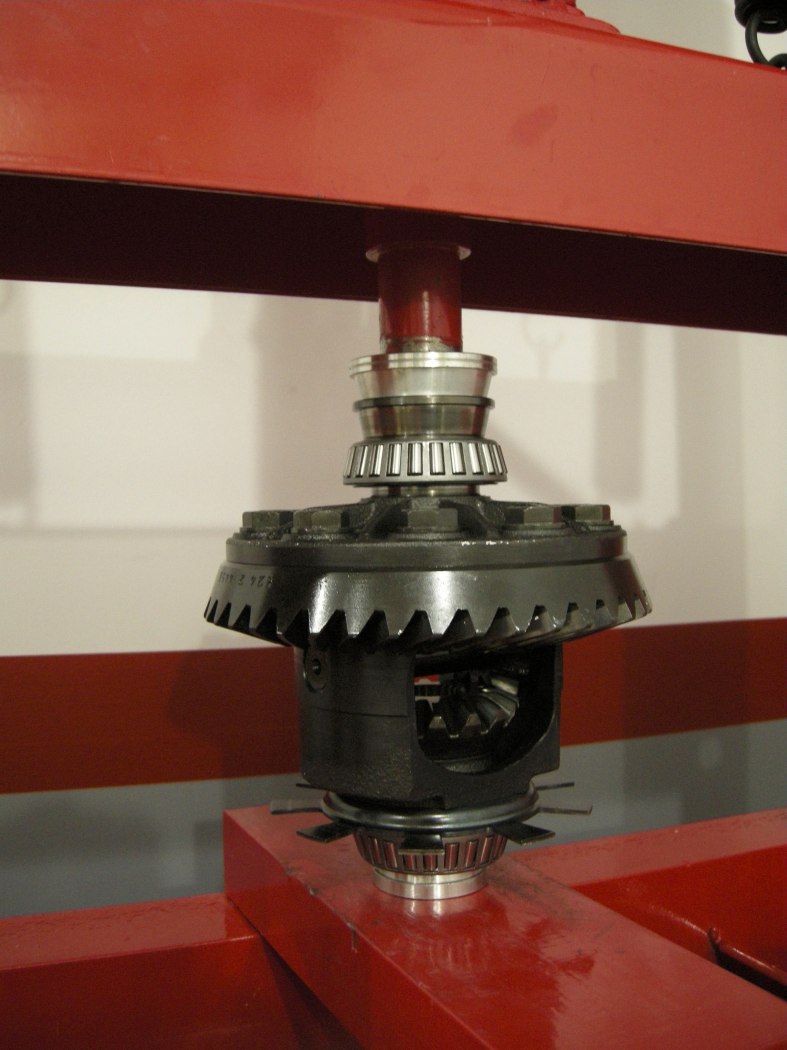
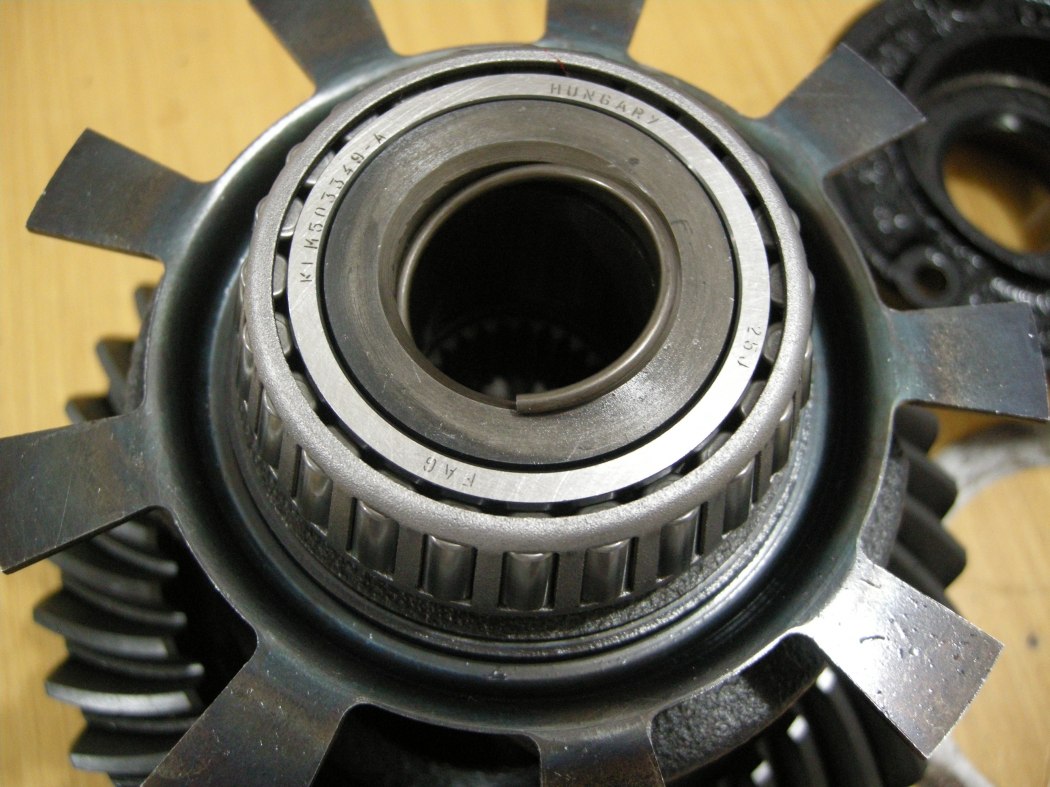
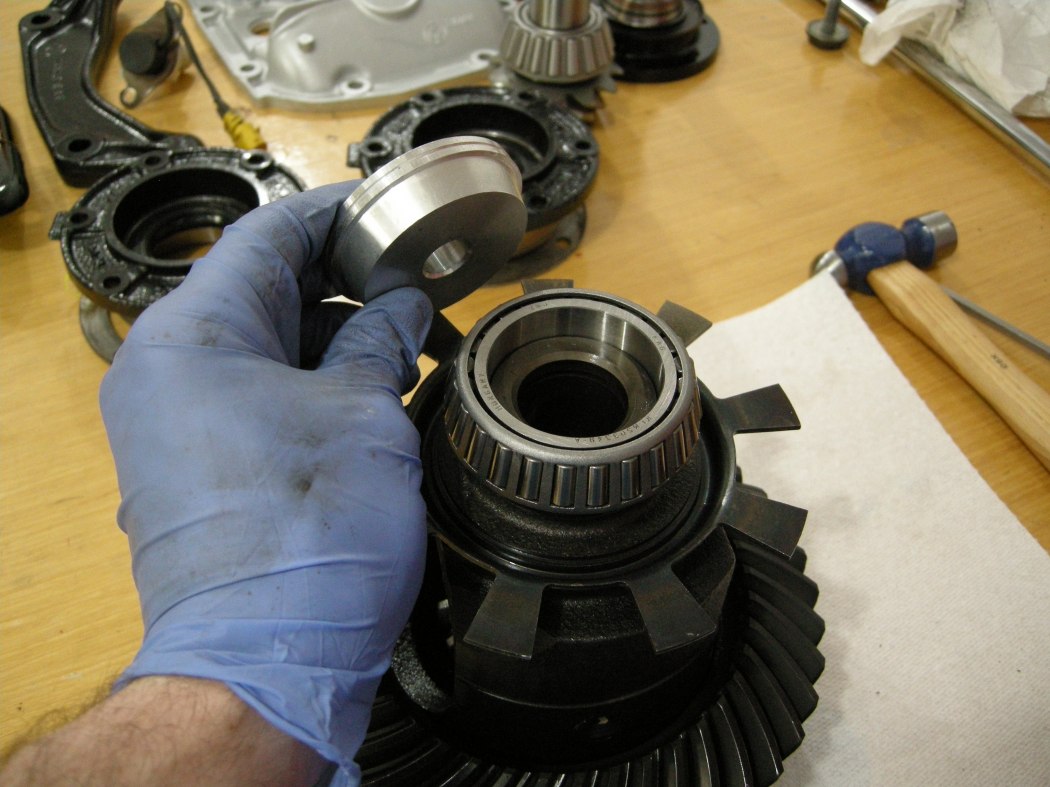
Press the Carrier Bearings on the Diff. Again, only apply force to the inside race, being careful not to touch the rollers or cage, which would damage the bearing.
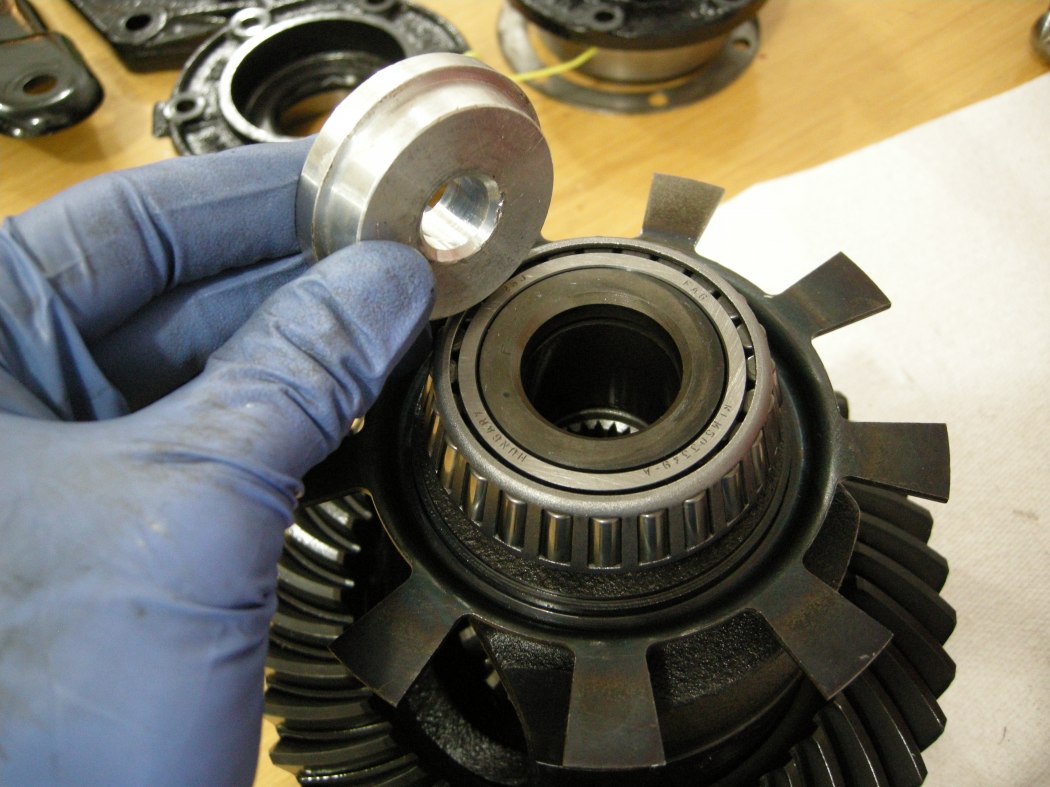
I did these bearings in 2 steps, first with a seal driver to get it going on the press, then added the old bearing race for inside clearance. Doesn't matter which side you start with.
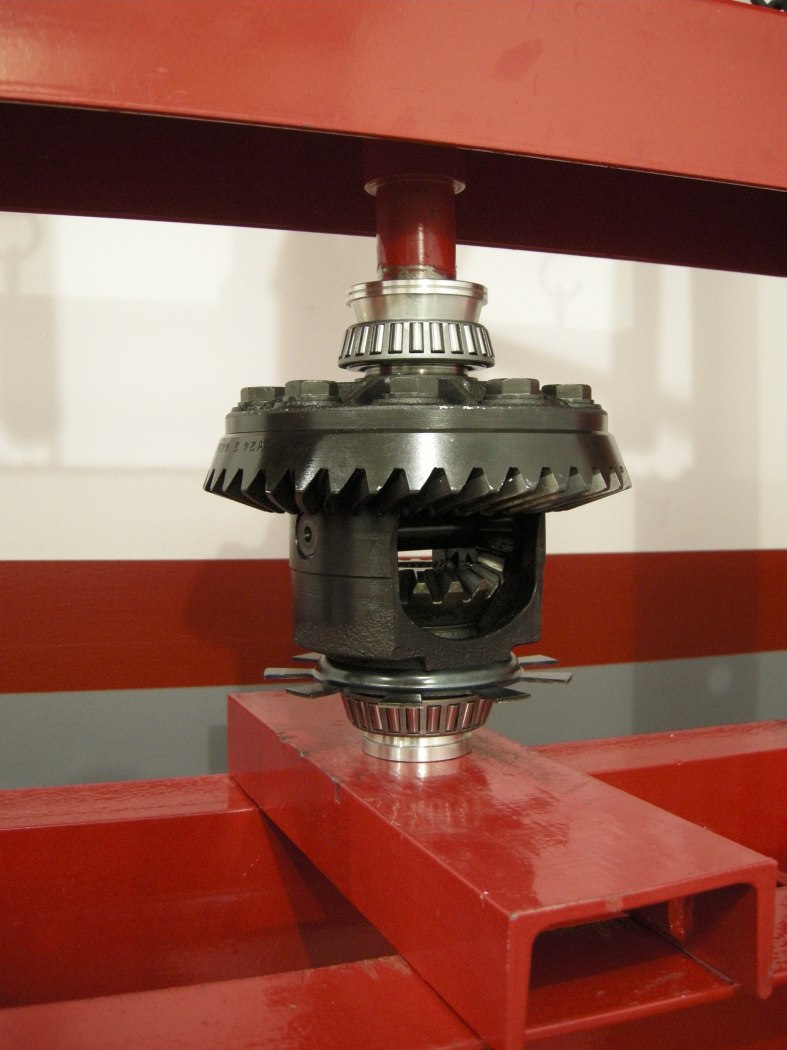
When you flip the Diff over for the other side, ensure it is supported properly underneath so that you don't damage the bearing you just installed.
Same 2-step process as before. Not required but this is how I did it.
Small Pinion Bearing:
Now we're getting into the meat and potatoes.
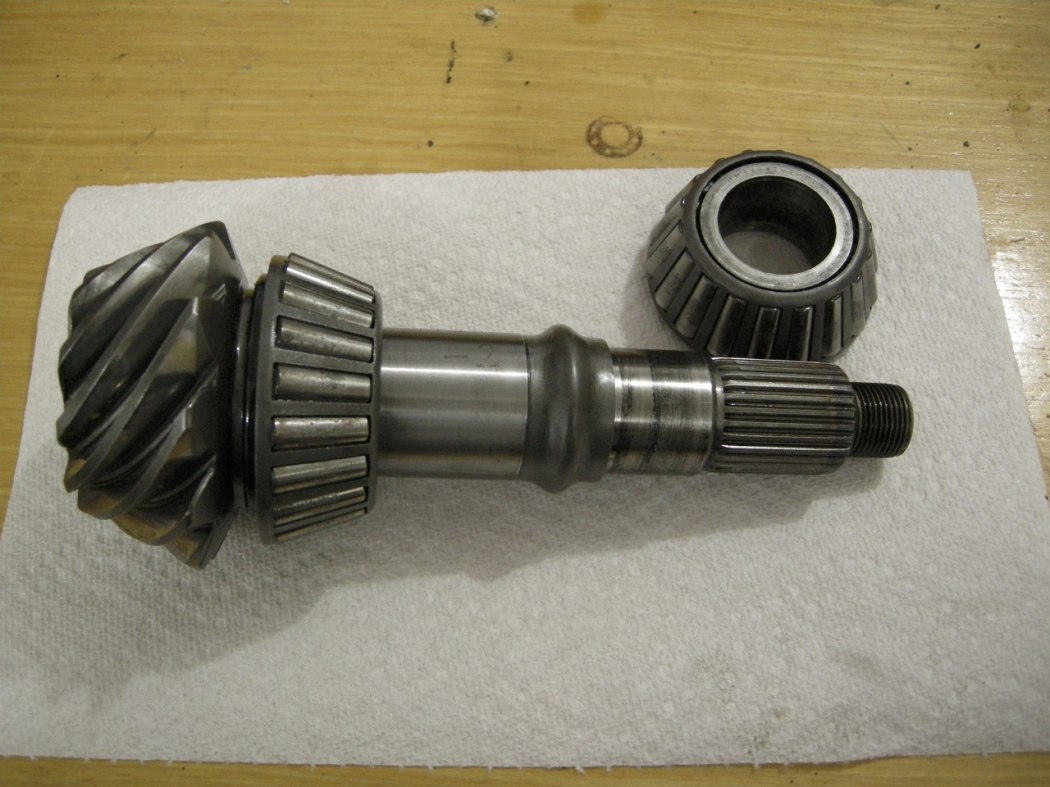
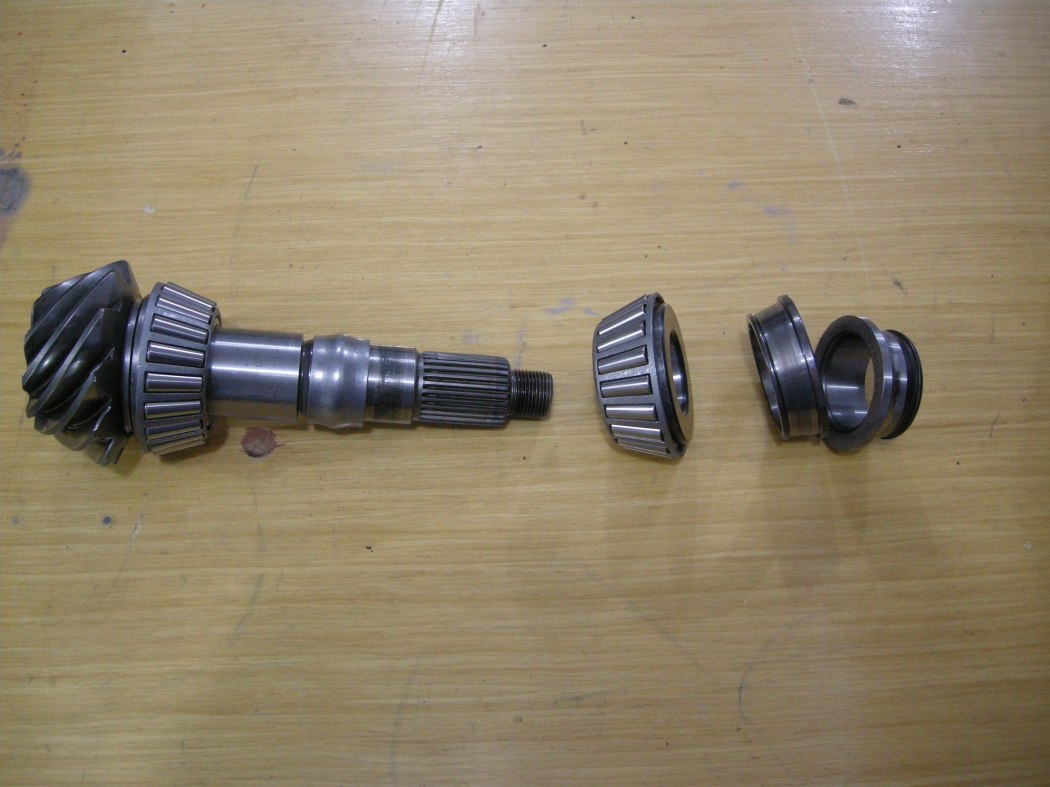
This step involves pressing the Small (outside) Pinion Bearing onto the Pinion Shaft inside the Diff Case.
In this picture, ignore the 2 parts on the right. But don't forget the Crush Sleeve!!
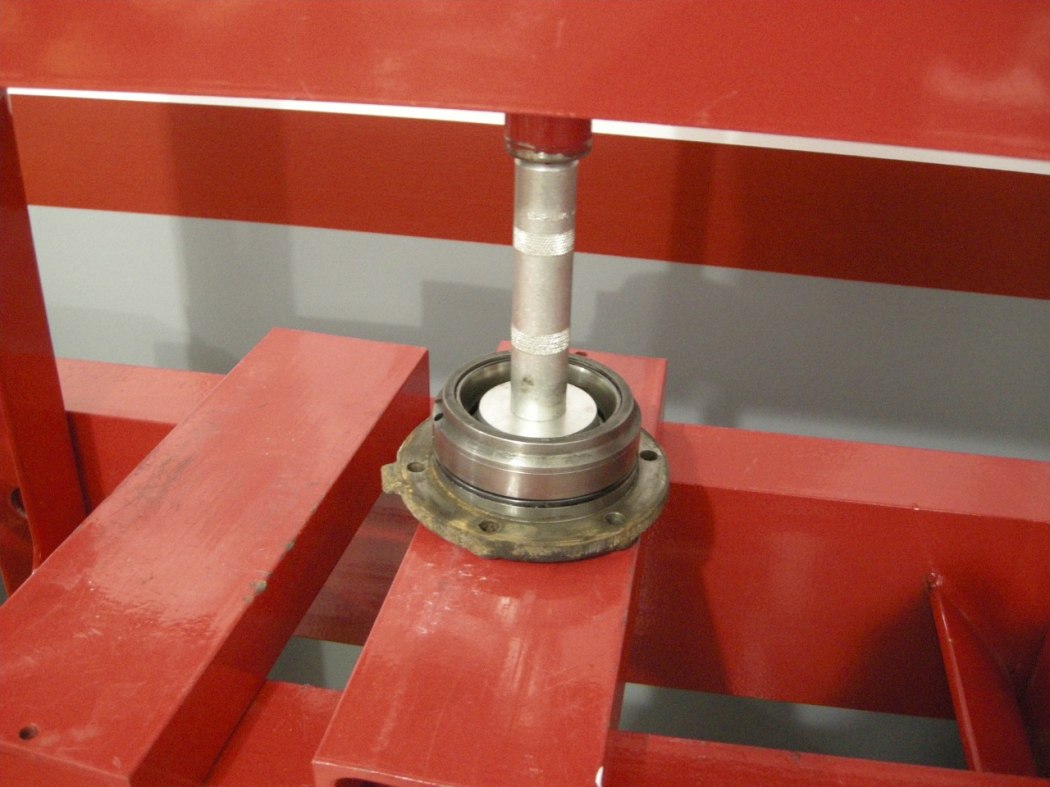
I pressed the Bearing on the Shaft in 2 steps, first with the bearing simply supported on the press plates to get it started.
In hindsight I should have used an impact extension since they are tougher, or better yet, re-adjusted the press and used a proper piece of metal. As usual, always wear your goggles.
Then, I supported the bearing race using appropriately sized random parts.
Stop pressing the bearing once it hits the Crush Sleeve.
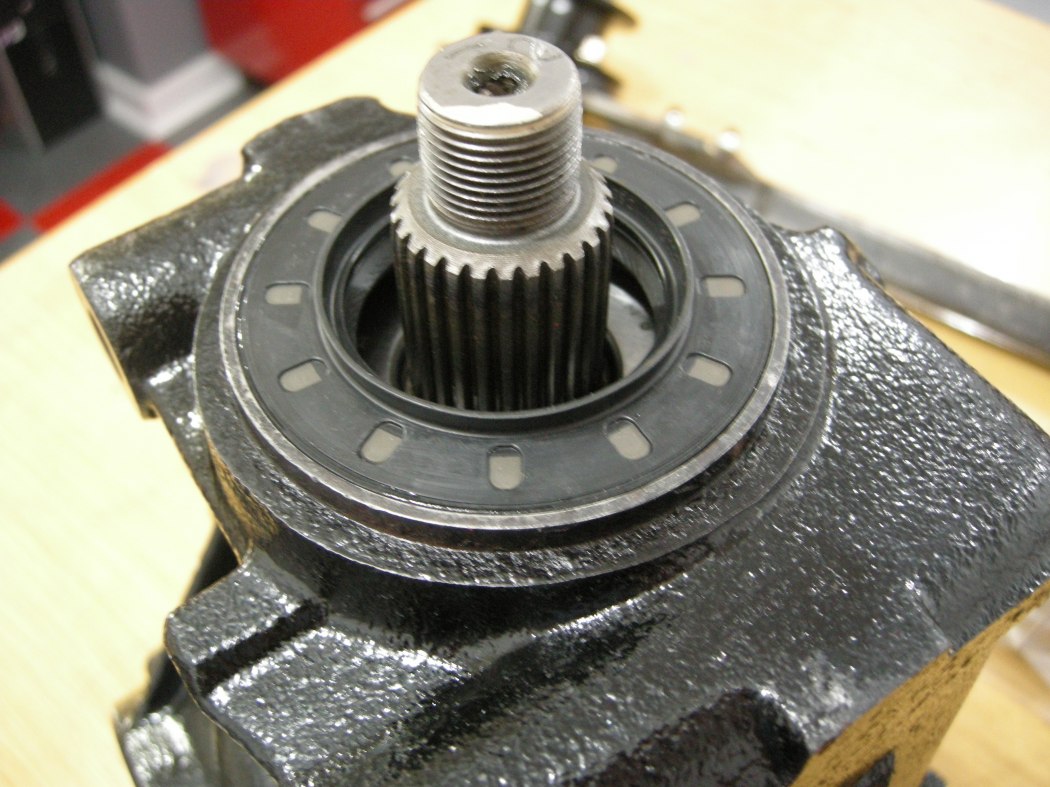
Pinion Seal:
Drive the Pinion seal into the Diff Case using the old bearing race. I suppose these seals can be hammered on but I elected to use the press. It is much easier to control.
Use a bit of oil on the seal during this step.
Pinion Bearing Preload:
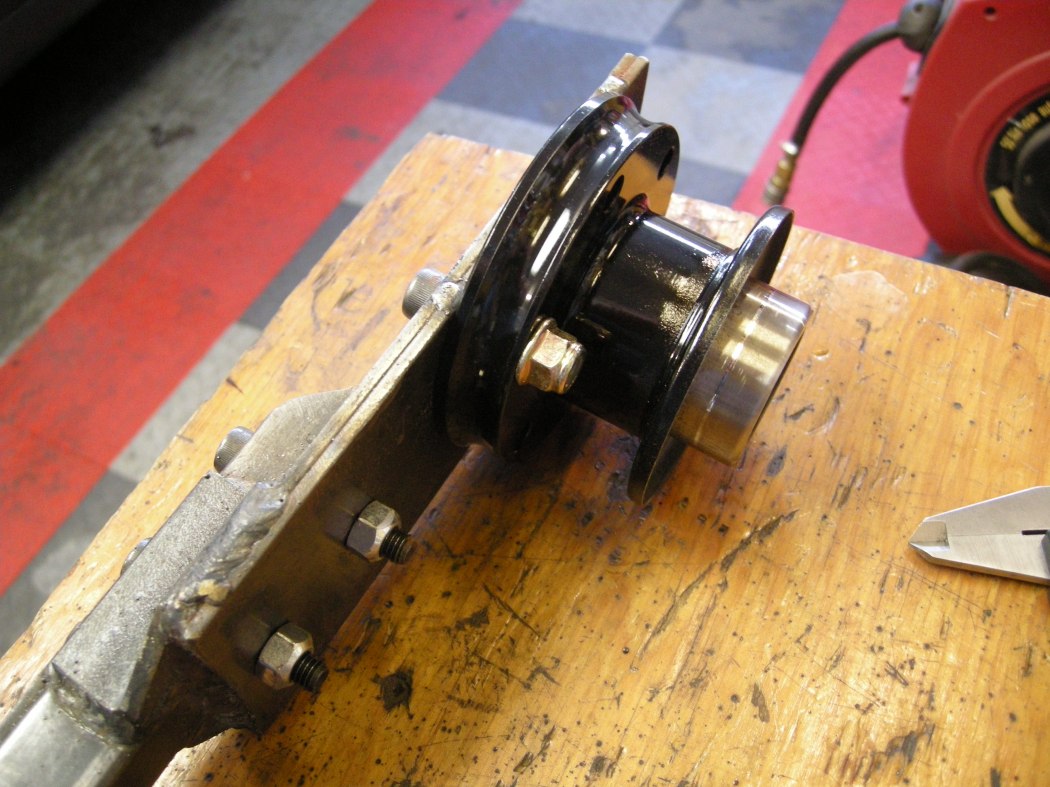
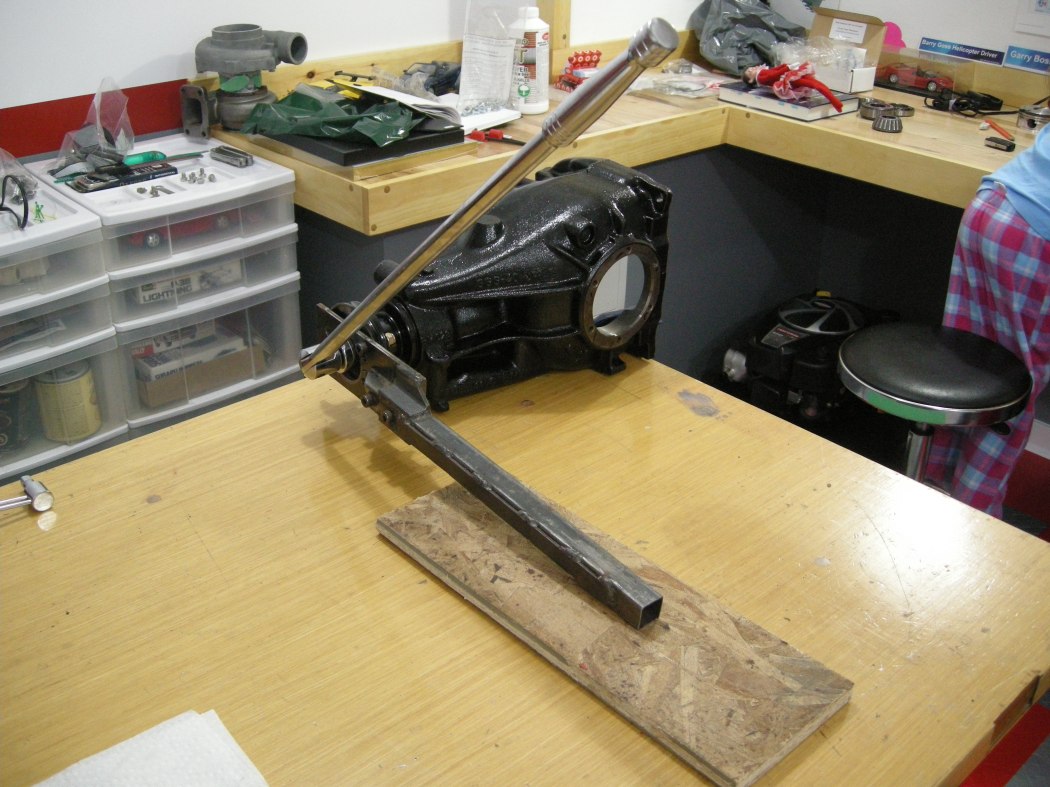
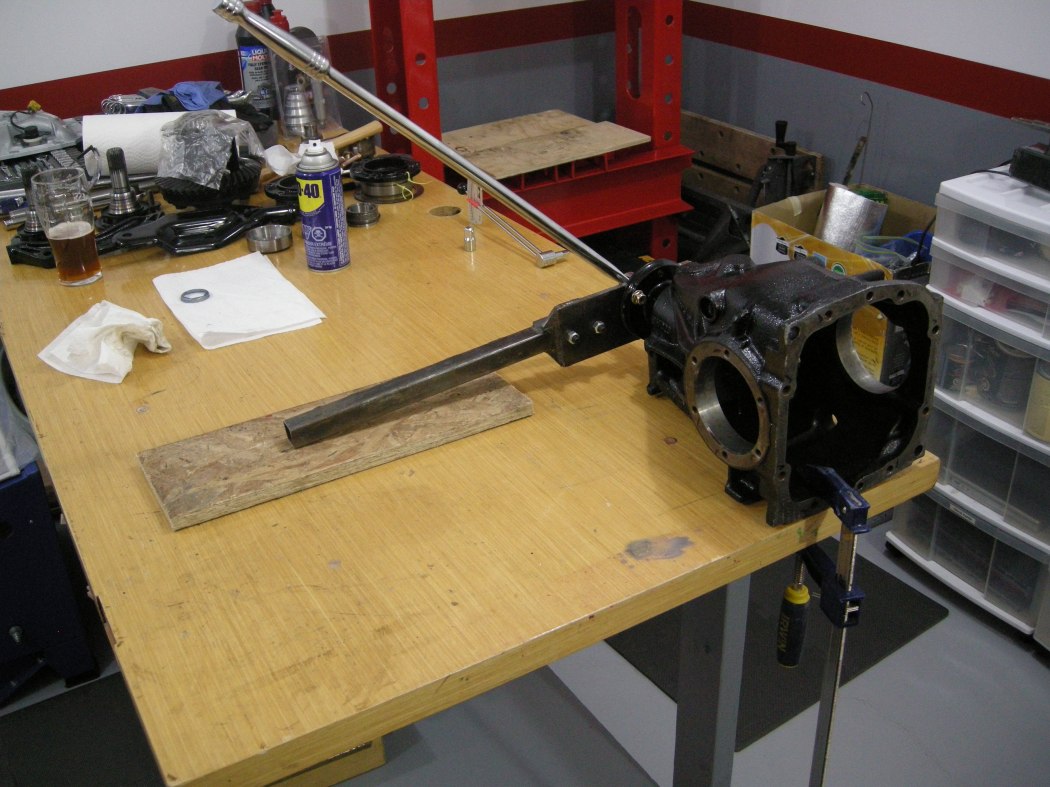
A Pinion Yoke holding tool is required to hold the Pinion while the preload is being set.
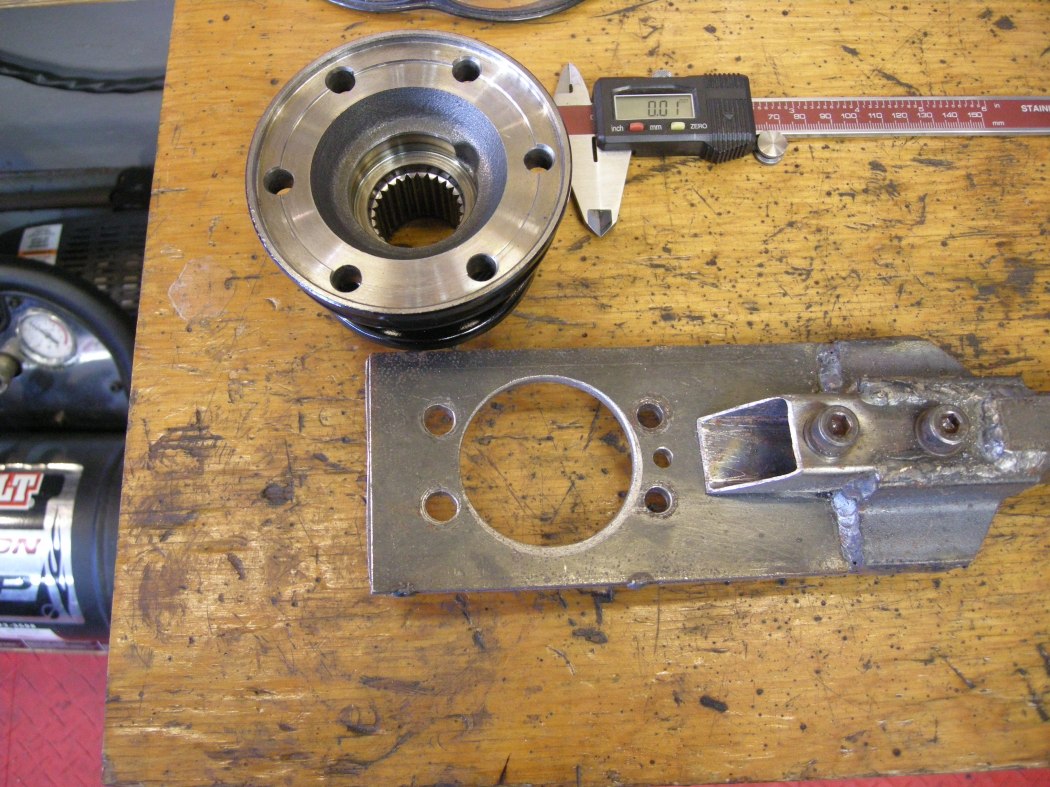
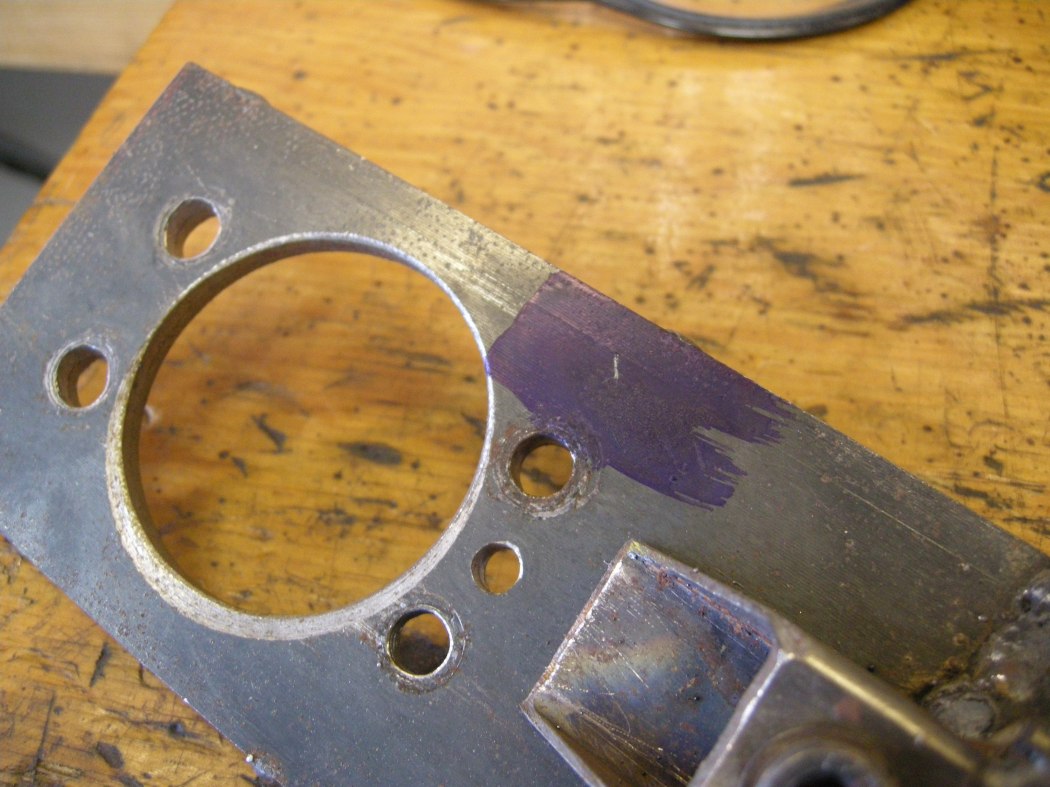
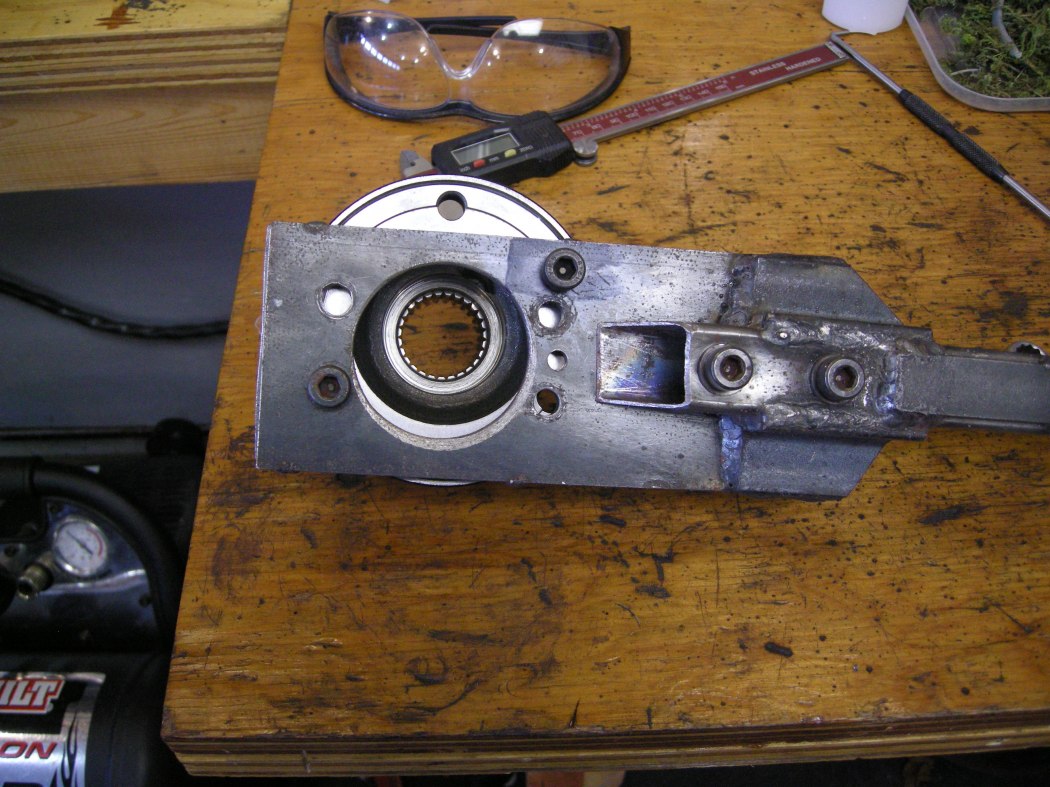
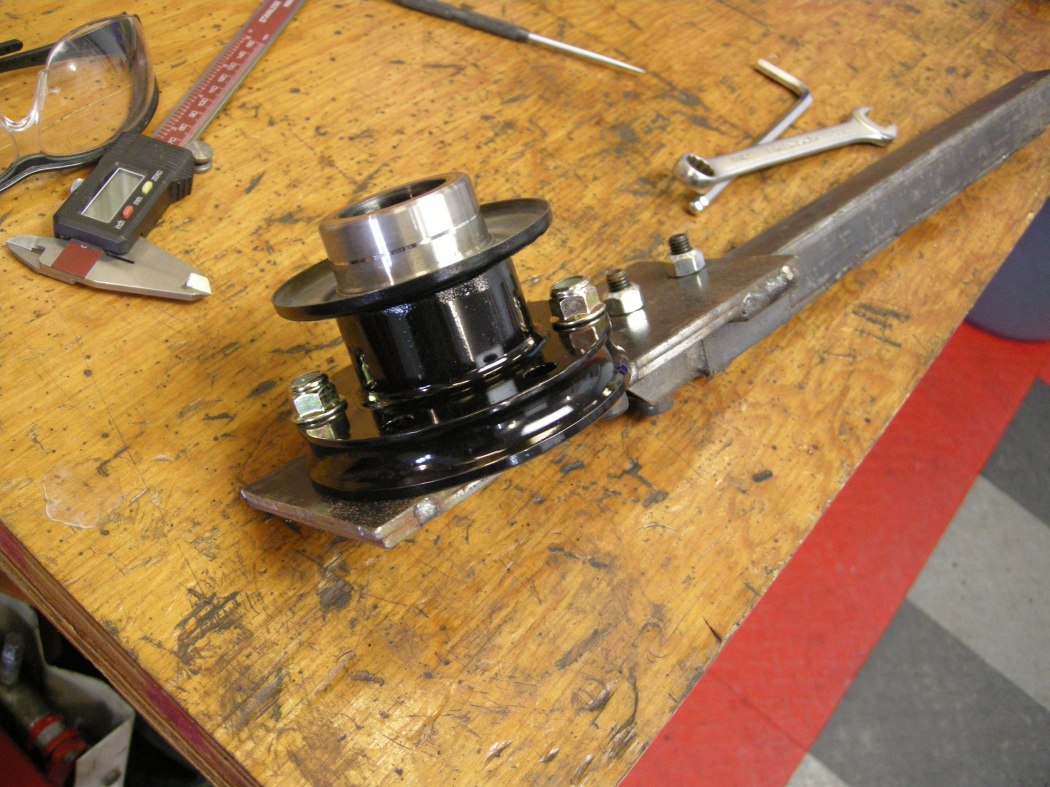
I modified my home brew crank lock tool by drilling an extra hole in it. If you don't have a something similar, you'll have to make something or buy a Pinion Yoke holding tool.
Lube the Pinion Yoke before installing it on the Shaft, where it will contact the lip of the seal.
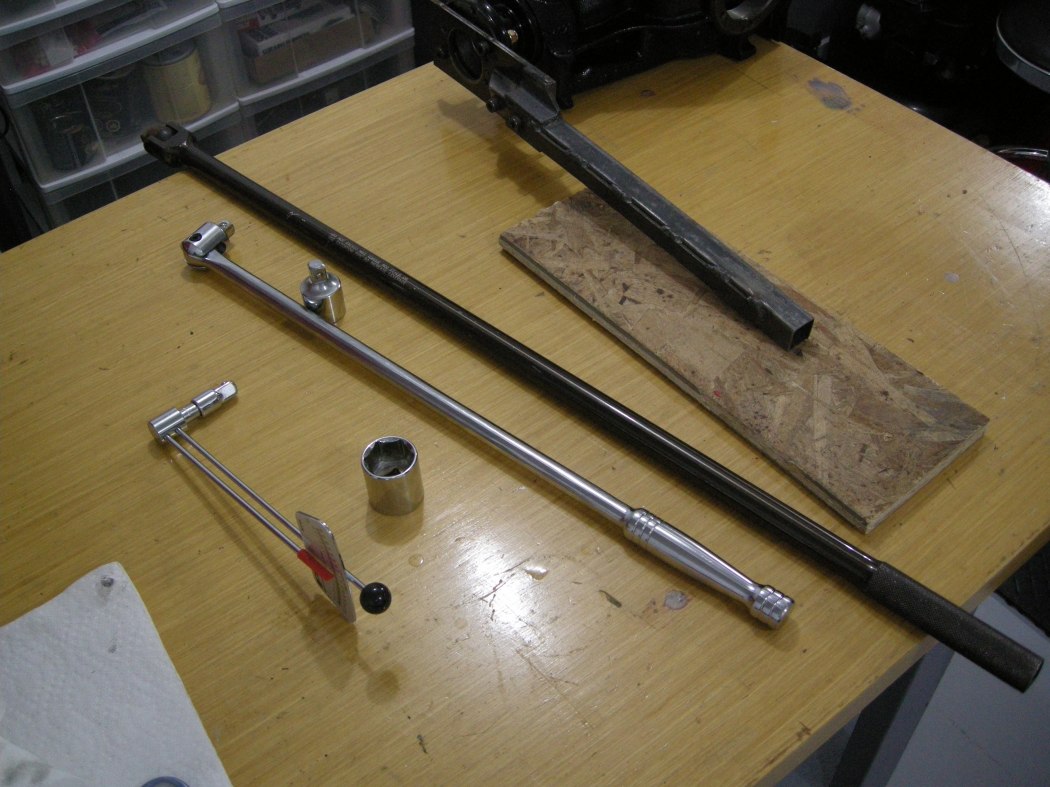
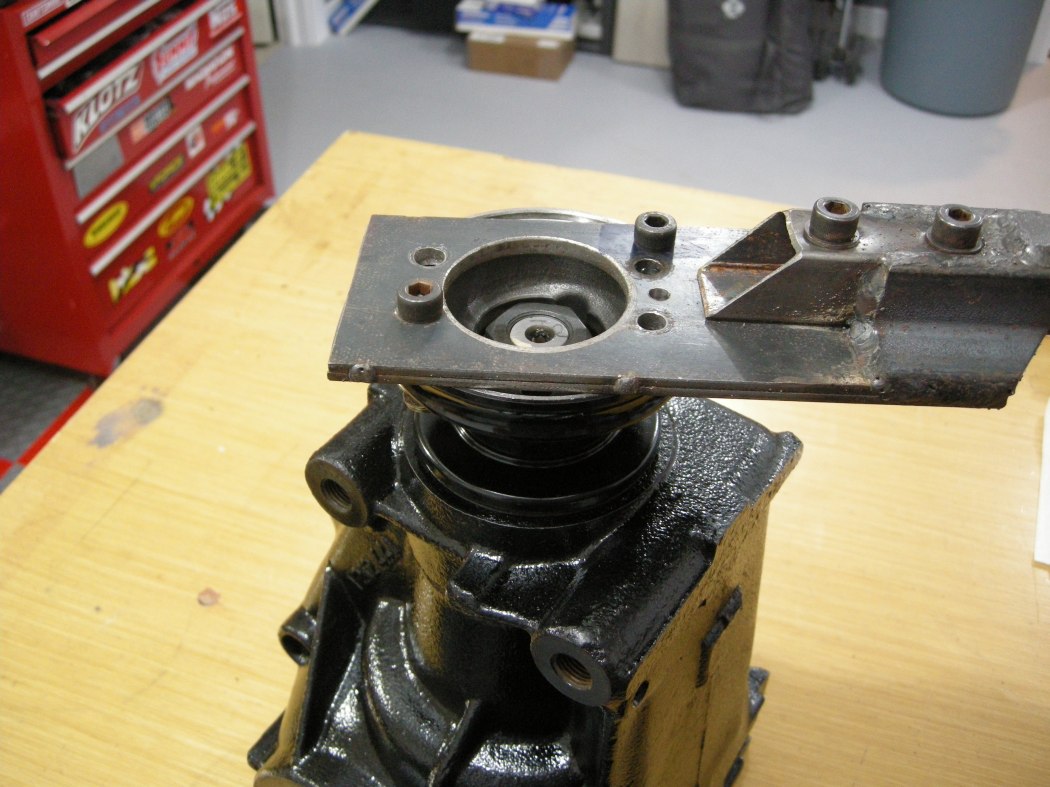
Start the Pinion Nut by hand then grab as big a breaker bar as can. When cranking down on the nut you are compressing the Crush Sleeve. Once the slop in the Pinion bearings is taken up, start taking torque measurements with your 1/4" Beam Torque Wrench. There are numbers all over the internet for bearing preload values, I aimed for 15-20 inlb of running torque. If you torque it too much you're starting all over with a new Crush Sleeve and potentially a new outer bearing, so the key here is to creep up on the final setting. Crank about 1/32 of a turn, check the torque, repeat, once you are close it's surprising how fast the torque jumps up.
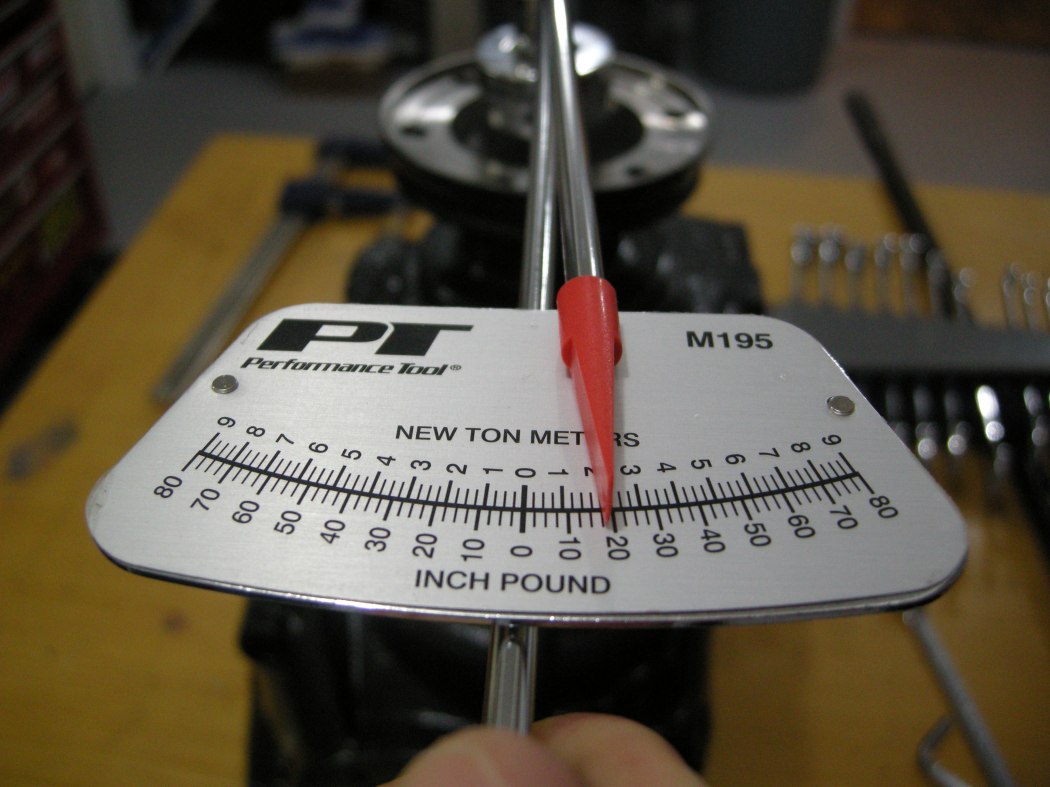
19 inlb of running torque. The initial torque required to start the Pinion moving is just higher than this.
Diff Installation:
If you haven't already, pop out the Lock Rings and install the new ones.
During these stages be extra vigilant about dirt and debris. Keep things as clean as possible. We aren't doing heart surgery but it's fun to pretend.
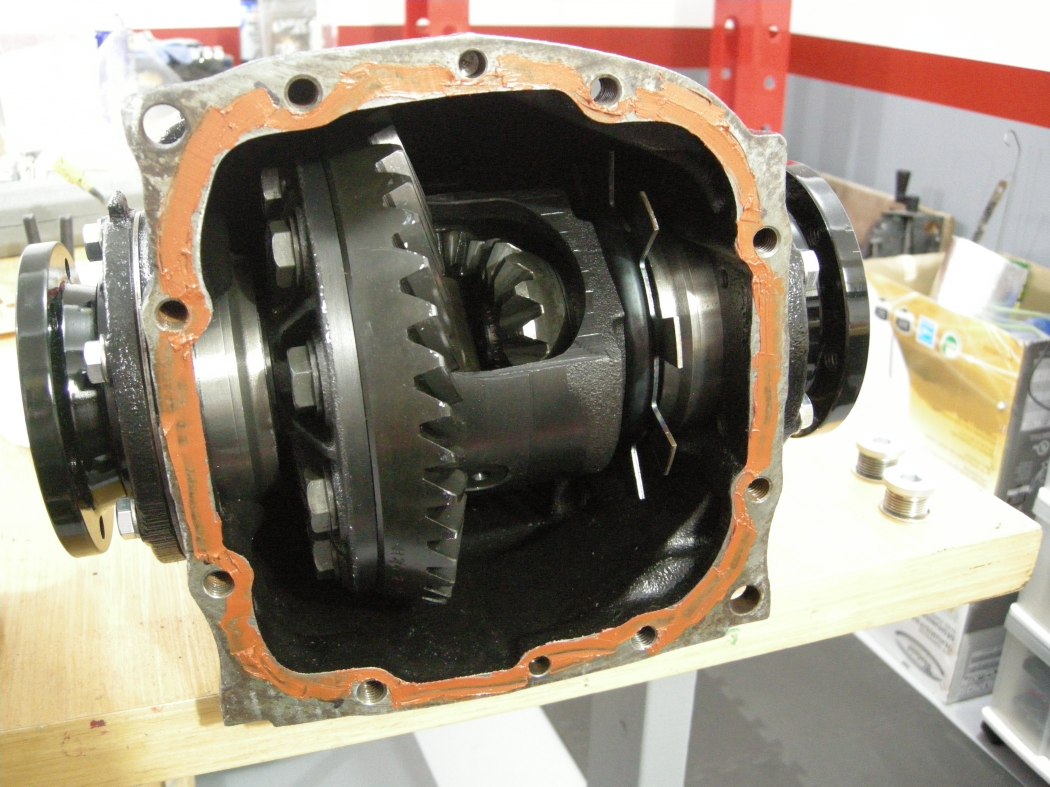
Drop the heart carefully into the Diff Case.
Replace the Bearing Cap o-rings, don't forget the shim that goes with the correct Bearing Cap, and add a bit of Diff Fluid to the o-ring before installation.
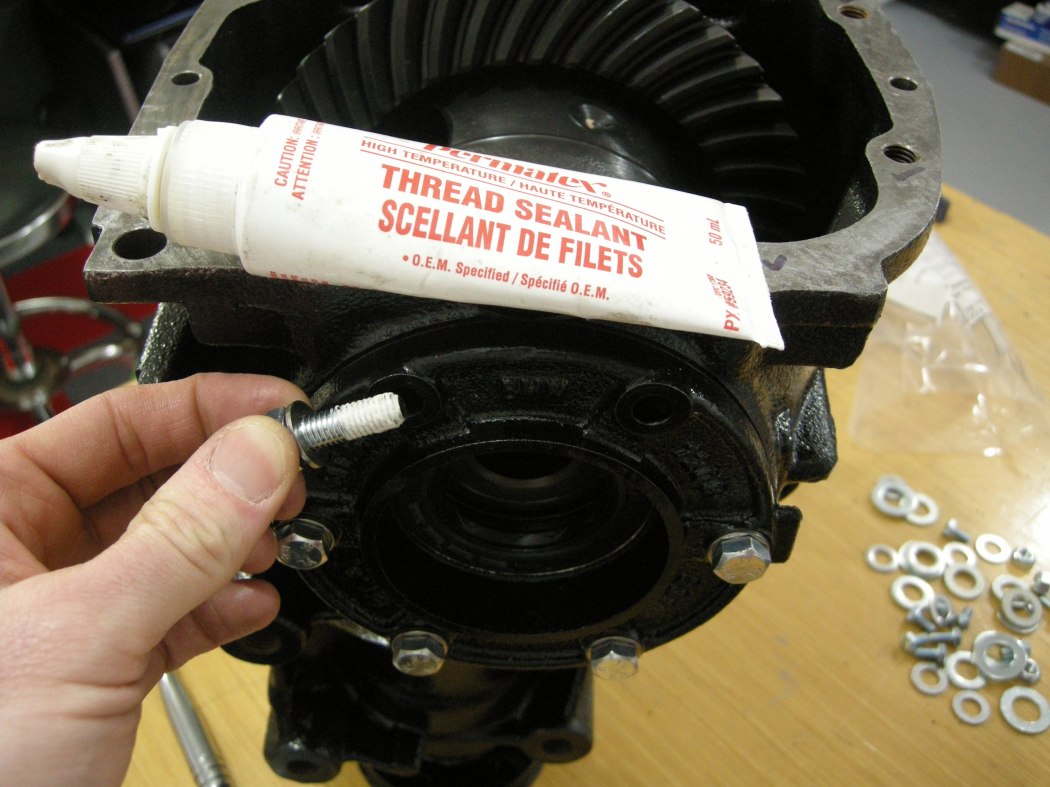
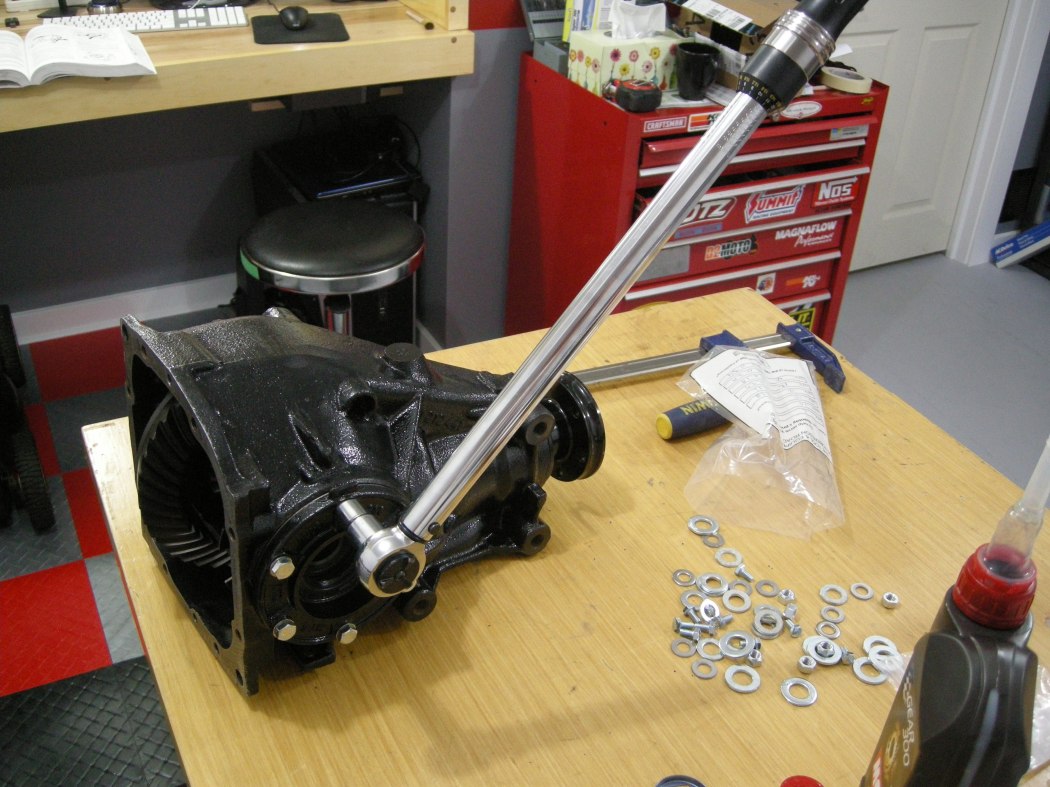
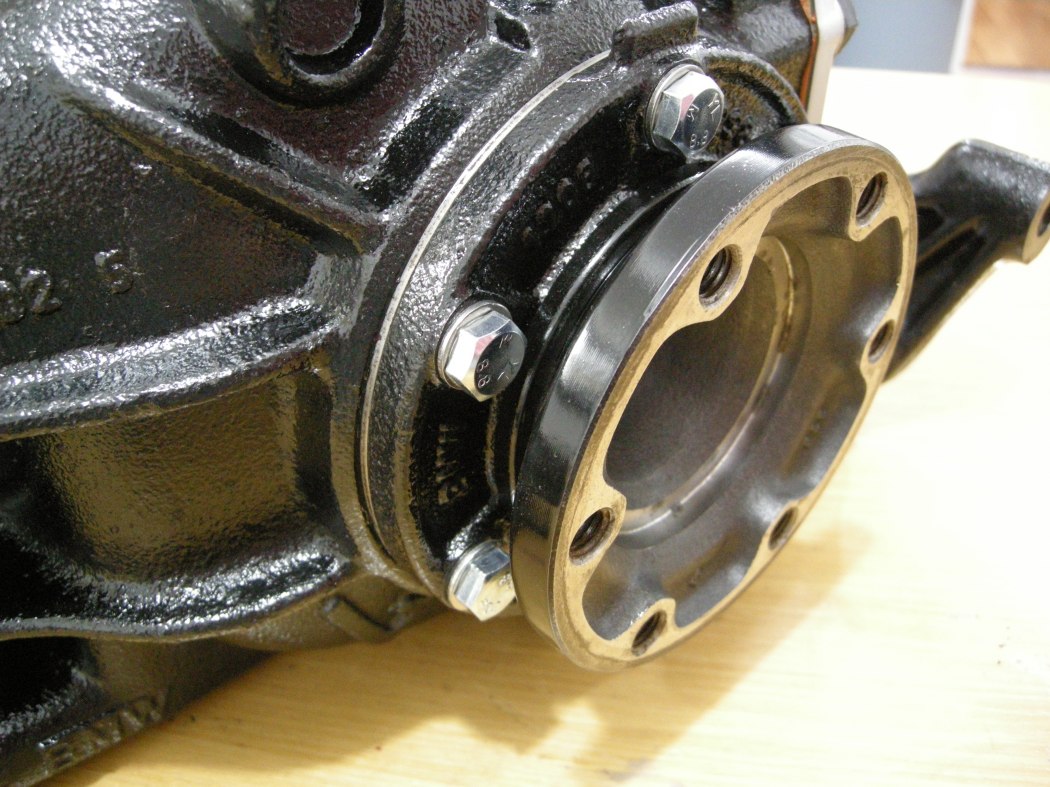
There are 2 Bearing Cap bolt holes on each side that penetrate into the Diff Case. I used sealant on these to prevent fluid getting through the threads. Torque all the Bearing Cap bolts in a progressive criss-cross pattern.
Bearing Cap Bolts:
12-off M8x25 - Gr 8.8 - 15 lb-ft
Lube the Output Flanges with Diff Fluid and slide these in.
Diff Cover and odds and ends:
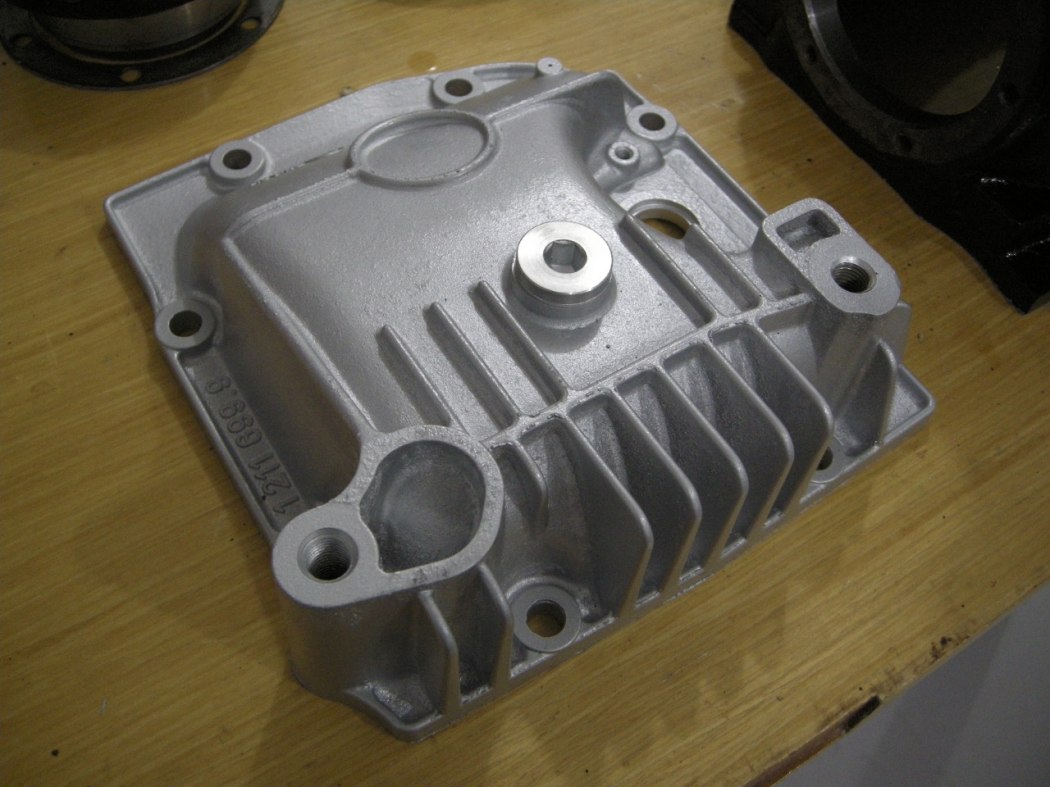
The OEM gasket for the Cover is paper, and it's up to you how you want to install this. From what I've read, it can be installed dry, with silicone sealant, with Dielectric Grease, etc, everything seems to work. I used some silicone sealant on both surfaces before putting the gasket on. Don't use too much or else it will squeeze into the Diff. As pictured there is too much, as I noticed some squeezed out the outside. In any case, make sure to let it completely dry before filling the Diff with fluid. Torque the fasteners in a progressive criss-cross pattern.
Diff Cover Bolts:
8-off M10x25 - Gr 8.8 - 30 lb-ft
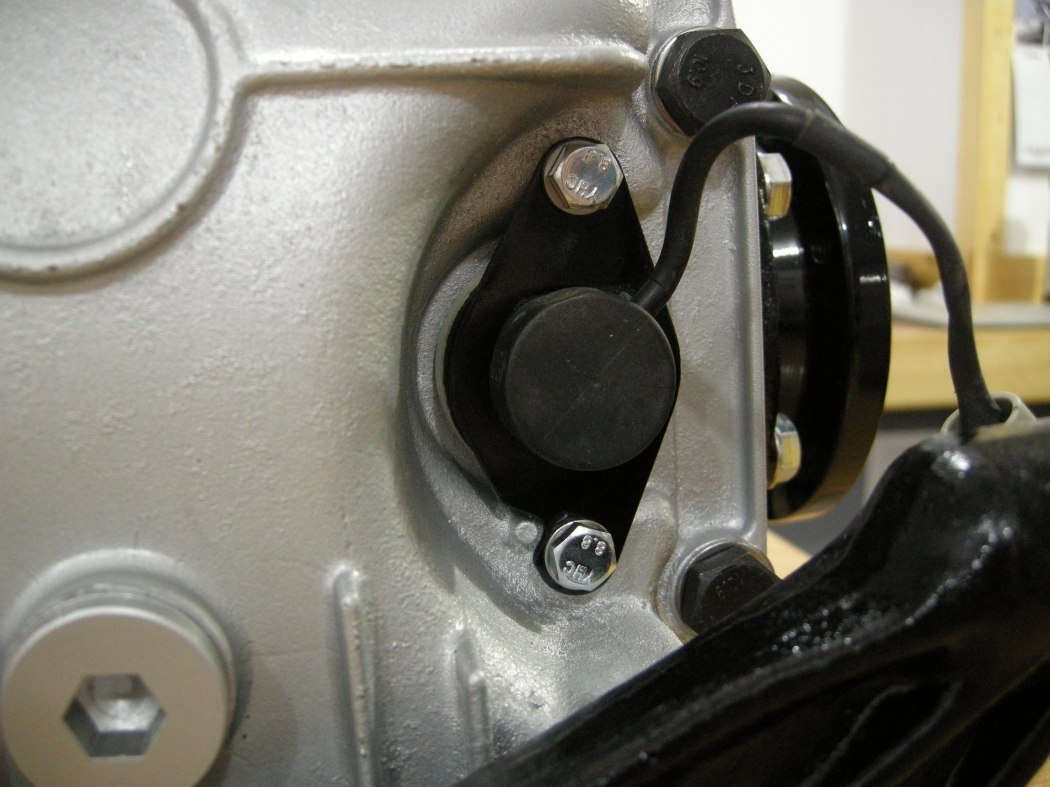
Install the Speed Sensor with new hardware and a new O-ring. I went to the hardware store with the old o-ring and found a near exact match from the bins. I should have written down the size. Anyone have it?
Tap in the new Pinion Nut Retaining Plate with a big socket. I fudged one up trying to tap it in with a flat blade screw driver and it deformed it making it useless. Luckily I had ordered a spare.
I machined the surfaces of the drain / fill plugs to clean them up, then hit them with rattle can silver.
Add your favourite brand Diff Fluid in the 75W90 variety, and use new crush washers on the plugs.
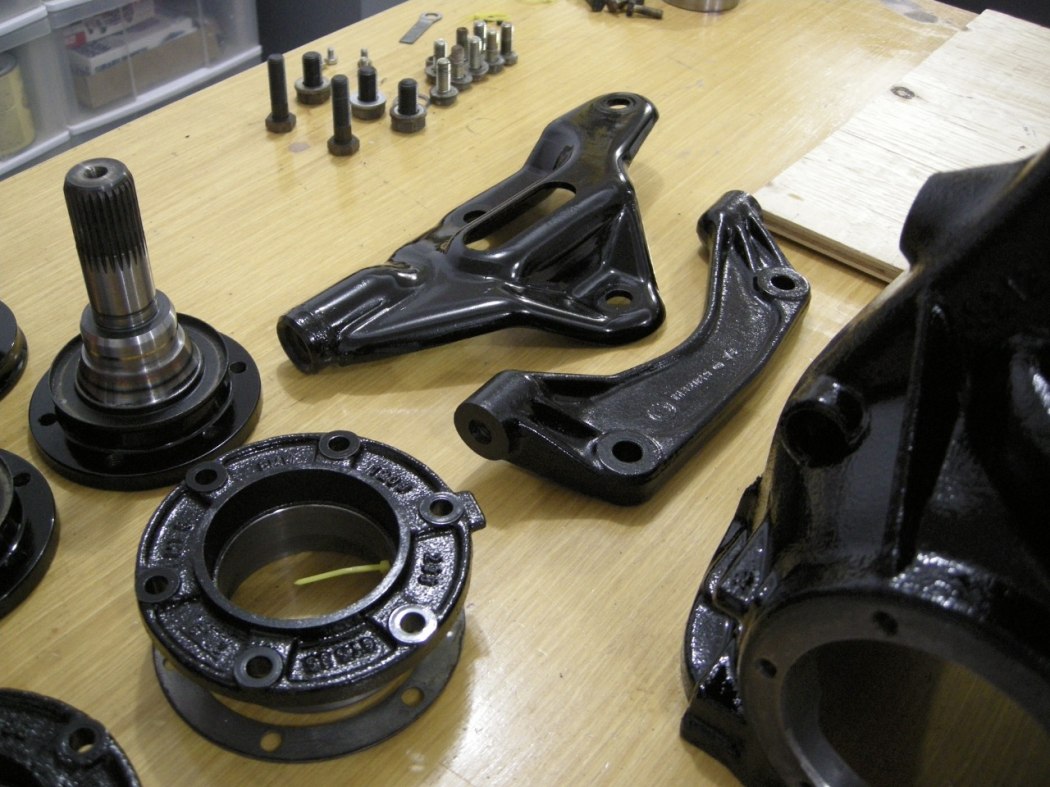
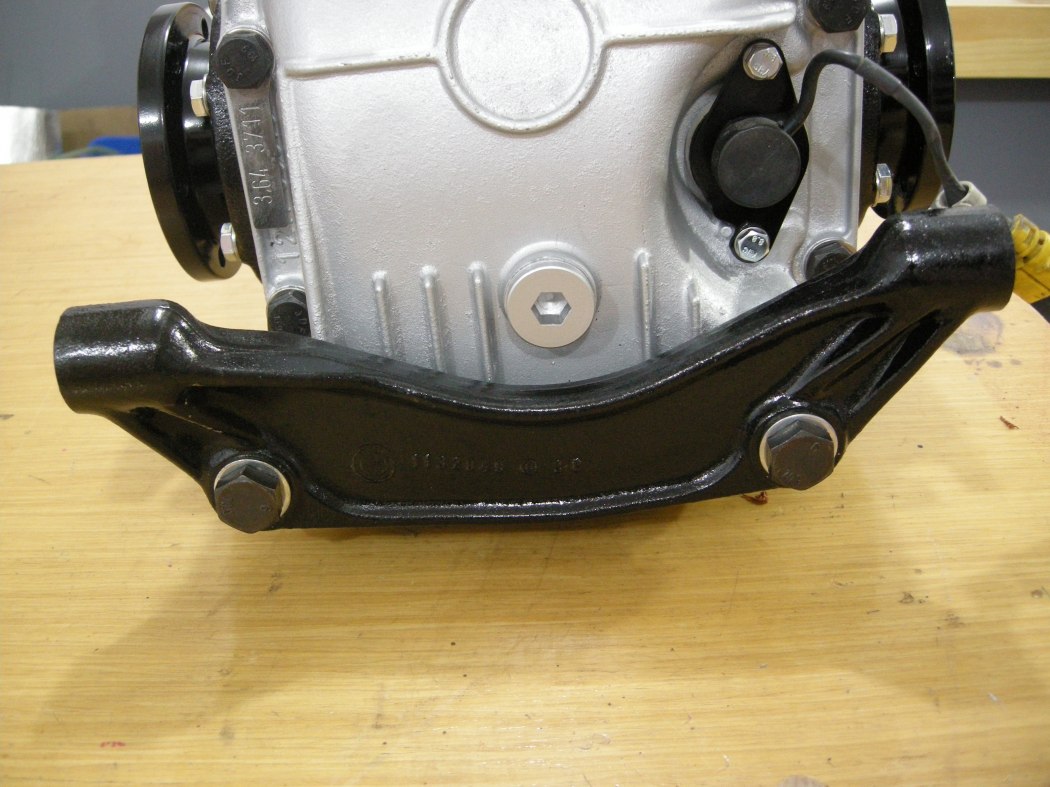
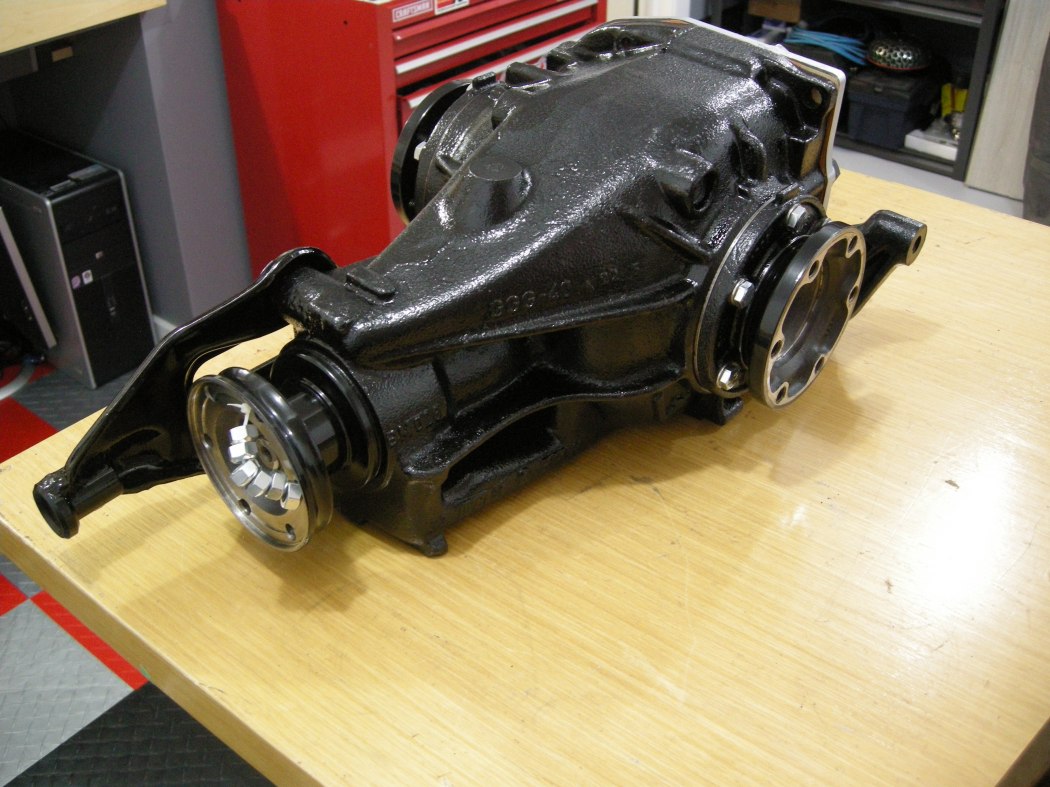
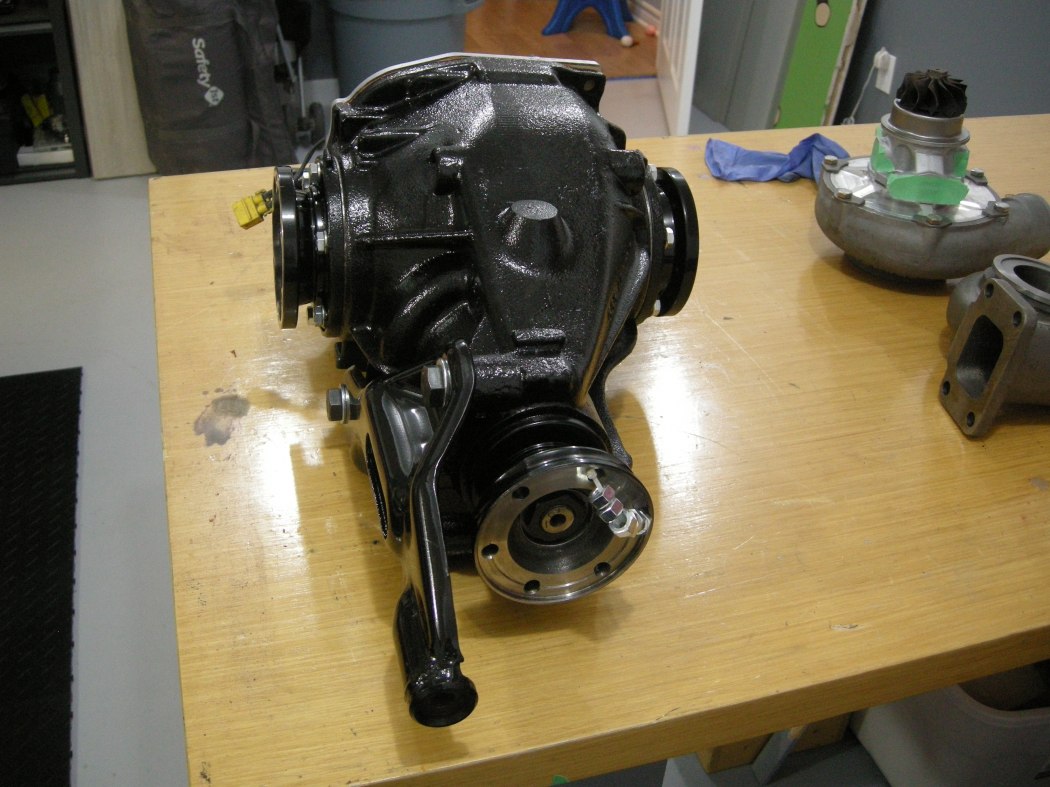
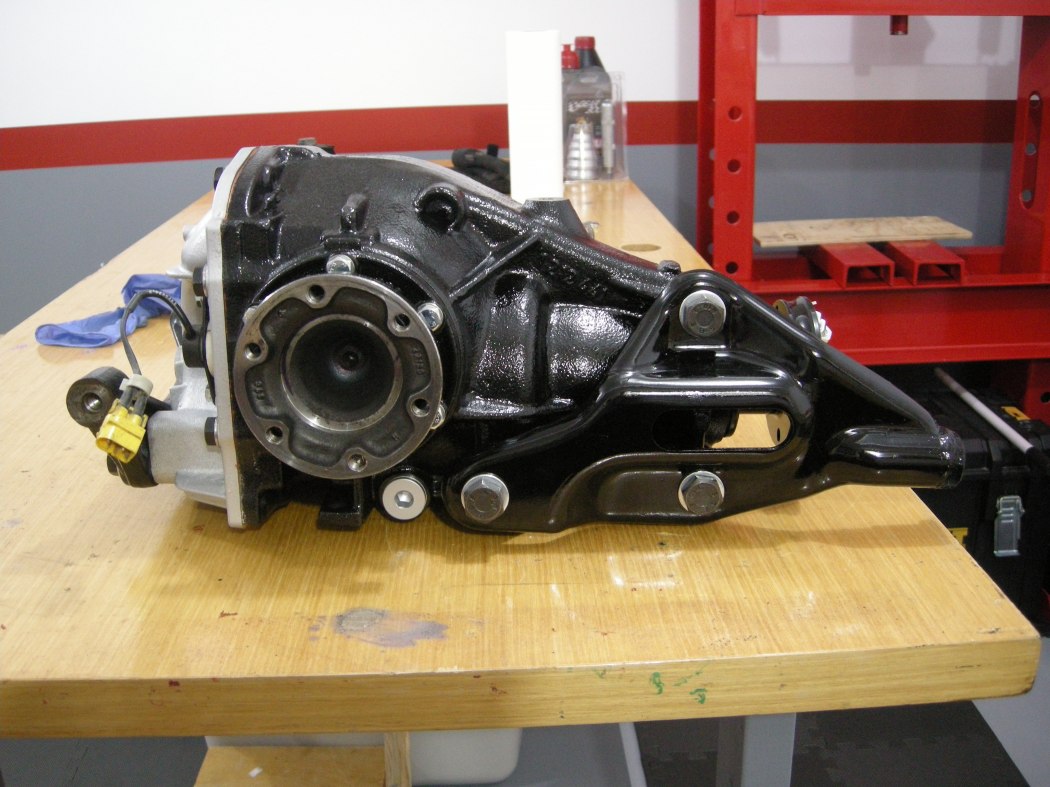
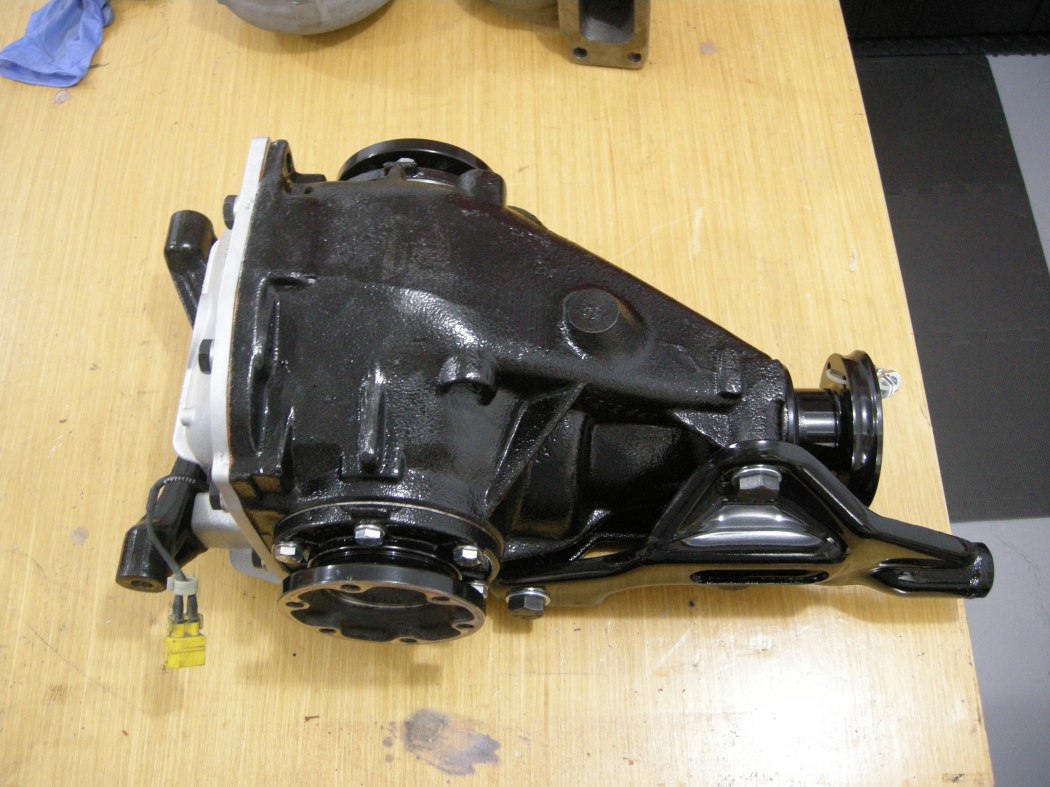
Install the mounting brackets with new hardware and you're all done.
Rear Horizontal Support Bracket
2-off M12 x 1.5 x 50 - Gr 10.9 - 100 lb-ft
Front Support Bracket
3-off M14 x 1.5 x 25 - Gr 10.9 - 150 lb-ft
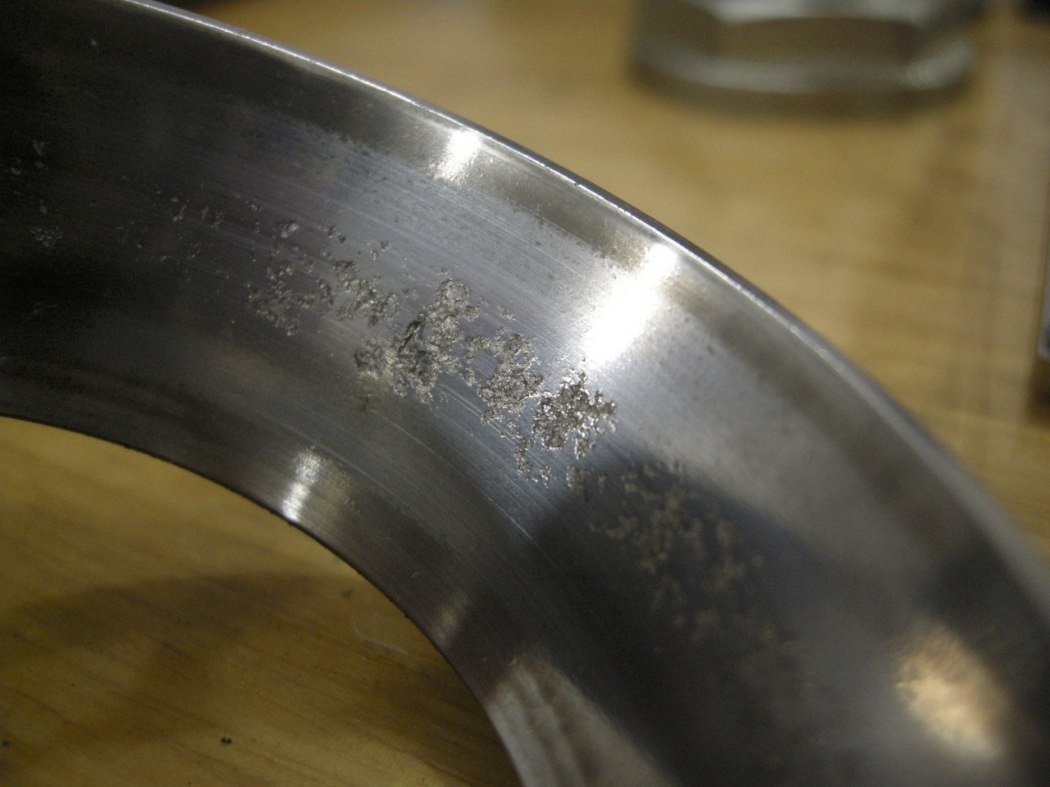
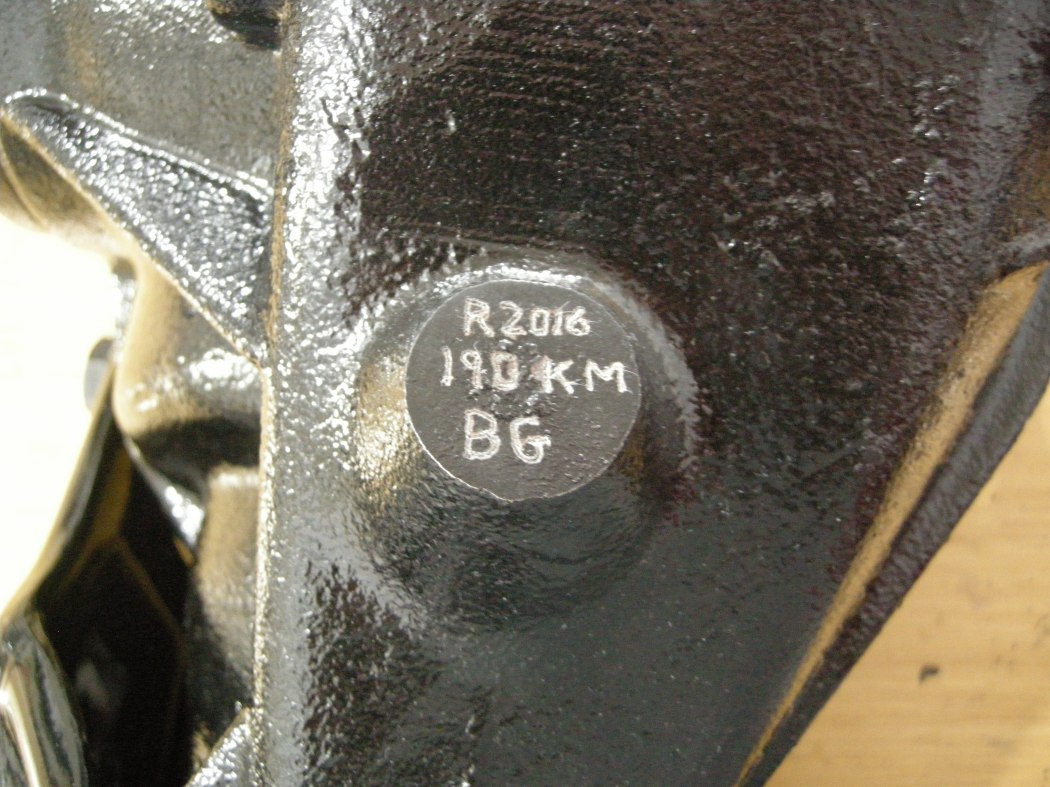
I engraved the mileage, year, and my initials on a flat spot to record the rebuild.
Hope this helps someone.
Barry
Problem: Cabin noise and/or vibration that is not affected by engine RPM or cornering, but is affected by vehicle speed.
Cause: Differential Pinion and/or Carrier Bearing failure
How to fix: Change the Diff Pinion and Carrier Bearings, see below.
Applicability: Generally this procedure can likely be applied to any rear differential, although the Pinion Bearing preload setting and fastener toque values may vary.
Tools required:
- Shop press
- Various sized mandrels. I used a variety of 'round' things from around the shop. This kit (or similar) came in handy:
OTC 4507 Bearing Race and Seal Driver (I bought my generic kit at Princess Auto (CDN) - try Harbour Freight in US)
https://www.amazon.ca/OTC-4507-Bearing- ... B000O824Y8
I have not included specific sizes in the procedure below since I simply don't know if all variants of BMW diffs use the exact same size bearings. Use good judgment here.
- Bearing splitter (1/2" - 3" size), example:
http://www.princessauto.com/en/detail/1 ... -p2990103e
- Impact gun
- 1/4" drive Beam Torque Wrench
- 3/8" drive Click-type torque wrench
- Large breaker bar
- Pinion Yoke Holding Tool
- Various typical shop supplies
Parts List:
Pelican Parts (USD):
33131213893 $20 Tapered Roller Bearing (carrier) (2 required)
23211490120 $3.25 Securing Plate (1 required, good to order a spare)
33107505602 $7.25 Shaft Seal (output) (2 required)
33111214144 $4.25 O-Ring (2 required)
33131207280 $0.50 Lock Ring (2 required)
33111211708 $5.50 Diff Cover Gasket
33121744368 $7.25 Crush Sleeve (1 required, good to order a spare. One came with the Pinion bearings from Thayer below)
Thayer Motorsports:
Pinion Brgs w/seal/crush collar $65.00
Pinion Nut (about $5.00)
Other Suppliers:
- Fasteners, see below.
- O-ring for the Speed Sensor, available from a hardware store. Here is the size:
w. 3/32"
ID. 1 5/16"
OD. 1 1/8"
Torque Values*: (unlubricated, no thread lock)
Bearing Cap Bolts:
12-off M8x25 - Gr 8.8 - 15 lb-ft*
Diff Cover Bolts:
8-off M10x25 - Gr 8.8 - 30 lb-ft*
Rear Horizontal Support Bracket
2-off M12 x 1.5 x 50 - Gr 10.9 - 100 lb-ft*
Front Support Bracket
3-off M14 x 1.5 x 25 - Gr 10.9 - 150 lb-ft*
* Not from BMW or Bentley, derived using best practice. Use at your own discretion.
Diagnosis:
For the past few years I've been noticing a cabin noise that sounded very similar to a wheel bearing on its way out, increasing slowly over time. A couple years ago I changed the front wheel bearings and while it got a bit better the noise was still there. At this point it's enough to vibrate the dash while driving a certain speeds and while it's still not 'loud', when the car stops rolling and things are quite you kind of feel like you just woke up from a Metallica concert the night before. Anyway, on a few occasion I've had the chance to isolate the noise to the diff. This past summer I had the axles out for a rebuild and was able to spin the diff alone and it was obvious this is where the sound was coming from.
Other details:
The diff is a BMW Medium188mm open type with a ratio of 3.64:1. It has roughly 190,000 KM on it and I would imagine it had its first oil change when I bought the car ~6 years ago (168,000 km). I just drained this 6 yr old fluid for the rebuild and even it came out black, obviously I should have done a better job flushing it 6 yrs ago. The outside of the diff was dirty but not really rusty.
For the most part the pictures do the talking. I assume anyone tackling this has enough experience to know the basics, i.e. pressing things in/out straight, how much force to use, what surfaces to apply pressure on and how to support properly. I have a bunch of random round parts, like old wheel bearing races and seal drivers, which made the job go smoothly. I've seen people use a slide hammer on some of the races, but with the right sized mandrels for the press the slide hammer isn't required.
References:
- While I found bits and pieces all over the net, I generally just dove in.
- This link has good tear down / rebuild documentation that I found:
https://www.bimmerforums.com/forum/show ... Pic-heavy)
- Forum member cek has successfully rebuilt / documented his diff rebuild here (wish I had seen this before starting mine!):
http://www.mye28.com/viewtopic.php?f=3&t=127886
- If you want to check / set gear backlash, there is a section in this link that covers it (courtesy of cek):
https://www.bmw2002faq.com/articles.htm ... -build-r74
Procedure:
I have not covered the diff removal from the car, I assume anyone tackling this project knows how to do this.
Disassembly:
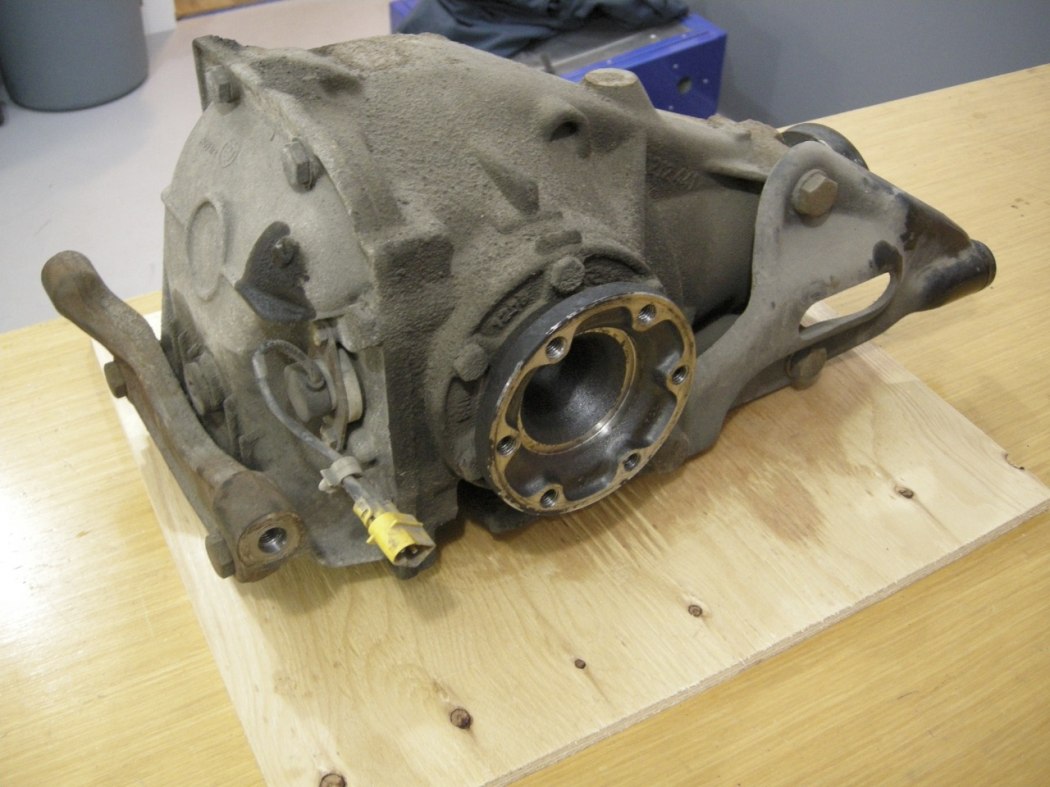
The Output Drive Flanges simply pop out. Use a screw driver for leverage if they are a bit stubborn but they shouldn't be.
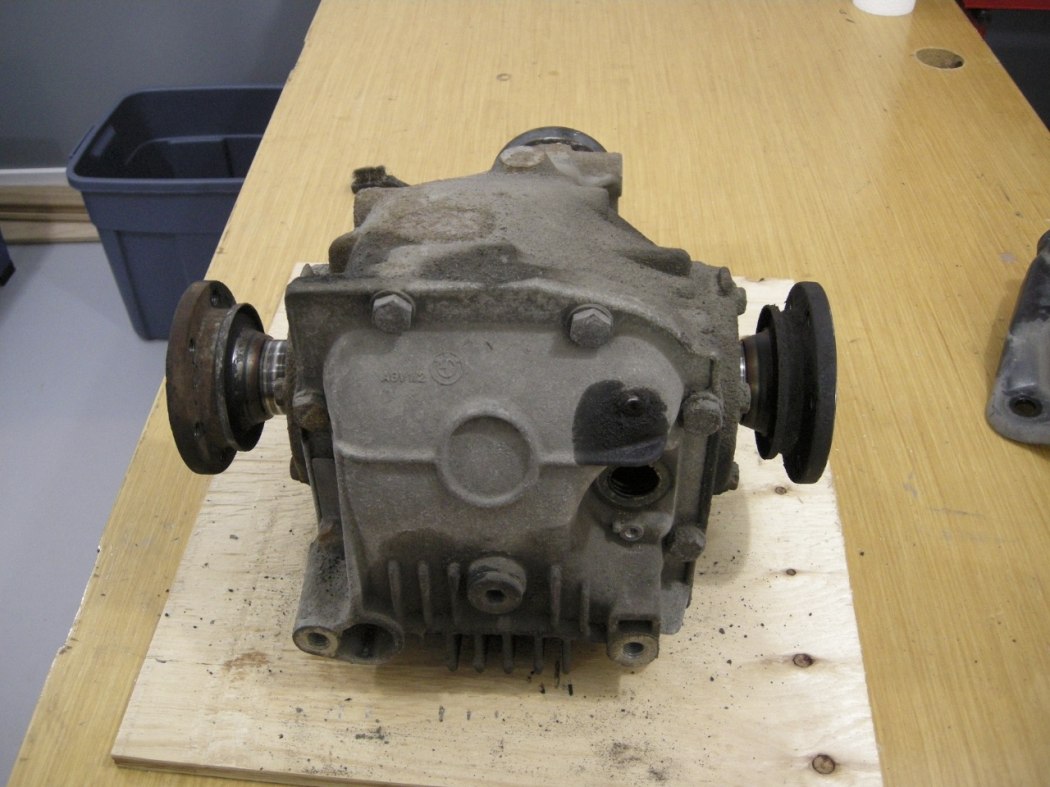
Tag one side with a zip tie or similar. This particular part could be installed on either side I believe, but it's better to be safe than sorry.
The Speed Sensor is easily removed by first removing the 2-off M6x10 screws. The sensor just pulls out, there is an o-ring that seals it to the diff cover. Notice the metal shaving that were attracted to the sensor.
The Bearing Caps are next, and using a flat blade screw driver for leverage helps here. Again, doesn't take much to pop these out. There is a specifically sized (thickness) shim under each bearing cap. Tag these so they go back on the same side. This is extremely important.
Also notice the witness patch from the OE assembly, where they used sealant on that (and another) particular threaded hole. These 4 holes (2 for each Bearing Cap) are through holes into the Diff Case.
Remove the 8-off M10x25 bolts holding the Diff Cover on and remove the Diff Cover. Notice the fluid level witness line left behind by the contaminated oil.
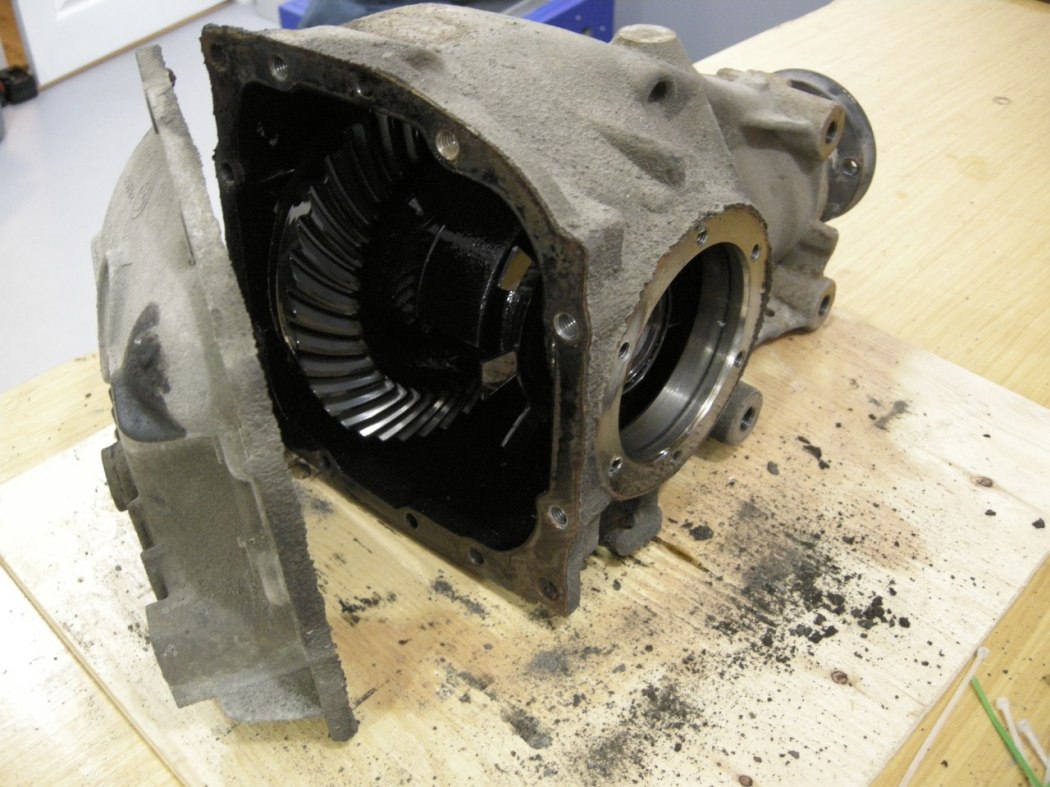
The Diff itself just drops out the back. Keep things organized and in tagged so that all pieces go back on the same side / where they belong. Nothing worse than getting it all back together and it's too tight or loose.
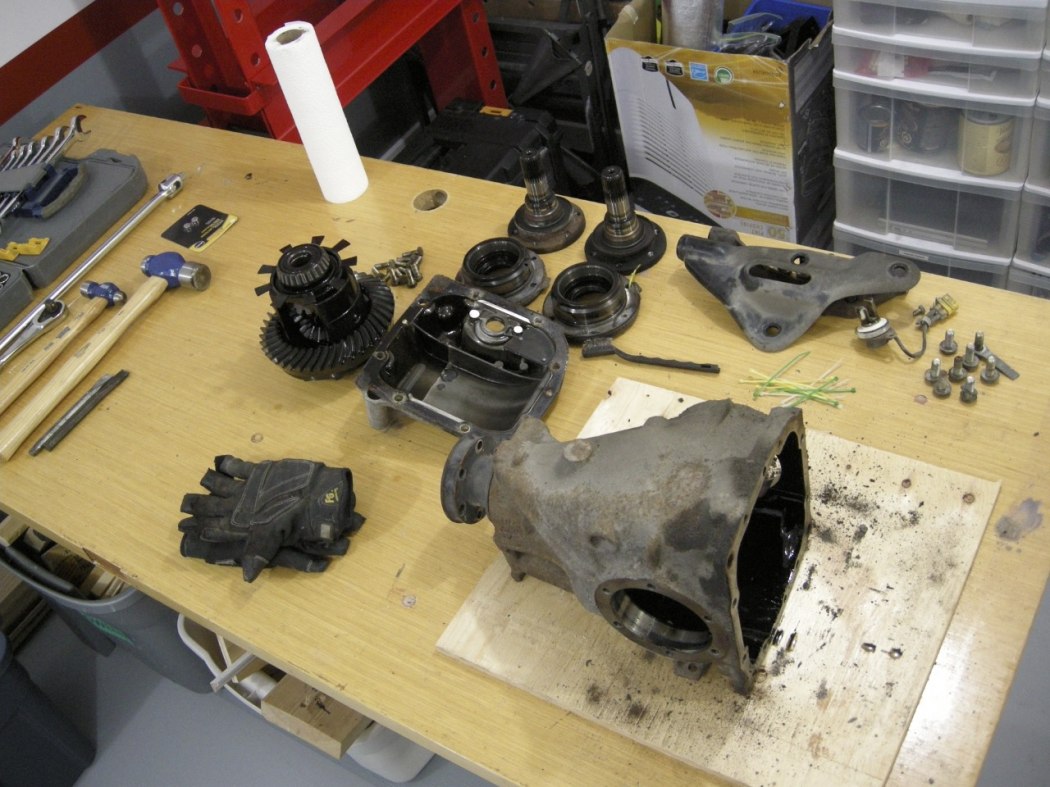
Pinion Removal:
The Pinion Nut is prevented from loosening by a Securing Plate. Drill a small hole in this, partially drive a sheet metal screw into it, and pry it out.
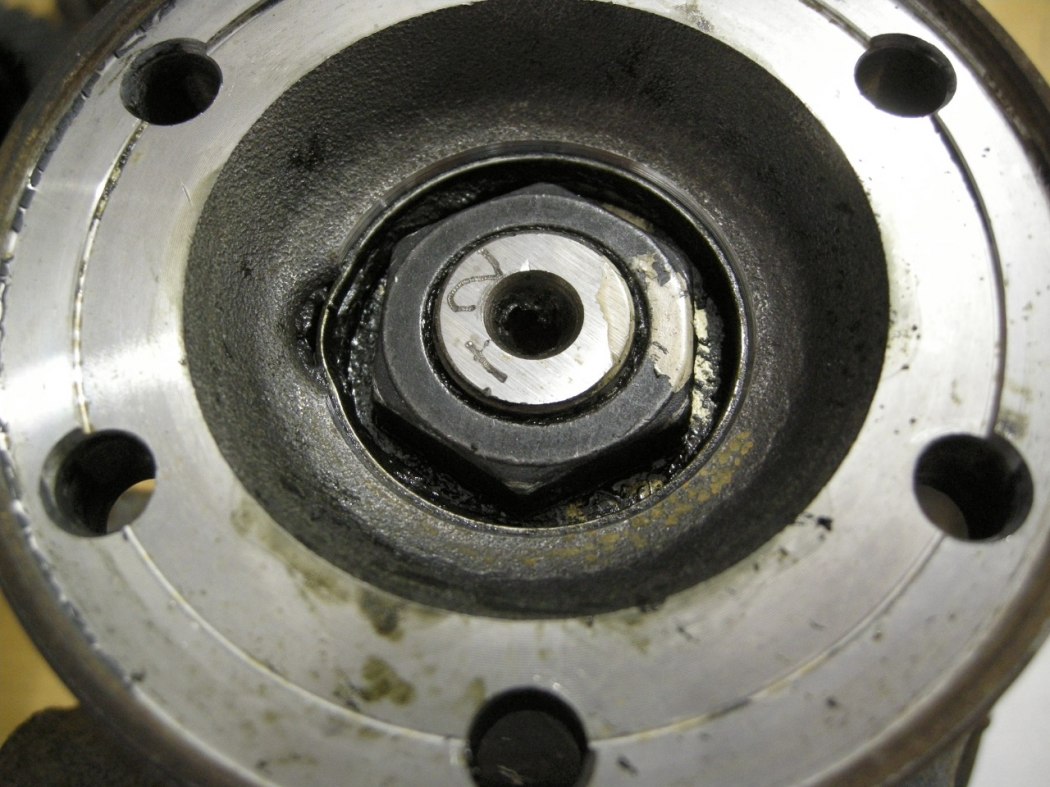
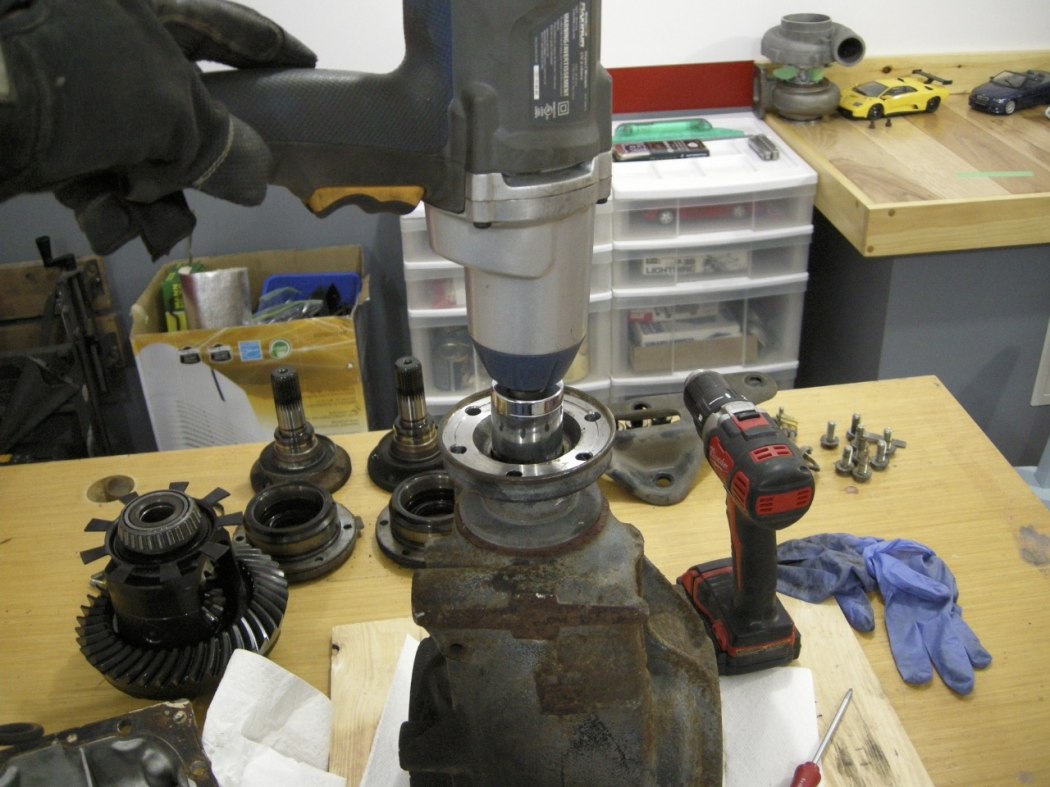
Then using an impact gun, zip the nut off. It helps to hold the Pinion gear on the inside of the Diff Case to prevent it from spinning. Because we're using an impact the Pinion gear does not need to be held very tight.
Jump on the press and drive out the Pinion. Now you can pry the Pinion Seal out with a seal pry bar or anything else. The Small (outside) Pinion Bearing will now be free and can be removed / discarded.
Pinion Bearing Race Removal:
The outside Pinion Bearing is slightly small than the inside Pinion Bearing. I used an old Audi wheel bearing race that just fit through the inside bearing race to remove the outer (smaller) race from the inside - out. I hope that wasn’t too confusing.
This picture shows the small pinion bearing race removed and the 2 pieces I used to get it out - an old Audi wheel bearing inner race and a piece of hardware. These 2 pieces are placed against the Pinion bearing race from within the Diff.
This picture shows the extension bar required to reach inside the diff case with the press.
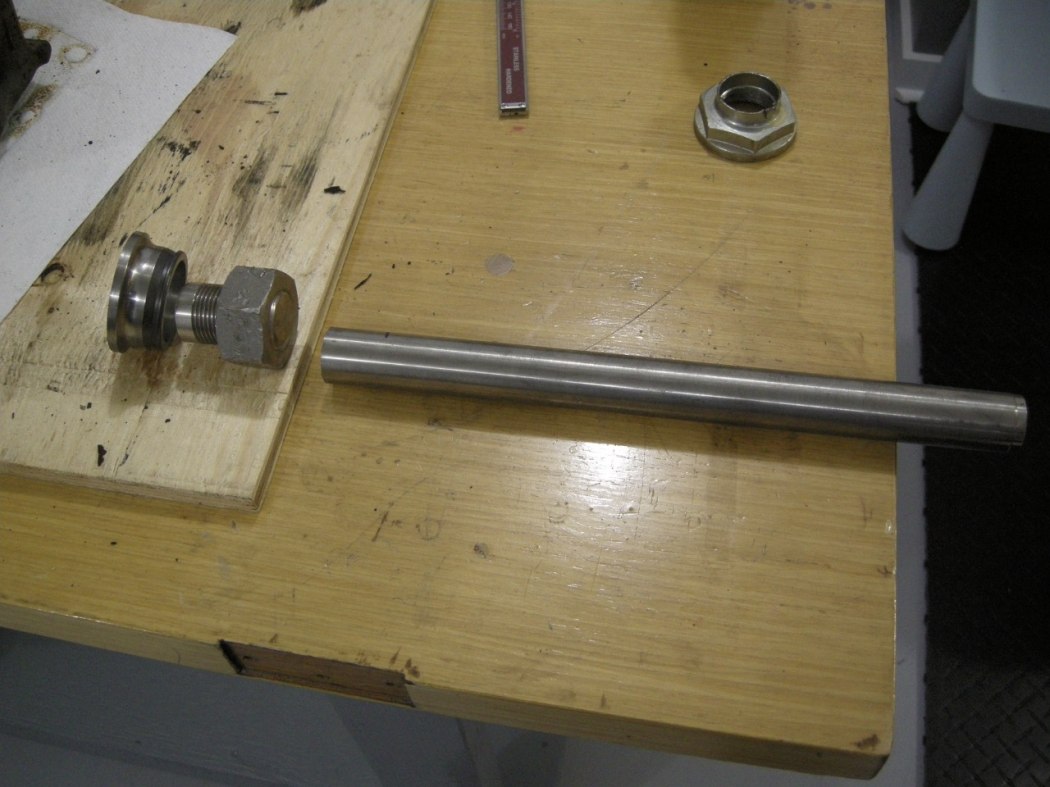
This picture shows the 2 pieces dropped in from inside the diff case, on top of the small pinion bearing race ready to press out.
This picture shows the diff case supported in the press; the small pinion bearing race drops out the bottom.
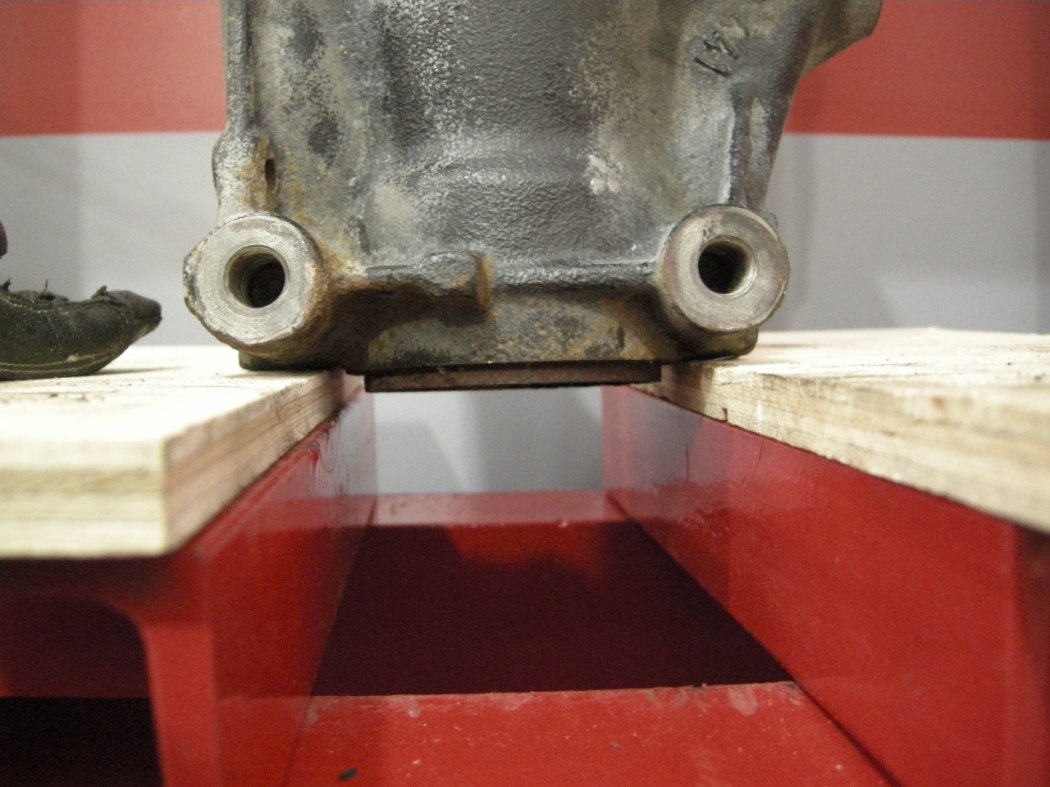
Next is the large (inside) pinion bearing race.
Drive it out with the press in the configuration shown. Fairly straight forward if you’ve made it this far.
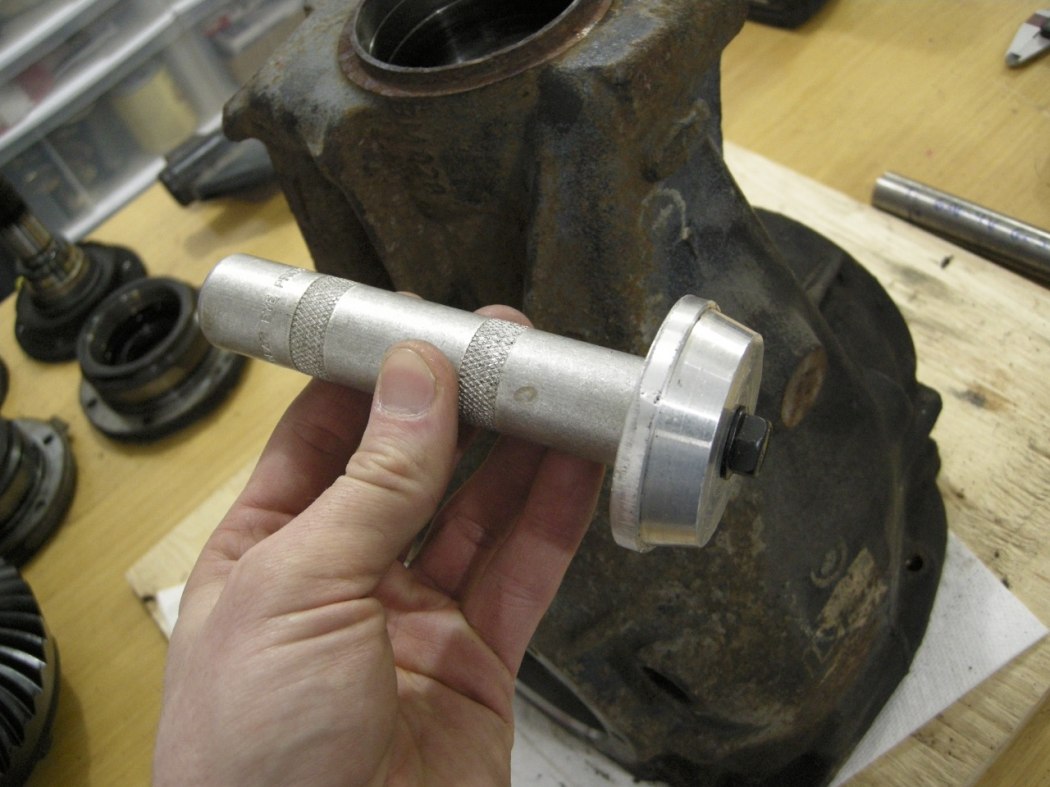
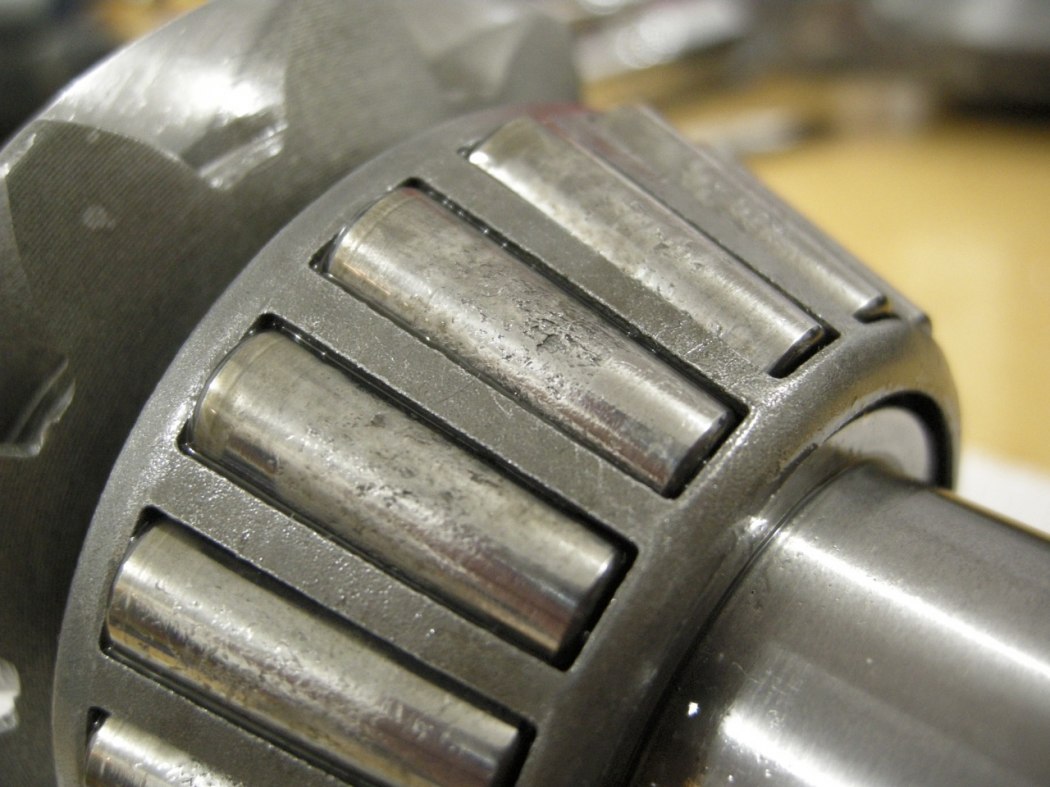
Worn Parts:
Take a look at your Pinion Bearing rollers and the outer races. Mine were very badly pitted and very noisy when spun in my hand. Definitely the smoking gun in my driveline noise issue.
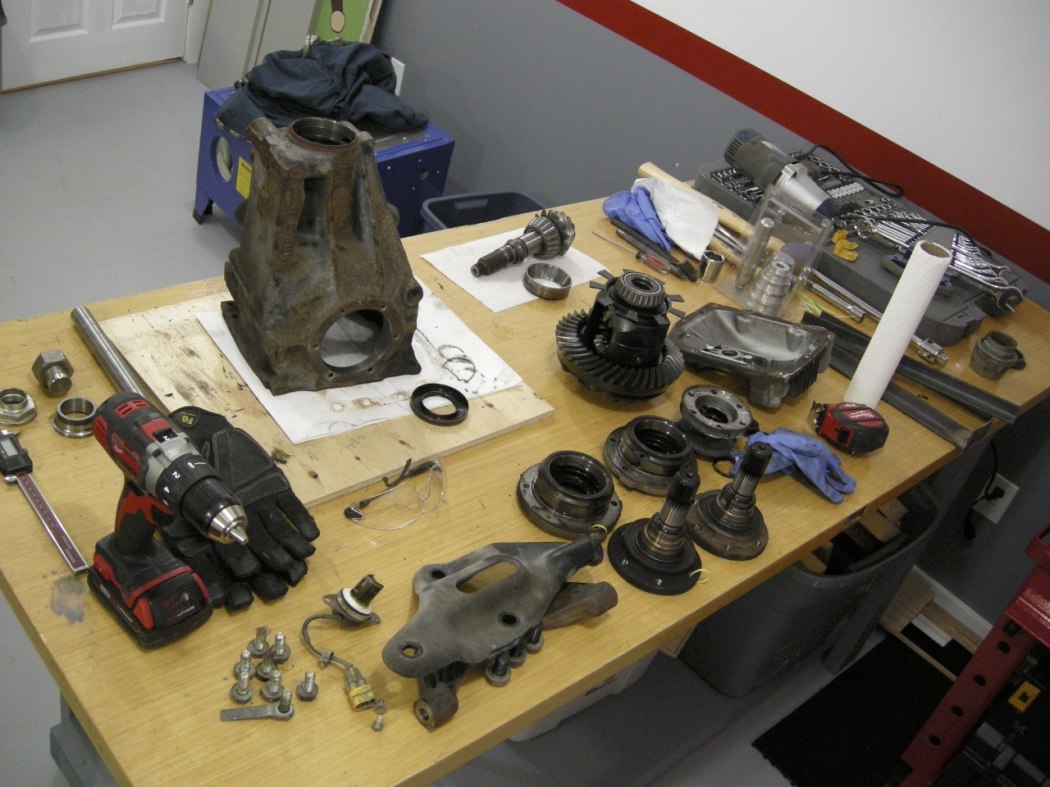
At this point we are almost completely disassembled... keep reading.
Large (inner) Pinion Bearing Removal:
Setup the Bearing Splitter as shown by Sarah.
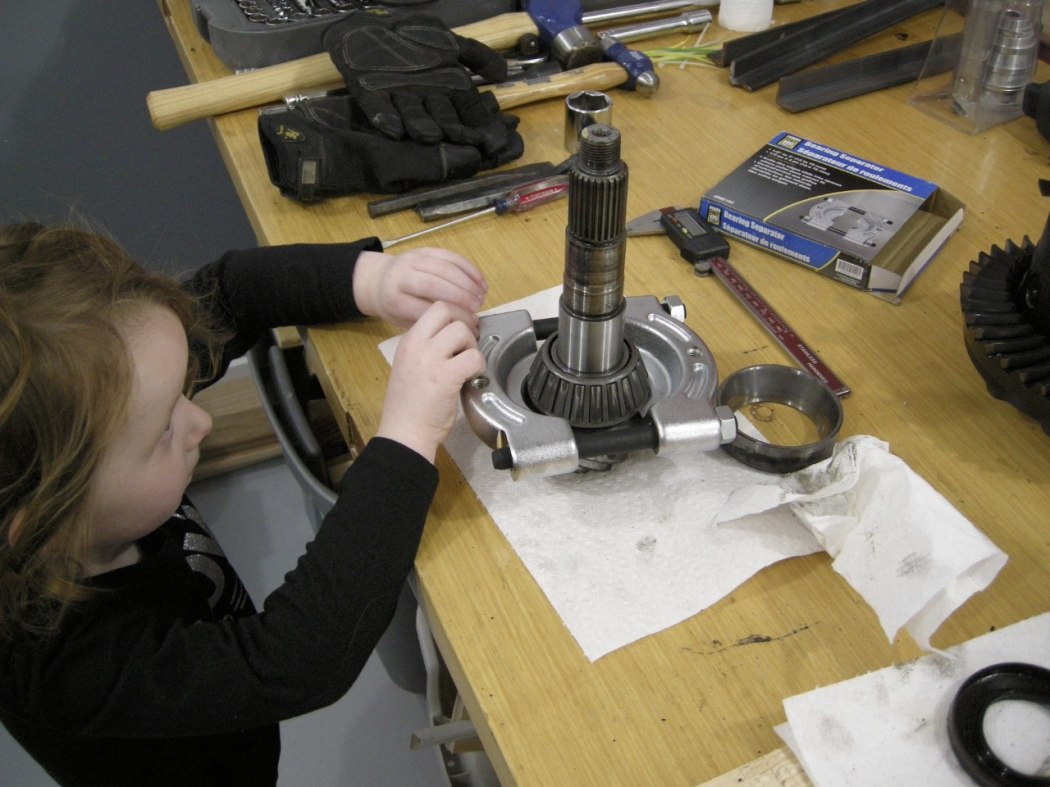
Drive the Large (inner) Pinion Bearing off the shaft with the press.
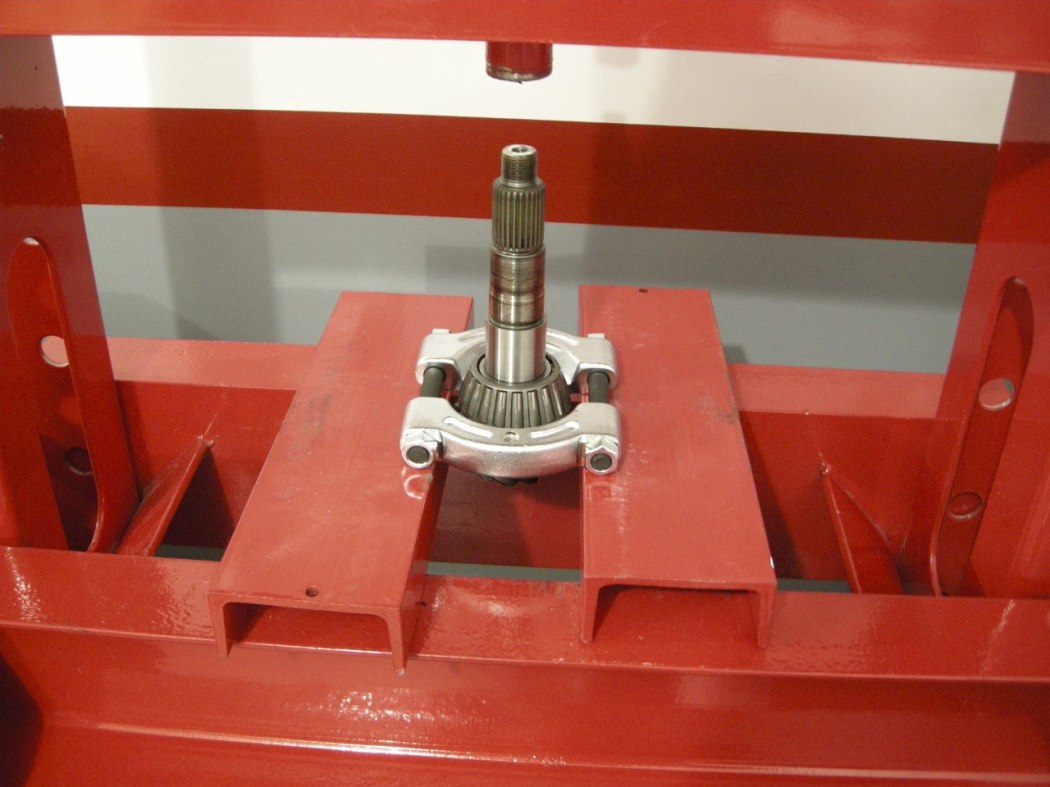
Carrier Bearing Removal:
The Carrier bearings require the use of a bearing splitter for removal. I also used a large bolt to fill the space in the center, to serve as a platform for the puller.
Start with the Bearing on the Ring Gear side. Cut through the roller cage and pry it off. This leaves the inner race on the Diff.
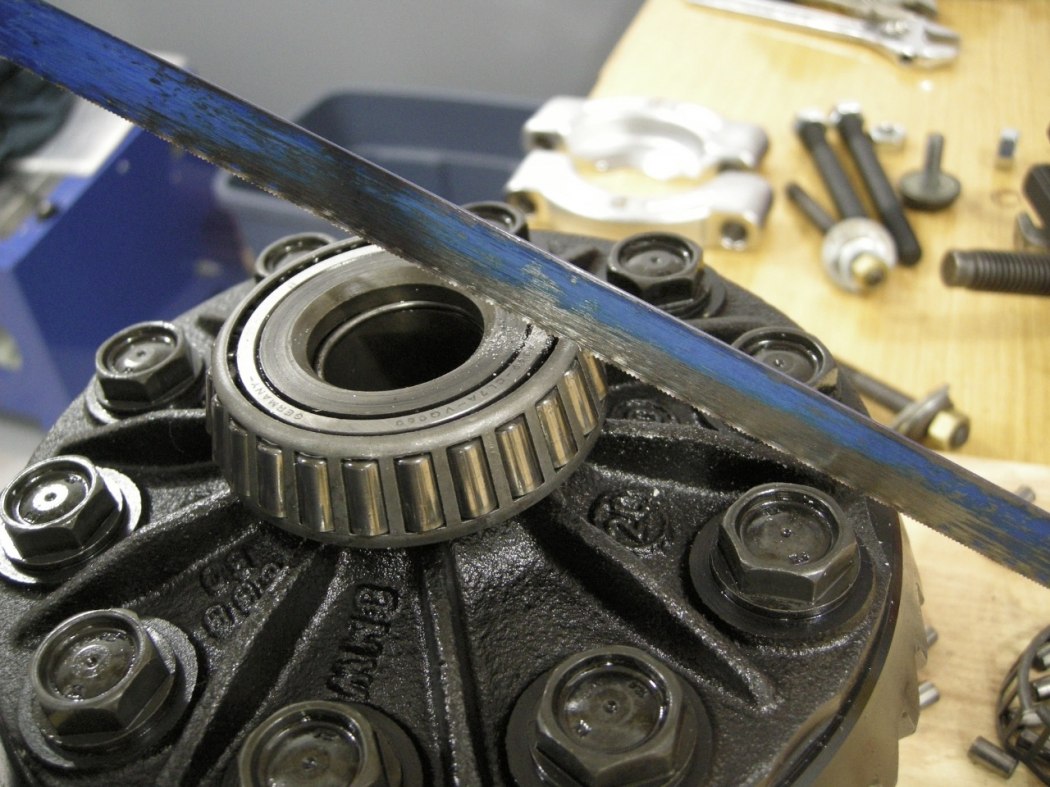
The press cannot be used for this operation because it is impossible to support the bearing splitter on the press plates. I converted a 2-jaw puller to interface with the bearing splitter, using some 3/8" studs and nuts. Start cranking and the bearing race will slip off.
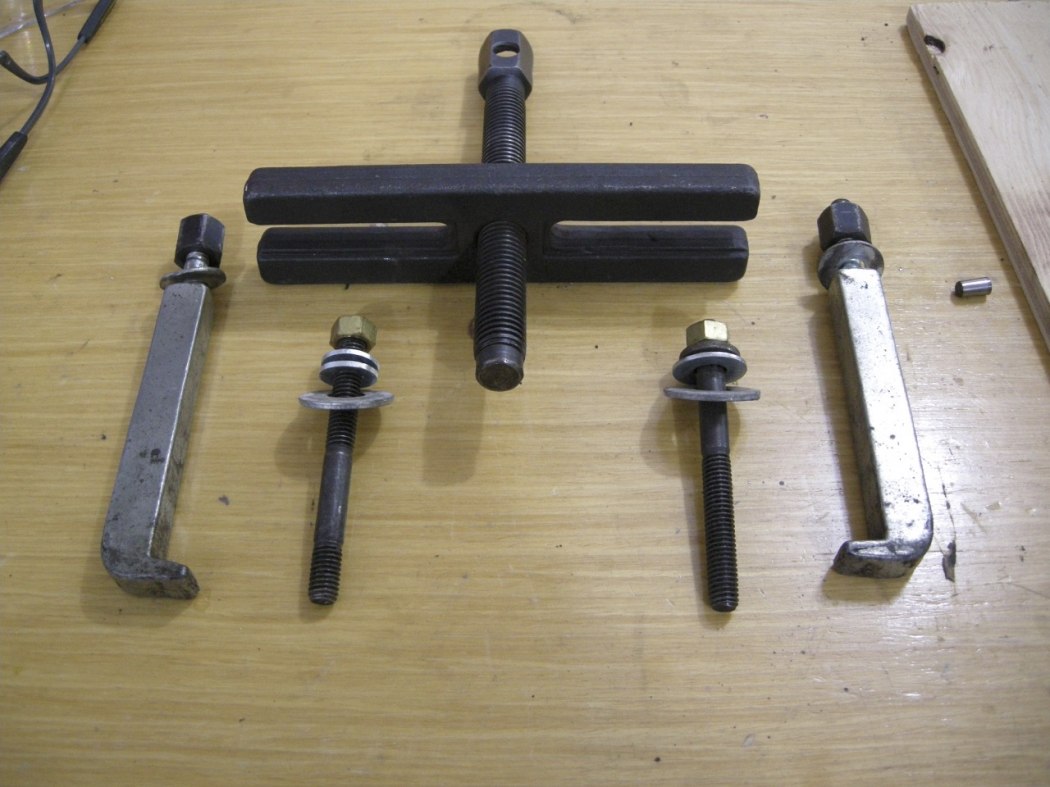
For the other side of the Diff with the speed sensor toothed ring, perform the same operation as the previous Carrier Bearing except the Bearing Splitter will engage with the top lip of the bearing race. There isn't much for the splitter to catch on so make sure the splitter is tightened up enough.
Bearing Cap Seals and Carrier Races:
Last but not least, the Bearing Cap Seals and bearing races.
Simply drive the Seals out using the appropriate driver, and same for the bearing race.
Half way point:
At this stage the diff is 100% disassembled. Consider how much time you've spent up until now and the pile of scrap parts can almost fit in one hand.
Clean clean clean and paint:
Now is the time to clean and paint everything. The amount of effort you exert here is up to you. I don't have an operational sand blaster so I stripped everything by hand. Took a bit of time but was worth it. I even turned the drain / fill plugs on the lathe to remove the surface rust. In the end I painted them silver to somewhat prevent them from rusting. Because I used a hacksaw to cut the Carrier Bearing cage, make sure to really flush out the diff of any metal particles. Same goes for the diff case. Flush everything thoroughly.
I chased all the treads to clean them up. This may be overkill to some but the devil is in the detail.
I had made an M14 thread chaser a while ago using an old axle bolt. Just cut some grooves in the thread with an angle grinder or Dremel. I have a few of these of different sizes.
Re-assembly:
Great service from Thayer Motorsport for some of the parts. I had overlooked the Pinion Nut and Securing Plate and Clay double checked to make sure I had these. I already ordered the Securing Plate from Pelican but figured a spare wouldn't hurt.. ended up needing it.
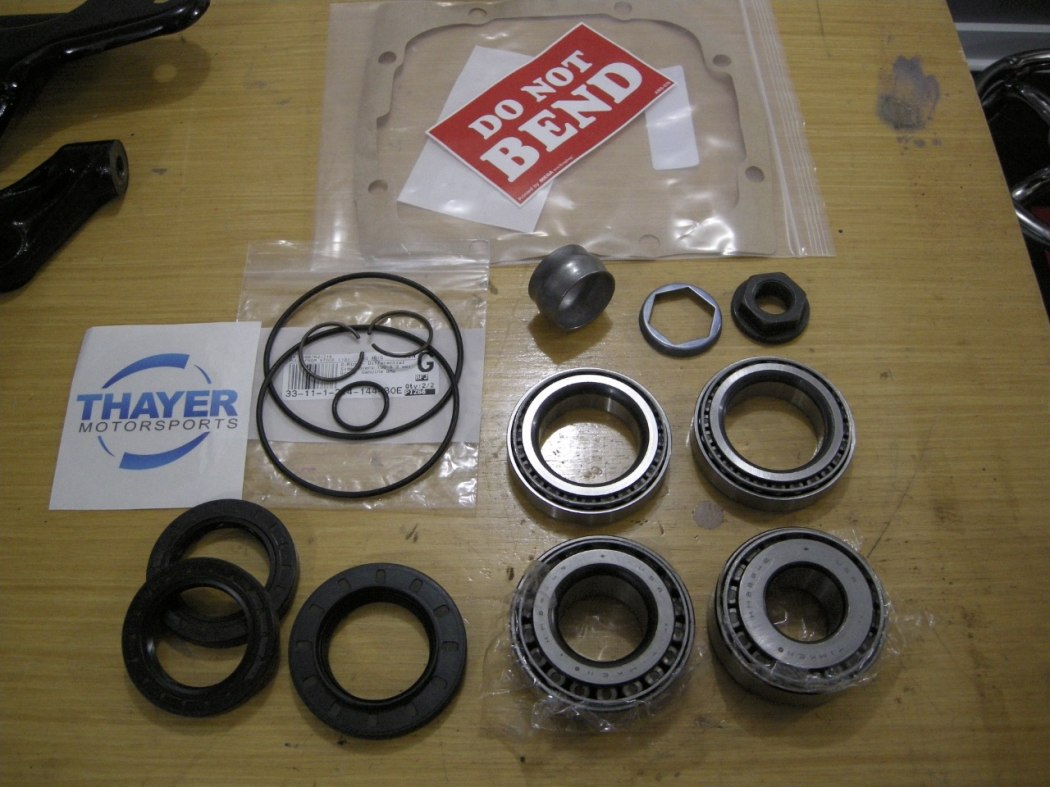
The final chapters below follow the "installation is the reverse of disassembly" mentality.
Bearing Caps:
Starting with the Bearing Caps, press the new seals in to the same depth as the old ones. Use a light smear of oil on the outside of the seal.
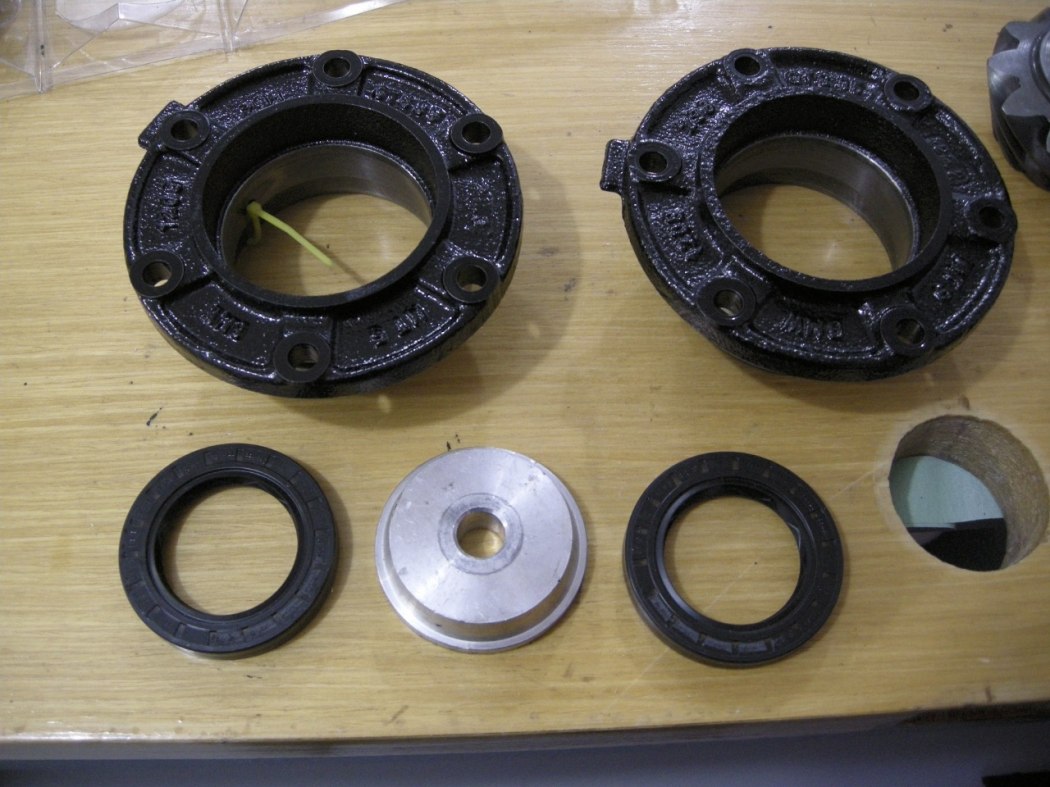
Flip the Caps over and drive in the Bearing races using one of the old races, as shown.
Pinion Bearing Races:
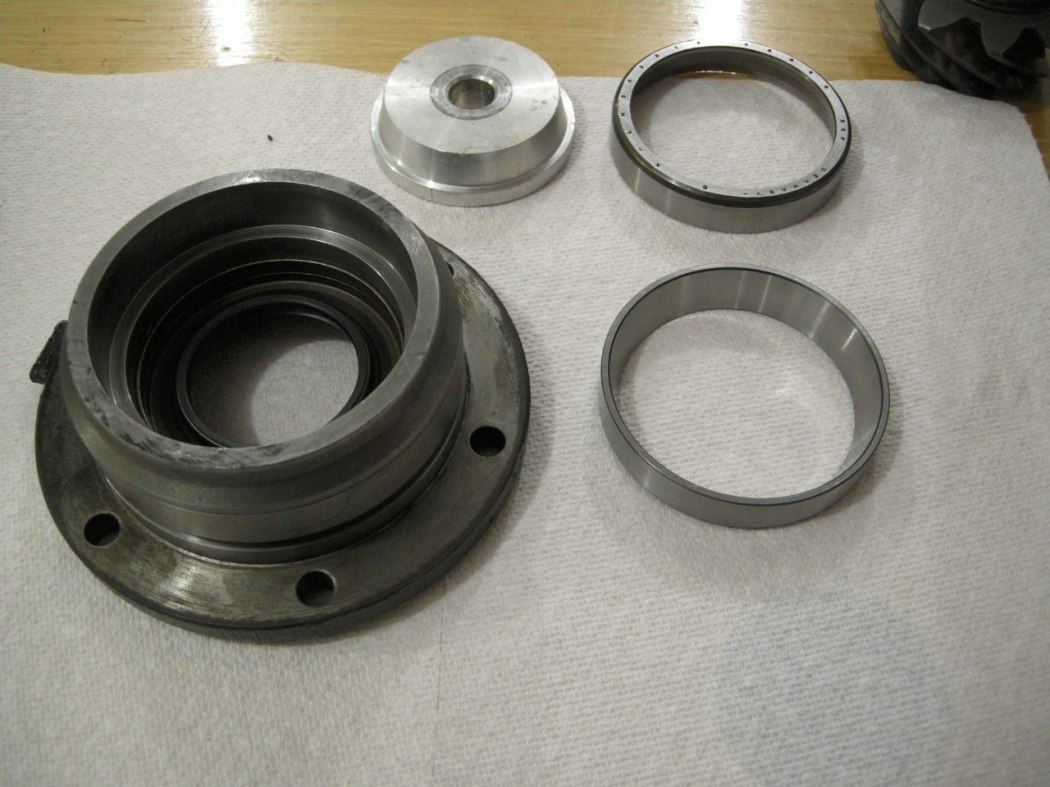
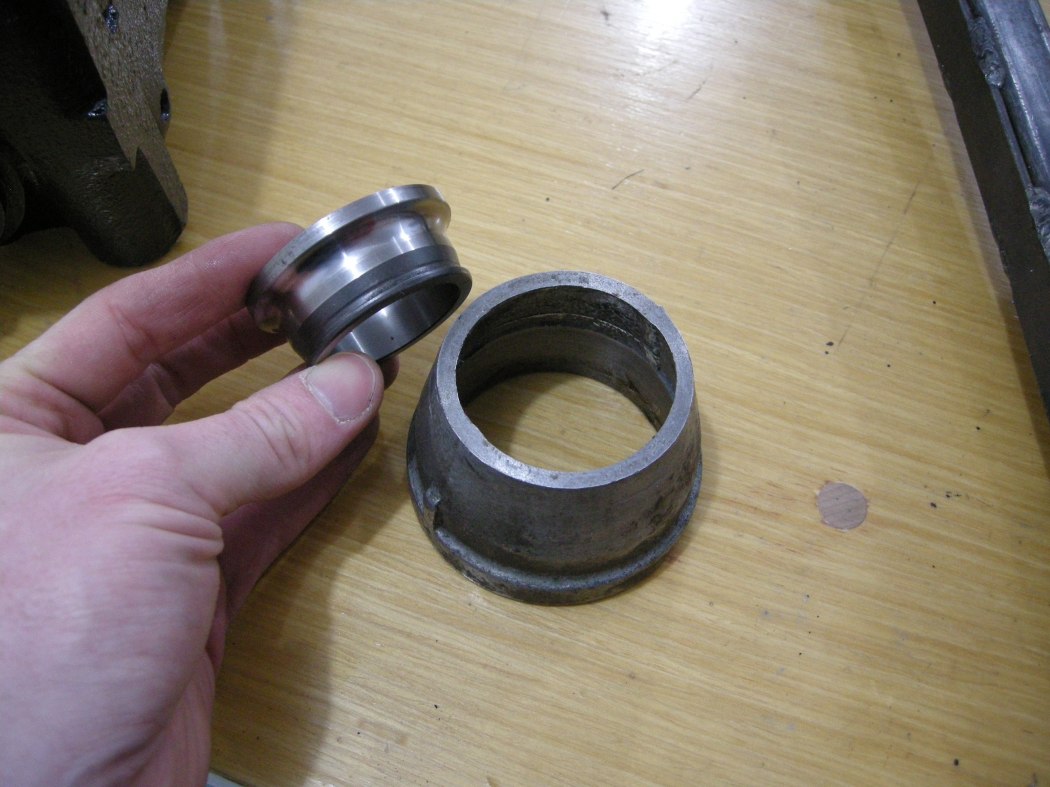
Old (left) vs new (right)
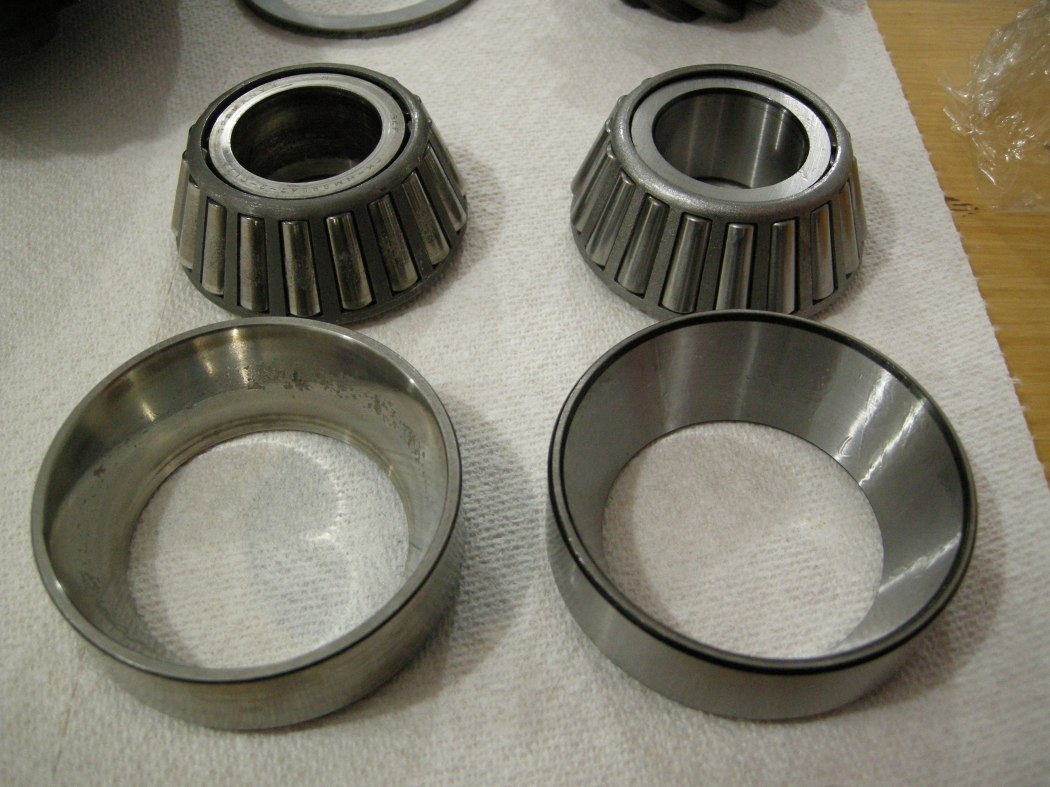
The Pinion Bearing Races are pressed into the Diff Case using the old races.
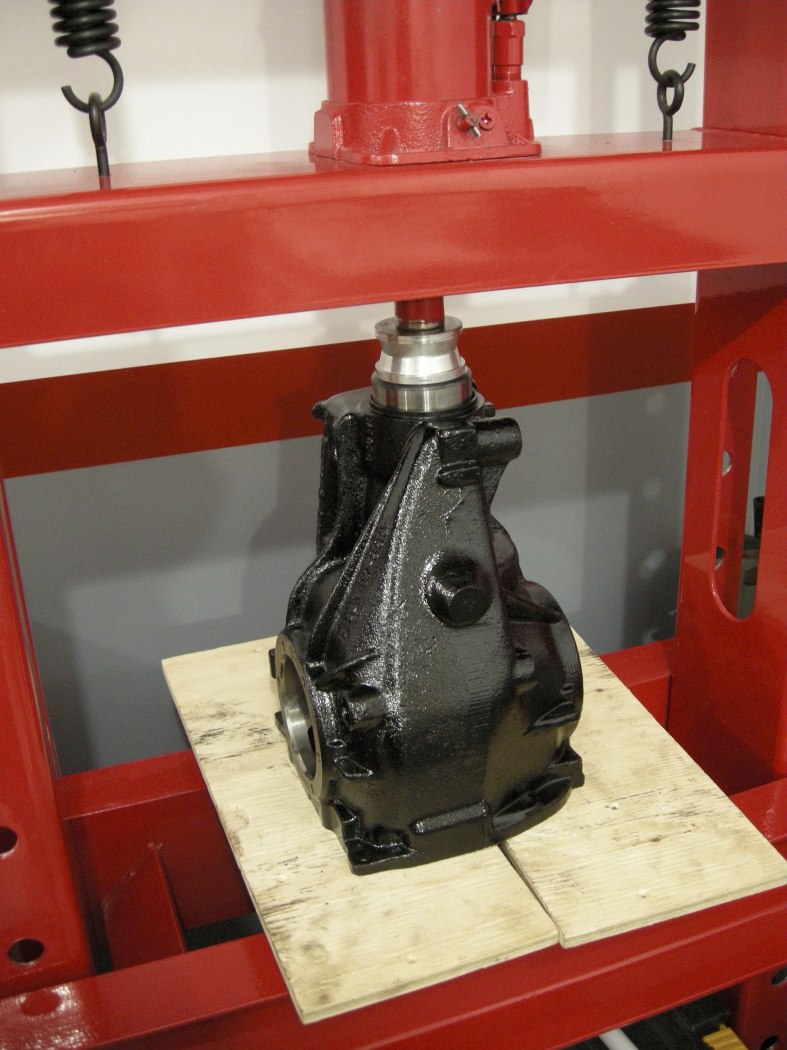
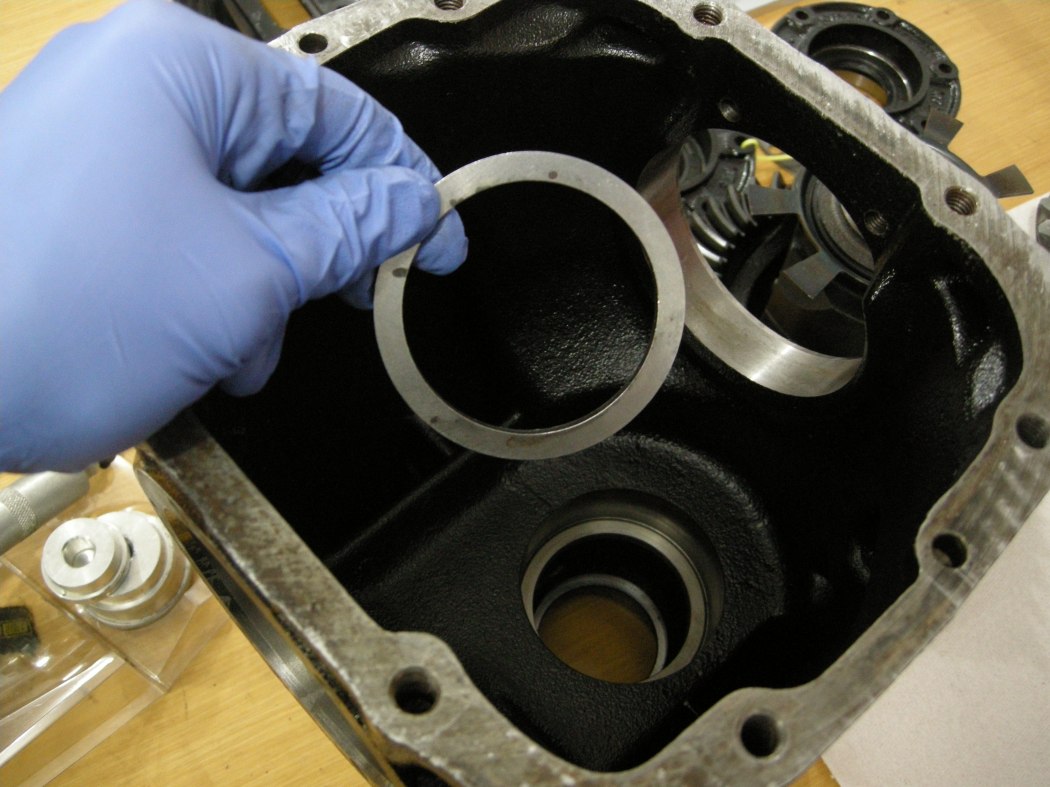
Special note for the Large Pinion race, there is a spacer that goes in first. Don't forget to drop this in. Also, I made the mistake of using the old bearing race for the Large Bearing, and it got stuck in the case! See picture. I had take a couple steps back to get it out. I ended up using one of the old Carrier Races to drive it in, which was a bit smaller.
Large Pinion Bearing:
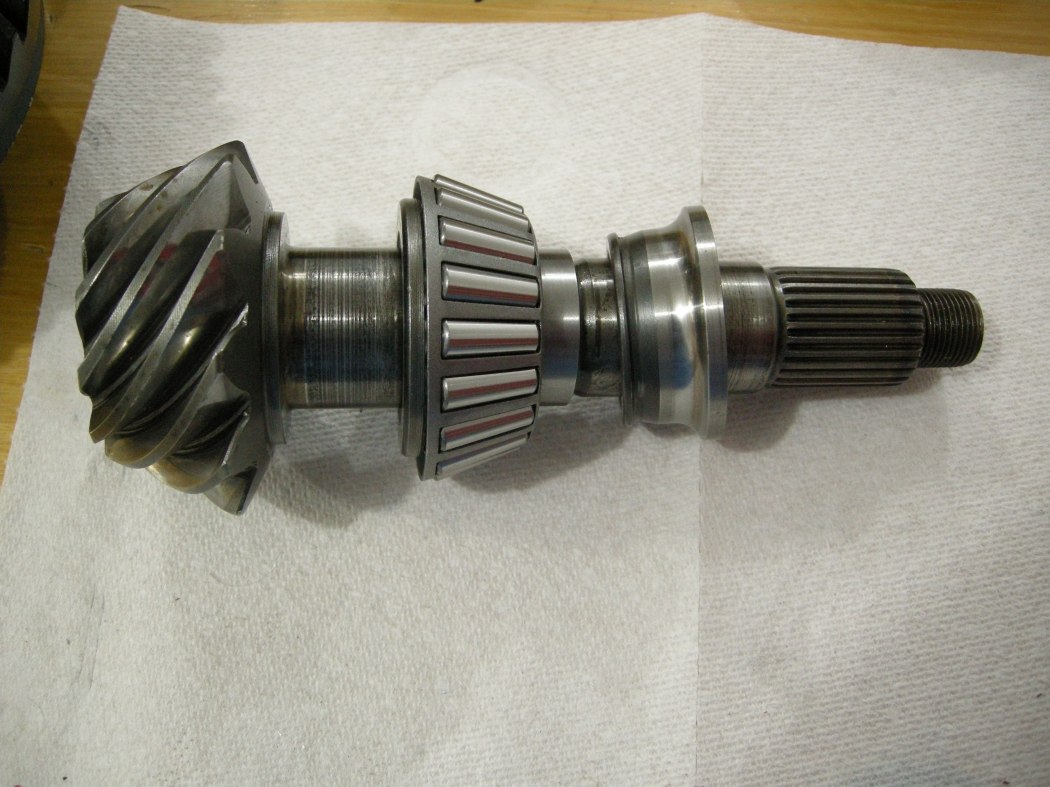
Press the Large Pinion Bearing on the Pinion shaft, using the old bearing or in my case, an Audi wheel bearing inner race, and the Bearing Splitter for support.
Carrier Bearings:
Press the Carrier Bearings on the Diff. Again, only apply force to the inside race, being careful not to touch the rollers or cage, which would damage the bearing.
I did these bearings in 2 steps, first with a seal driver to get it going on the press, then added the old bearing race for inside clearance. Doesn't matter which side you start with.
When you flip the Diff over for the other side, ensure it is supported properly underneath so that you don't damage the bearing you just installed.
Same 2-step process as before. Not required but this is how I did it.
Small Pinion Bearing:
Now we're getting into the meat and potatoes.
This step involves pressing the Small (outside) Pinion Bearing onto the Pinion Shaft inside the Diff Case.
In this picture, ignore the 2 parts on the right. But don't forget the Crush Sleeve!!
I pressed the Bearing on the Shaft in 2 steps, first with the bearing simply supported on the press plates to get it started.
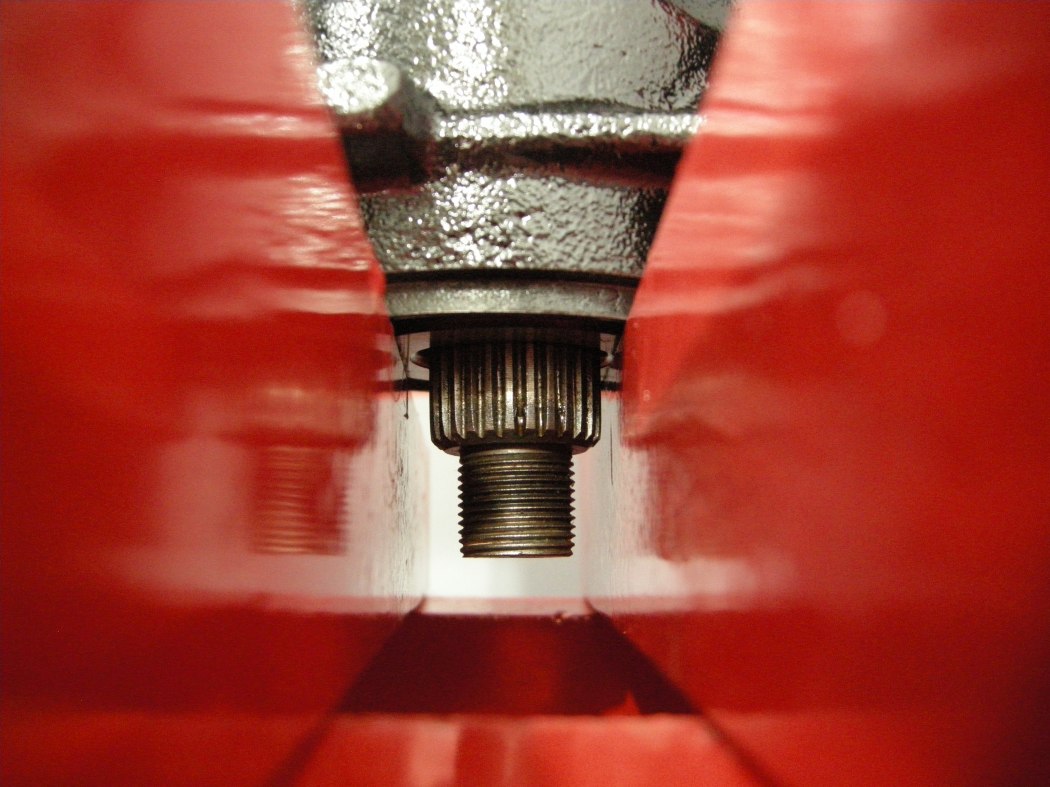
In hindsight I should have used an impact extension since they are tougher, or better yet, re-adjusted the press and used a proper piece of metal. As usual, always wear your goggles.
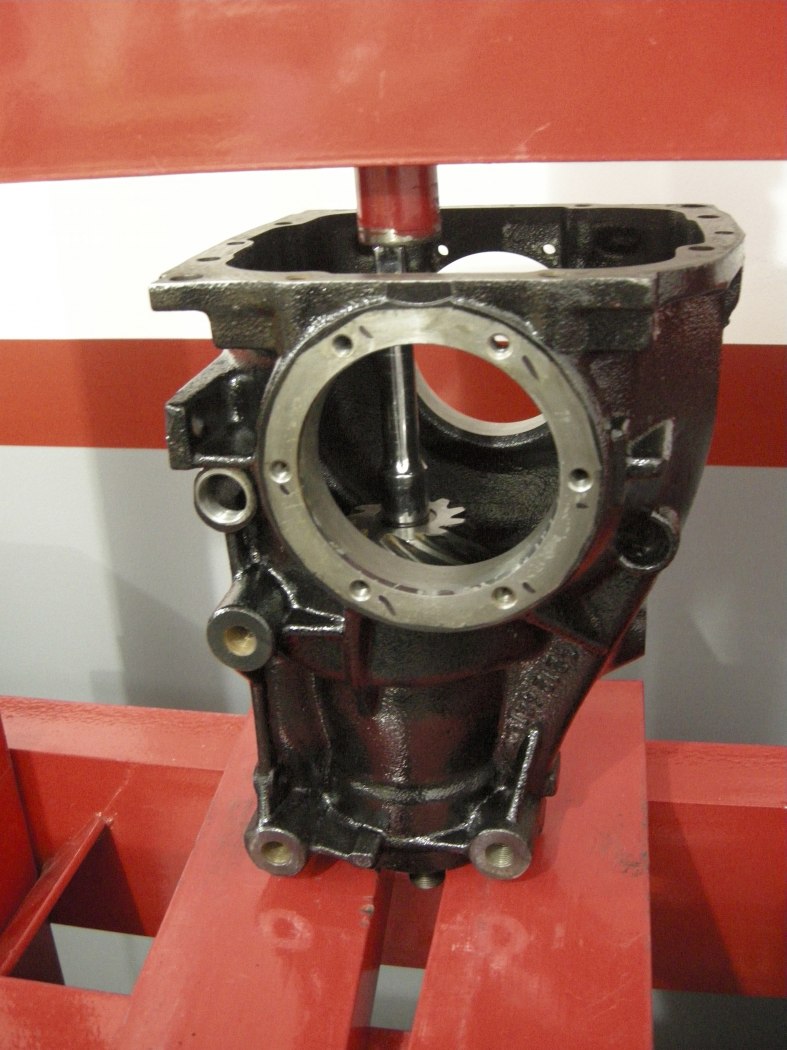
Then, I supported the bearing race using appropriately sized random parts.
Stop pressing the bearing once it hits the Crush Sleeve.
Pinion Seal:
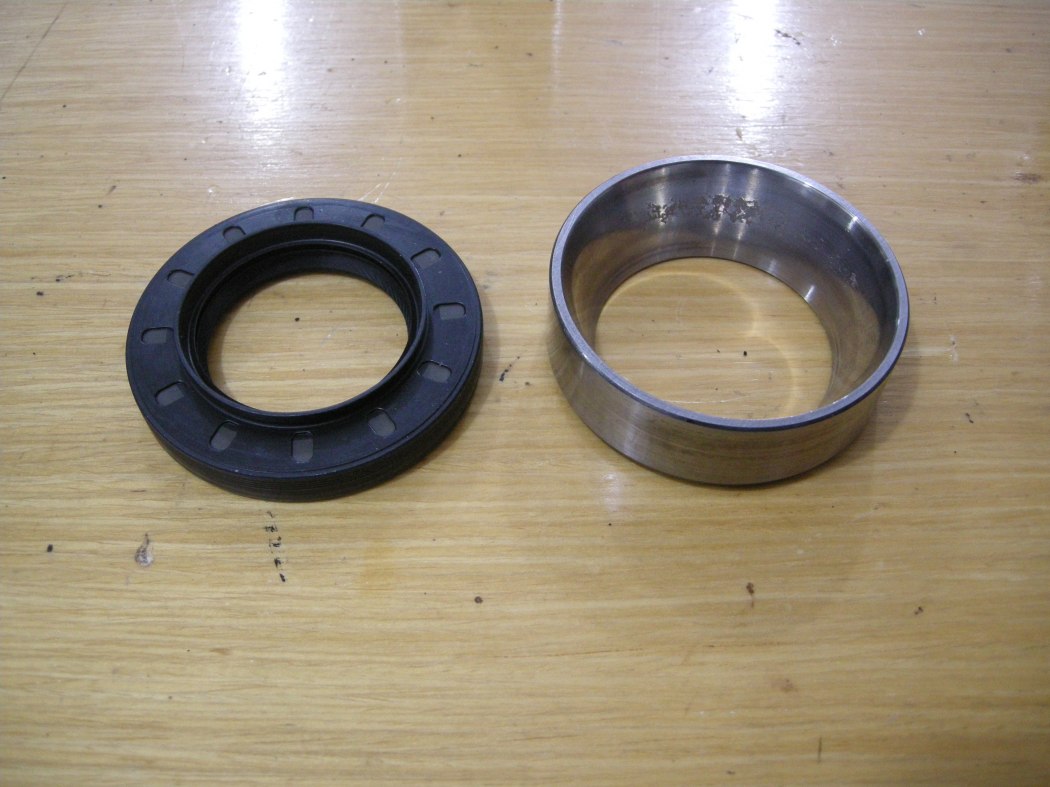
Drive the Pinion seal into the Diff Case using the old bearing race. I suppose these seals can be hammered on but I elected to use the press. It is much easier to control.
Use a bit of oil on the seal during this step.
Pinion Bearing Preload:
A Pinion Yoke holding tool is required to hold the Pinion while the preload is being set.
I modified my home brew crank lock tool by drilling an extra hole in it. If you don't have a something similar, you'll have to make something or buy a Pinion Yoke holding tool.
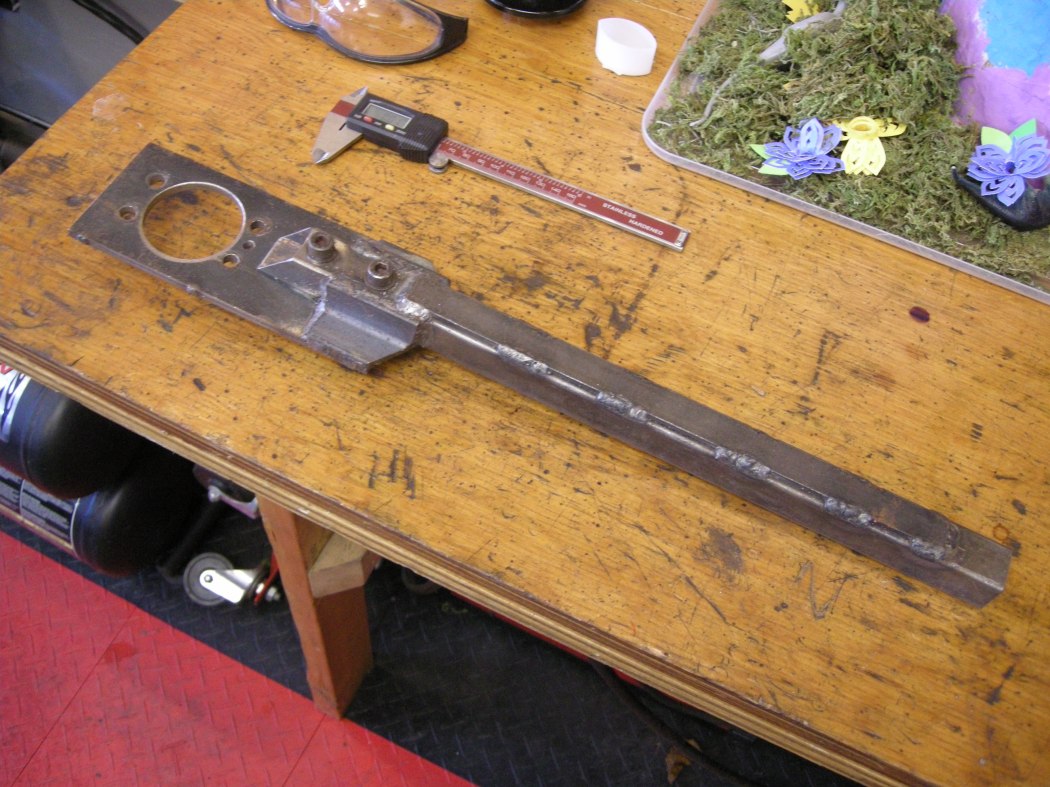
Lube the Pinion Yoke before installing it on the Shaft, where it will contact the lip of the seal.
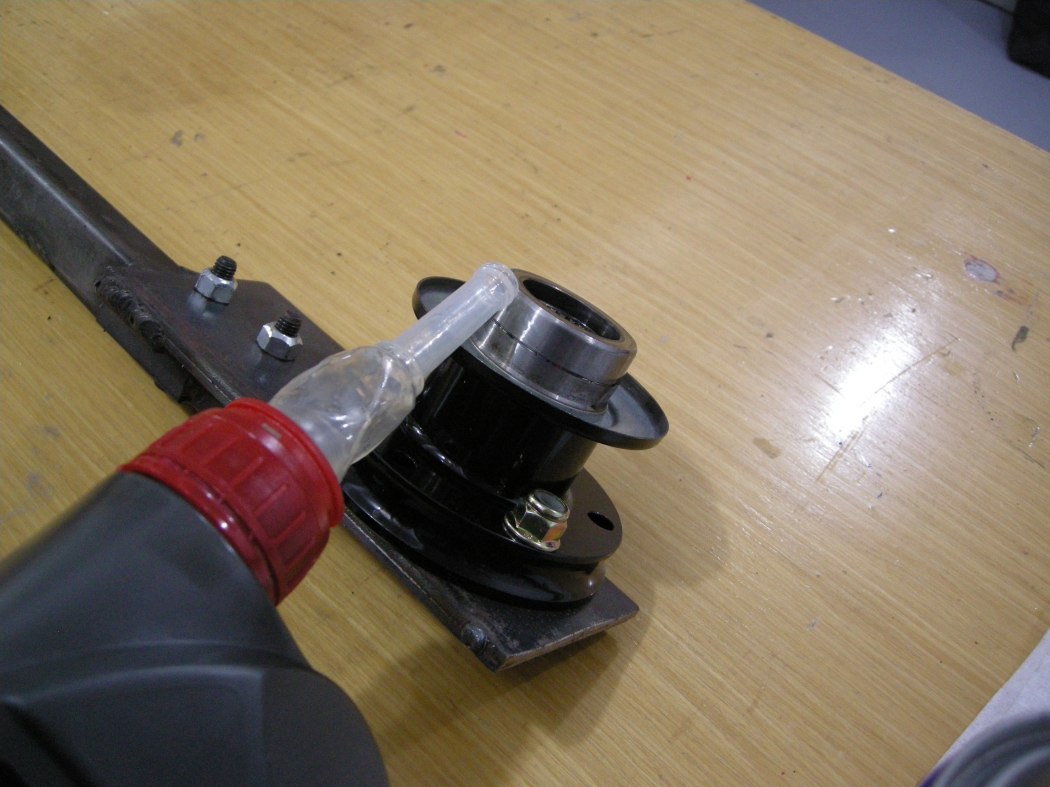
Start the Pinion Nut by hand then grab as big a breaker bar as can. When cranking down on the nut you are compressing the Crush Sleeve. Once the slop in the Pinion bearings is taken up, start taking torque measurements with your 1/4" Beam Torque Wrench. There are numbers all over the internet for bearing preload values, I aimed for 15-20 inlb of running torque. If you torque it too much you're starting all over with a new Crush Sleeve and potentially a new outer bearing, so the key here is to creep up on the final setting. Crank about 1/32 of a turn, check the torque, repeat, once you are close it's surprising how fast the torque jumps up.
19 inlb of running torque. The initial torque required to start the Pinion moving is just higher than this.
Diff Installation:
If you haven't already, pop out the Lock Rings and install the new ones.
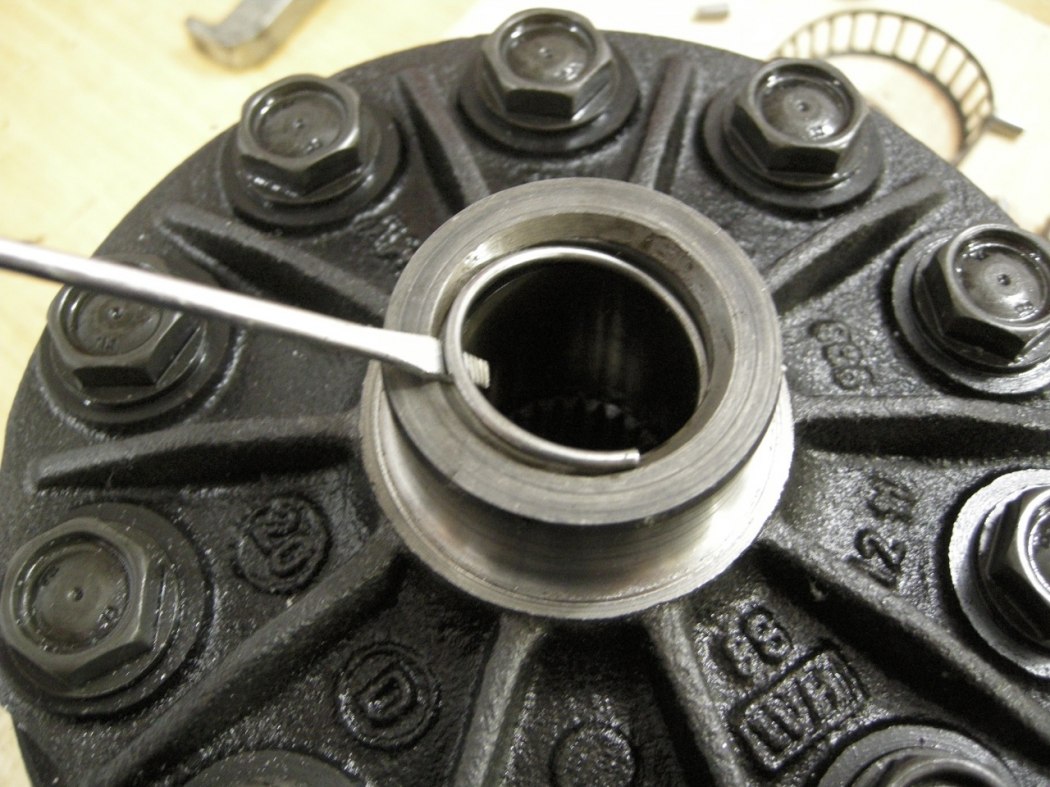
During these stages be extra vigilant about dirt and debris. Keep things as clean as possible. We aren't doing heart surgery but it's fun to pretend.
Drop the heart carefully into the Diff Case.
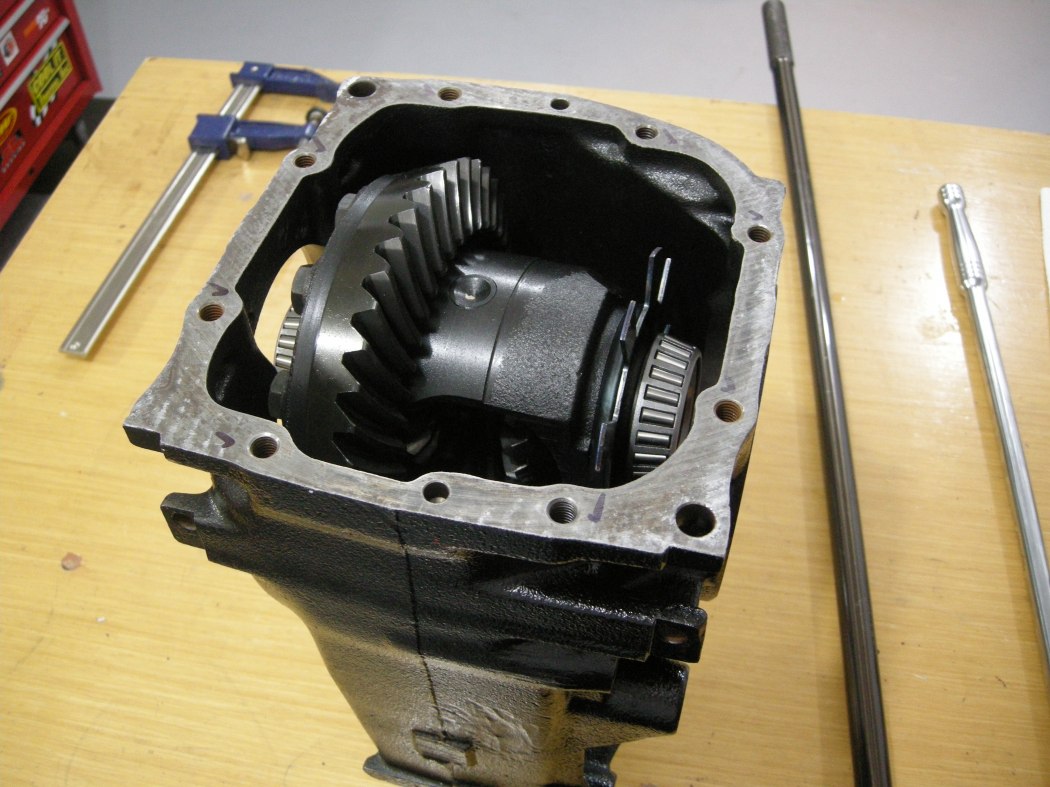
Replace the Bearing Cap o-rings, don't forget the shim that goes with the correct Bearing Cap, and add a bit of Diff Fluid to the o-ring before installation.
There are 2 Bearing Cap bolt holes on each side that penetrate into the Diff Case. I used sealant on these to prevent fluid getting through the threads. Torque all the Bearing Cap bolts in a progressive criss-cross pattern.
Bearing Cap Bolts:
12-off M8x25 - Gr 8.8 - 15 lb-ft
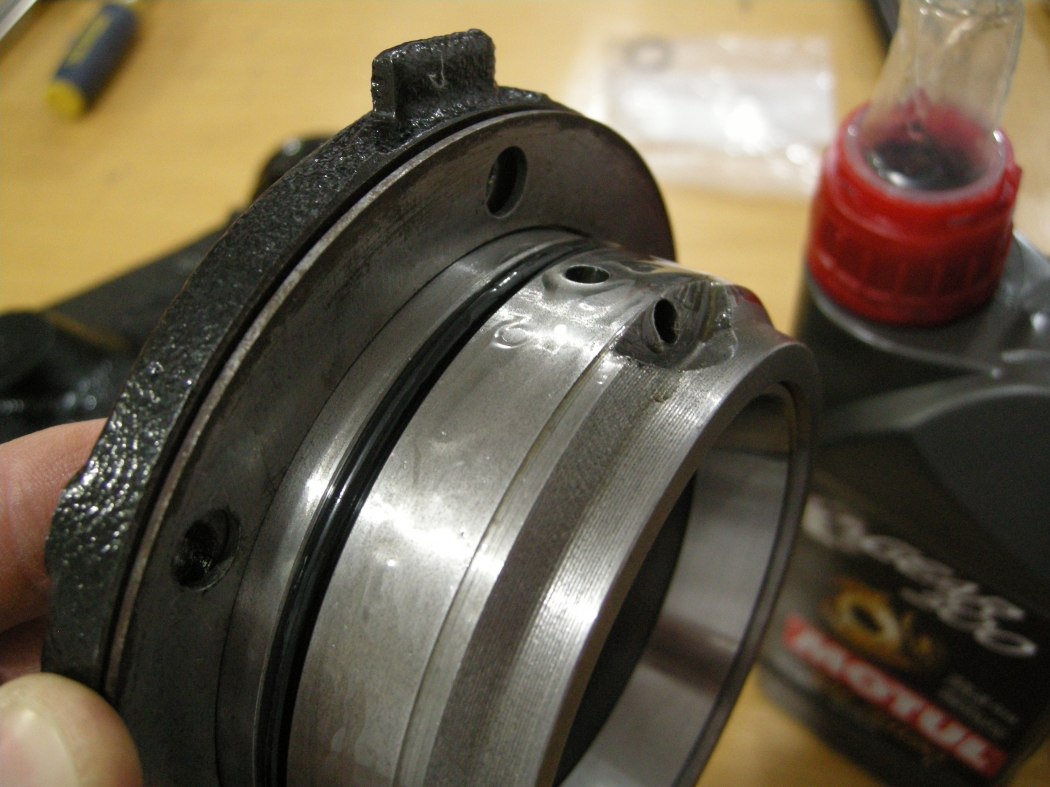
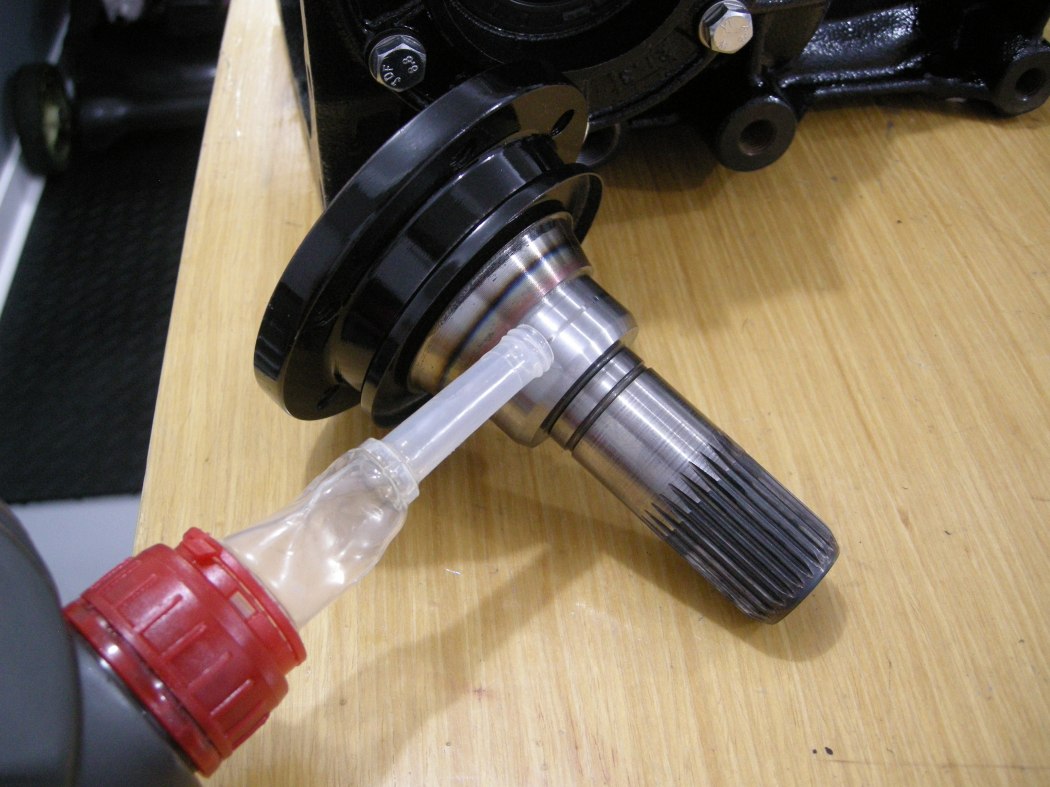
Lube the Output Flanges with Diff Fluid and slide these in.
Diff Cover and odds and ends:
The OEM gasket for the Cover is paper, and it's up to you how you want to install this. From what I've read, it can be installed dry, with silicone sealant, with Dielectric Grease, etc, everything seems to work. I used some silicone sealant on both surfaces before putting the gasket on. Don't use too much or else it will squeeze into the Diff. As pictured there is too much, as I noticed some squeezed out the outside. In any case, make sure to let it completely dry before filling the Diff with fluid. Torque the fasteners in a progressive criss-cross pattern.
Diff Cover Bolts:
8-off M10x25 - Gr 8.8 - 30 lb-ft
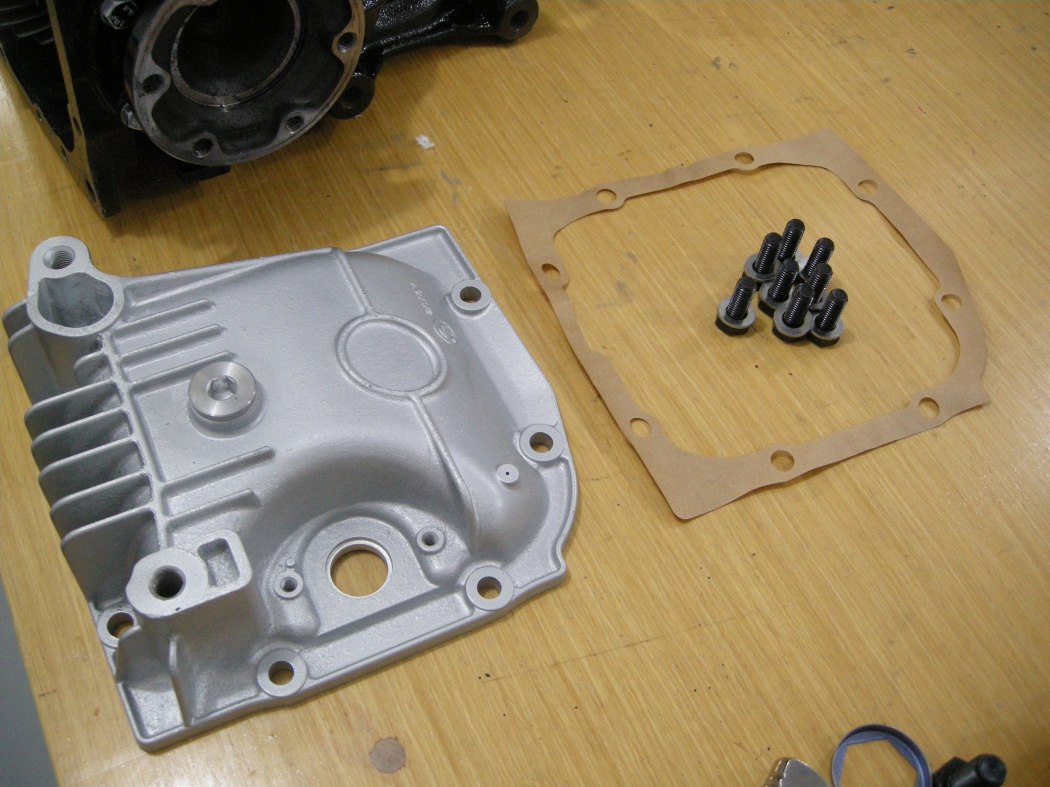
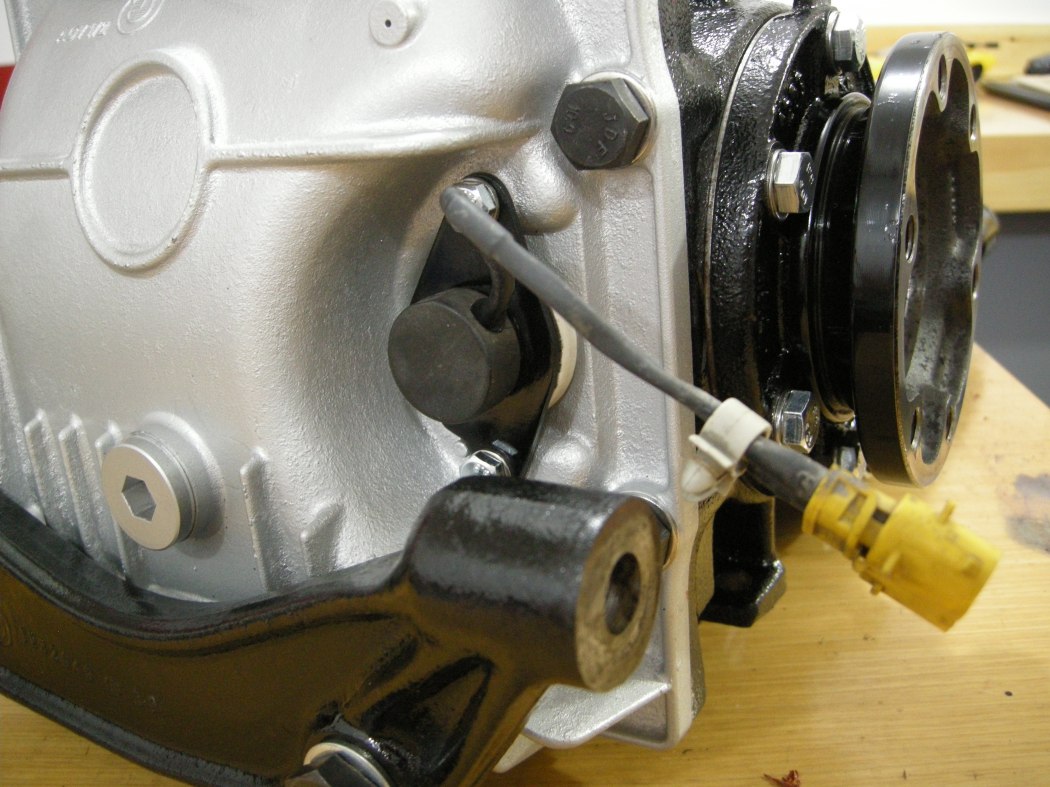
Install the Speed Sensor with new hardware and a new O-ring. I went to the hardware store with the old o-ring and found a near exact match from the bins. I should have written down the size. Anyone have it?
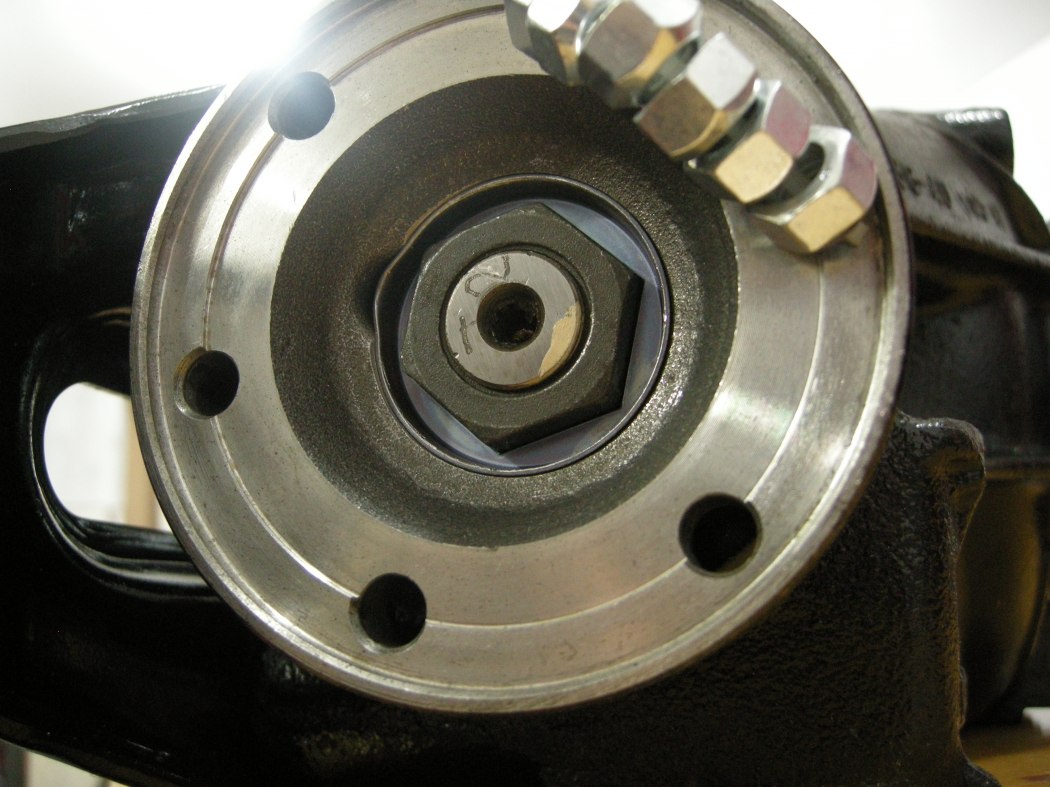
Tap in the new Pinion Nut Retaining Plate with a big socket. I fudged one up trying to tap it in with a flat blade screw driver and it deformed it making it useless. Luckily I had ordered a spare.
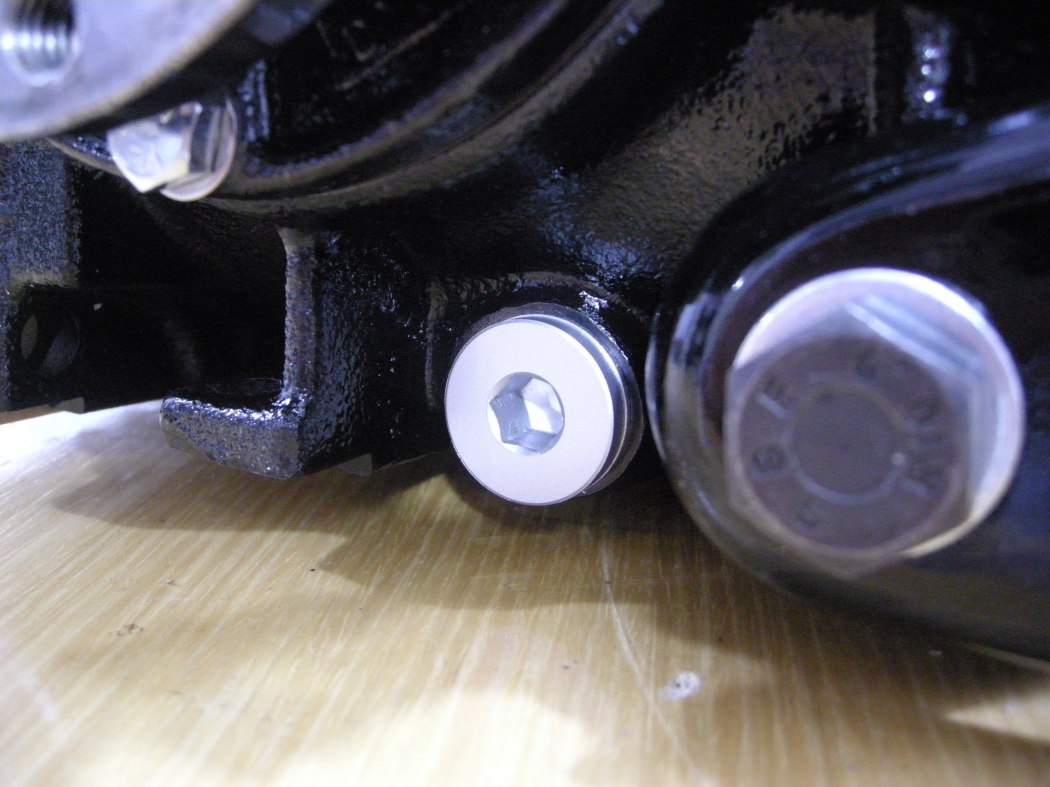
I machined the surfaces of the drain / fill plugs to clean them up, then hit them with rattle can silver.
Add your favourite brand Diff Fluid in the 75W90 variety, and use new crush washers on the plugs.
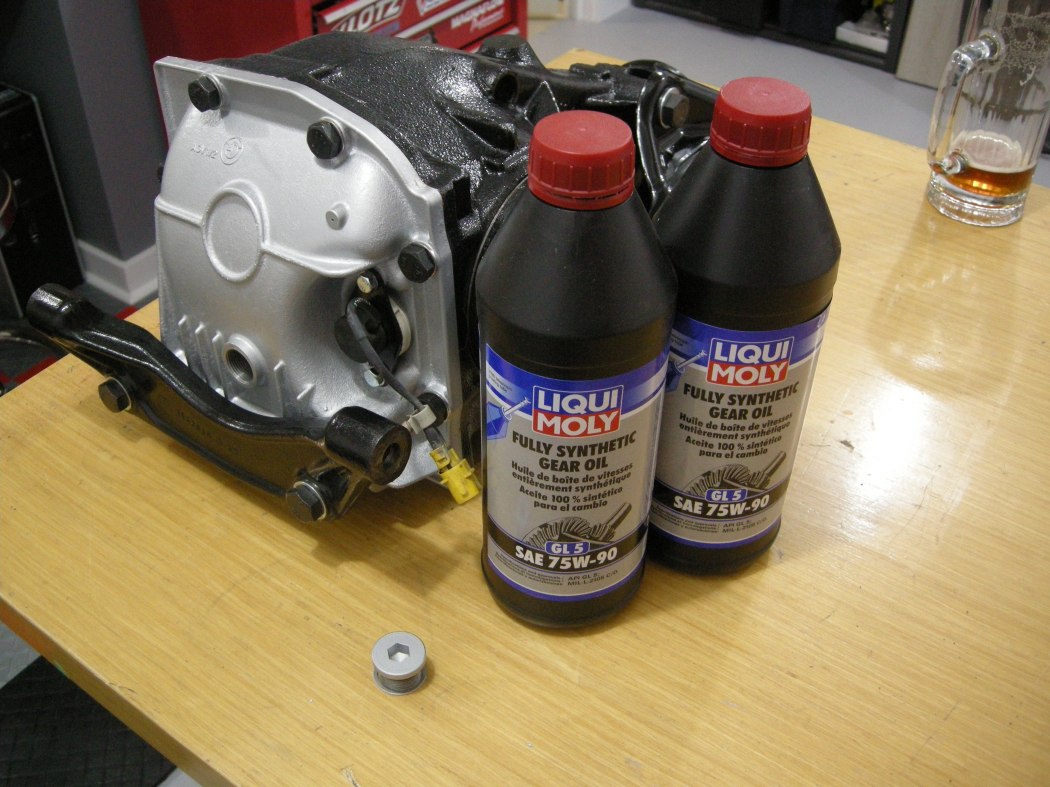
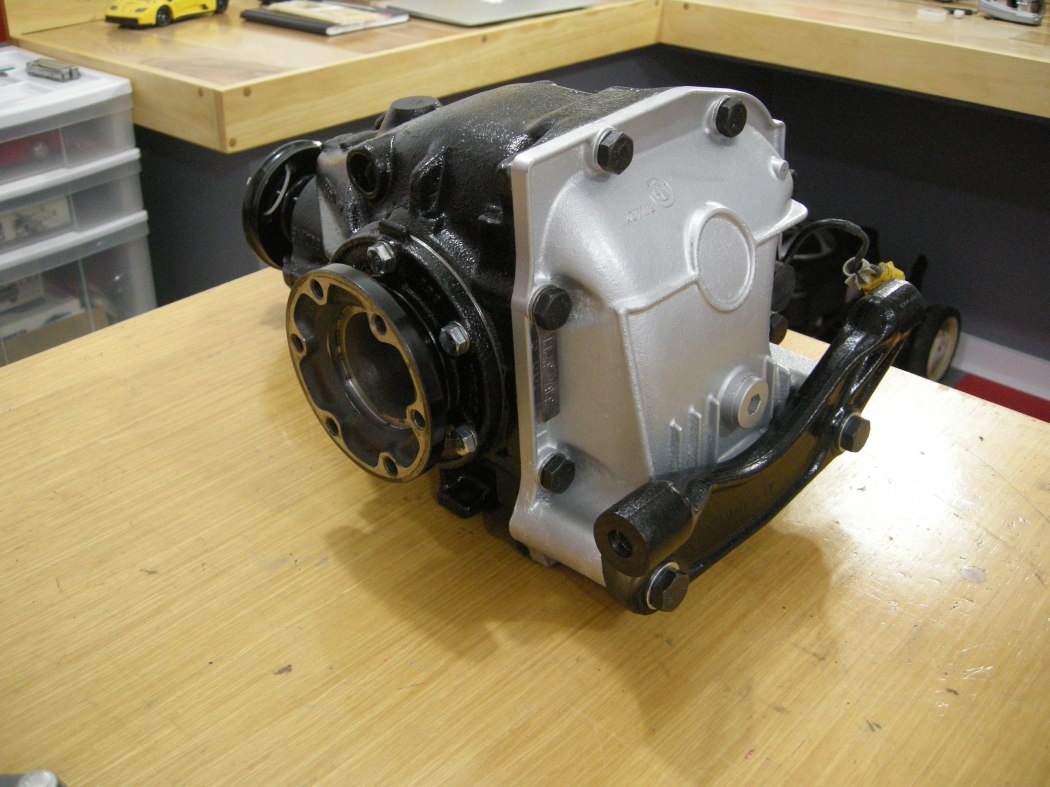
Install the mounting brackets with new hardware and you're all done.
Rear Horizontal Support Bracket
2-off M12 x 1.5 x 50 - Gr 10.9 - 100 lb-ft
Front Support Bracket
3-off M14 x 1.5 x 25 - Gr 10.9 - 150 lb-ft
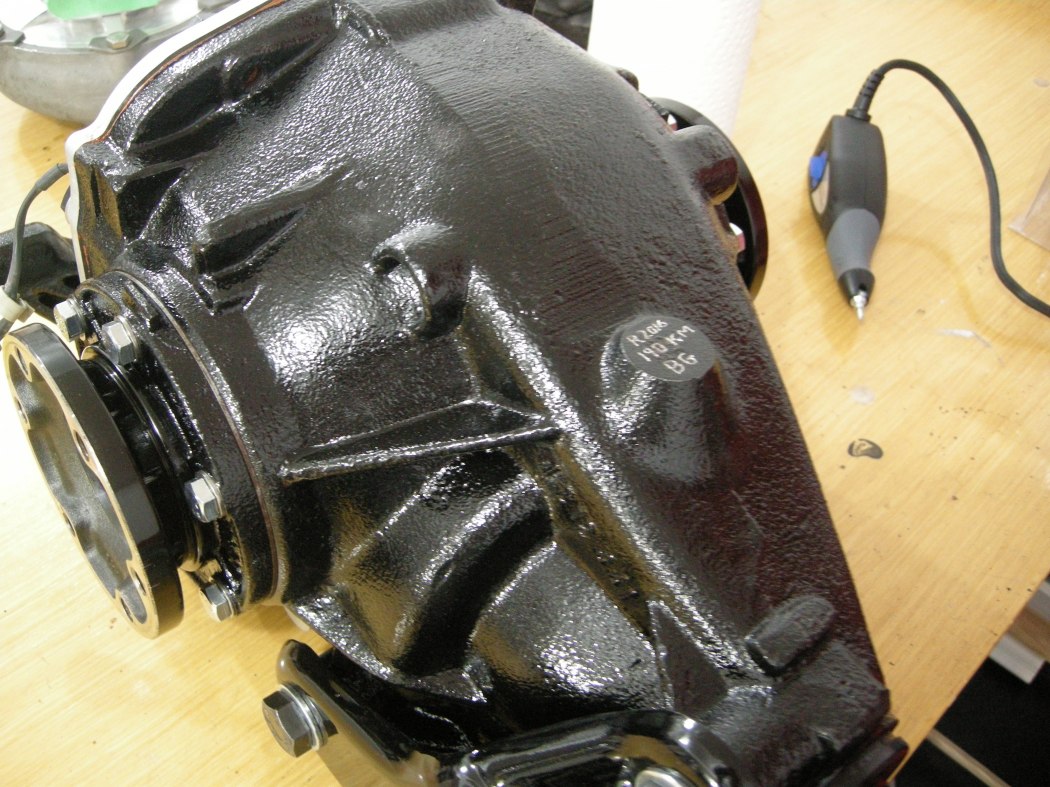
I engraved the mileage, year, and my initials on a flat spot to record the rebuild.
Hope this helps someone.
Barry
Last edited by q20v on Jan 28, 2018 8:13 PM, edited 3 times in total.
Re: FAQ Medium Case Diff Rebuild
Wow, nice writeup. Excellent writeup. I didn't make it all the way thru, and not having done it I can't really proofread it, but that's book or manual grade. On something very few will tackle. My complements.q20v wrote:*** FAQ FOR REVIEW / COMMENT ***
Problem: Cabin noise and/or vibration that is not affected by engine RPM or cornering, but is affected by vehicle speed.
Cause: Differential Pinion and/or Carrier Bearing failure
How to fix: Change the Diff Pinion and Carrier Bearings, see below.
Re: FAQ Medium Case Diff Rebuild
Thanks Mike, I appreciate the feedback! While researching the rebuild I couldn't find a comprehensive source of information for this. While I knew I was capable of doing it, I was hoping to find out what to expect. I read on many forums that this is not a DIY job, however with a few simple tools and a lot of patience this is definitely a DIY job.
Which reminds me, I forgot to mention that I didn't check backlash as part of this. I think I'll add a section on Lessons Learned.
Re: FAQ Medium Case Diff Rebuild
Excellent write up, my compliments.
Also speaking as someone who hasn't tackled this but has read all he can, a few things might be missing.
Checking lash and mesh pattern of the gears.
But overall, fine work.
Also speaking as someone who hasn't tackled this but has read all he can, a few things might be missing.
Checking lash and mesh pattern of the gears.
But overall, fine work.
Re: FAQ Medium Case Diff Rebuild
Good point Jay. I have been into a couple of diffs, not BMW, and reusing all the old shims matched things up well as far as I could tell. But that isn't to the level of detail of q20v's FAQ here.ElGuappo wrote:Excellent write up, my compliments.
Also speaking as someone who hasn't tackled this but has read all he can, a few things might be missing.
Checking lash and mesh pattern of the gears.
But overall, fine work.
Re: FAQ Medium Case Diff Rebuild
This is fantastic. I have done this, but had no idea what I was doing at the time. This FAQ would have helped me tremendously.
Re: FAQ Medium Case Diff Rebuild
Thanks guys.
I subjectively assessed the backlash before / after and it doesn't feel like it's changed. Mesh pattern I did not check. Anyone have a good reference on how to do these properly? I can include it as a reference.
Re: FAQ Medium Case Diff Rebuild
From my thread: http://www.mye28.com/viewtopic.php?f=3&t=127886q20v wrote:Thanks guys.
I subjectively assessed the backlash before / after and it doesn't feel like it's changed. Mesh pattern I did not check. Anyone have a good reference on how to do these properly? I can include it as a reference.
This resource has good stuff (search for "Setting Lash"): https://www.bmw2002faq.com/articles.htm ... -build-r74
Where I did it starts here: http://www.mye28.com/viewtopic.php?p=1316108#p1316108
Re: FAQ Medium Case Diff Rebuild
q20v, thank you for taking the time to shine a light on this. Very illuminating.
Re: FAQ Medium Case Diff Rebuild
No problem demetk!
I added a References Section at the start to include cek's links and one from Bimmerforums that I used.
Re: FAQ Medium Case Diff Rebuild
Excellent writeup!
Did you have any issue using the bearing race drivers "backward" and/or in the press?
Re: FAQ Medium Case Diff Rebuild
And what size race drivers would you need for this work? Links on where to buy would be appreciated.
Re: FAQ Medium Case Diff Rebuild
Shawn, I didn't have any issues however careful alignment and pressing straight is important. But nothing out of the ordinary for a person who's used a press before. I definitely would not want to be learning how to use a press on a project like this!
I threw in a few links for some of the tools. The Seal/Race driver kit I used was a generic one from Princess Auto, but any should work. I didn't record the sizes of the drivers because it's really dependent on the size of bearing being removed / installed. Do all medium case BMW diffs use the same size bearings? I still have the old races and could take some measurements. I originally wanted to manufacture a set of mandrels for this job, and offer them for sale afterwards, but figured the market would be too small and it's too damn cold out to spin the lathe right now. I may revisit this idea in the spring / summer, though (assuming medium case diffs use the same size bearings).
Re: FAQ Medium Case Diff Rebuild
Oh and thanks for the suggestions!
Re: FAQ Medium Case Diff Rebuild
Excellent writeup!
I've noticed a bit of speed-related noise on my car, so I'm thinking this is a job I'll be doing sometime in the not-so-distant future (along with wheel bearings.)
Thanks!
I've noticed a bit of speed-related noise on my car, so I'm thinking this is a job I'll be doing sometime in the not-so-distant future (along with wheel bearings.)
Thanks!
Re: FAQ Medium Case Diff Rebuild
I'll add my gratitude for this post. I was just thinking earlier this week that I need to pull my diff and replace the bearings. Haven't seen any writ-ups and figured I'd have to just wing it when the time comes. Thanks a ton!
Re: FAQ Medium Case Diff Rebuild
No problem, guys. Glad it can help someone.
Barry
Barry
Re: FAQ Medium Case Diff Rebuild
As a follow-up to this chapter, I installed the rebuilt diff in March and took the car for a 100km drive this past weekend (first extended drive in 1.5 years!). The driveline noise is gone, I can now drive at 115 kph and speak at a normal level and hear myself (not that I talk to myself often). I also don't need to crank the radio for it to be heard. What I do notice now is how loud my 7 year old tires are on the highway. They are quite worn but will last me this summer (Dunlop Direzza Star Spec 235 Fr and 265 Rr). Early next year I'll have to replace them and will have the Alpinas refinished at the same time ($ permitting).
-
- Posts: 487
- Joined: Oct 13, 2014 10:18 AM
- Location: Raleigh, NC
Re: FAQ Medium Case Diff Rebuild
Fantastic write up q20v! I've used it as a reference for various information when changing axle seals and other general diff related work, so thank you for taking the time! I had two questions that were not explicitly spelled out in the write up and are a bit confusing on the Bently page. Both questions may save people a lot of digging. I answered these partly through further research and partly through 'try & see'.
1-Q: Is the driveshaft flange pressed on or does it simply slide off once the collar nut is removed?
A: The flange is not pressed on (even though Bently is confusing in this are and explicitly mentions "pressing the flange back on" in the pinion seal replacement section.
2-What size is the collar nut on standard medium case diff?
A: I have a 3.25 and 3.46 LSD. Both use the M20 collar nut which is 30mm. This was also mentioned in cek's diff post referenced here but no need to force needless hunting.
Re: FAQ Medium Case Diff Rebuild
Glad to hear it helped, freedspeak! I'll update the relevant sections of the write up with the information you found. Thank you.
Barry
Barry
Re: FAQ Medium Case Diff Rebuild
As others have said, thanks for a thorough write up. It got me encouraged to finish the task a few weeks back. The parts list at the top was particularly appreciated.
You asked about the o-ring size for the speed sensor;
w. 3/32"
ID. 1 5/16"
OD. 1 1/8"
Perhaps theres a metric equivalent out there, perhaps not. But this one fits perfectly. Thanks again.
You asked about the o-ring size for the speed sensor;
w. 3/32"
ID. 1 5/16"
OD. 1 1/8"
Perhaps theres a metric equivalent out there, perhaps not. But this one fits perfectly. Thanks again.
Re: FAQ Medium Case Diff Rebuild
Lapisblau, thanks for the o-ring size. I updated the original post with that info.
Barry
Barry
-
- Posts: 39
- Joined: Sep 30, 2018 1:20 AM
Re: FAQ Medium Case Diff Rebuild
Is this something you'd recommend to a weekend DIY mechanic? I've done everything from oil changes to motor swaps but never a full motor rebuild or anything like this. I don't have a press so I'd need to buy that.
I've got some slack somewhere in the diff I believe, between on and off load I hear a click, brand new driveshaft, half shafts, and diff mount so I think this is the only thing left it could be.
Re: FAQ Medium Case Diff Rebuild
Hey Brayden,
That's hard to answer, it all depends on how much patience you have I'd say. It's not overly difficult but you really need to approach every step deliberately and carefully. I had rebuilt a couple engines back in the day and have done a lot of press work (wheel bearings, bushing, etc) but this was my first diff, and I had the diff out of the car as a winter project so I was in zero rush. Obviously now that I've done one I could knock it out much quicker, but as a first go I wouldn't want to be worried about doing this over a weekend. Also, having the right tools is a must for this job (check out the list at the start of the original post).
Let me know if you have any specific questions if you decide to do it, happy to help!
Barry
-
- Posts: 669
- Joined: Jul 25, 2012 12:10 AM
- Location: Denver, Colorado
Re: FAQ Medium Case Diff Rebuild
@ q20v
It just blows my mind the amazing talent and dare of so many people here in this forum like yourself.
Barry, you just arrived and earned first place on my personal E28 hero podium (not that it matters) but appreciate your well documented post.
Love your helper too. My 9 year old daughter will feel encouraged as well. Good luck!
I may have a question soon.
-Jack
Re: FAQ Medium Case Diff Rebuild
q20v
Congratulations on your diff rebuild. I haven't seen anyone else ask but would you consider doing another rebuild? Specifically a 3.25 LSD from my '86 535. Diffs locally have been hard to find (other than a 500k mile unit with few if any oil changes). And haven't seen any on the various sites with 3.25 ratio and LSD, though would consider a 3.46 LSD.
My diff exhibits the same speed related noise, though sounds like a loud lathe rather than a Metallica concert. That's loud! Great write-up.
Ben
Re: FAQ Medium Case Diff Rebuild
Sorry for the late replies guys. Had a busy summer and only drove the BMW a small handful of times, so it fell down the priority list and hence a lower interest in browsing BMW-related forums.
Barry
Thanks Jack! Glad you enjoyed the read and hope you took something away from it. I'd love to have more time to post more content but usually end up just getting the job done and moving on. The diff rebuild was a winter project so I had lots of time! I think the next one will likely be a paint correction. Not sure if people are interested in the details of polishing paint but at least I'll post some highlights in my project thread.@ q20v
It just blows my mind the amazing talent and dare of so many people here in this forum like yourself.
Barry, you just arrived and earned first place on my personal E28 hero podium (not that it matters) but appreciate your well documented post.
Love your helper too. My 9 year old daughter will feel encouraged as well. Good luck!
I may have a question soon.
-Jack
Hey Ben, thanks! I'd certainly entertain the idea.. shipping to / from New Jersey might be expensive though. I do have an address on the US side (13669) that can receive / ship packages. I realize I'm a bit late seeing your message so let me know if you're still interested.q20v
Congratulations on your diff rebuild. I haven't seen anyone else ask but would you consider doing another rebuild? Specifically a 3.25 LSD from my '86 535. Diffs locally have been hard to find (other than a 500k mile unit with few if any oil changes). And haven't seen any on the various sites with 3.25 ratio and LSD, though would consider a 3.46 LSD.
My diff exhibits the same speed related noise, though sounds like a loud lathe rather than a Metallica concert. That's loud! Great write-up.
Ben
Barry
Re: FAQ Medium Case Diff Rebuild
Huge thanks to q20v for this really detailed write-up. The result is a diff that looks brand new. Well done sir!
Question for the group: Is it possible to replace the output flange seals *without* removing the side plates from the diff housing?
TIA
Question for the group: Is it possible to replace the output flange seals *without* removing the side plates from the diff housing?
TIA
Re: FAQ Medium Case Diff Rebuild
superb write up, has made me aware of a few things i didn't know i needed to know
Re: FAQ Medium Case Diff Rebuild
Fantastic write-up and super-helpful pictures. I've used this post now a bunch of times.
For reference on the running drag measurements for the bearing pre-loads, this is from a Metric Mechanic PDF:
Here's a link to the MM document. Preloads are discussed on page 8.Pinion bearings are separated by a “boa neck” crush collar that must be collapsed first in order to preload the [pinion] bearings for 14 to 16 inch pounds of rolling torque. Preload specs for the carrier bearings are 9 -11 inch pounds of rolling torque. This is accomplished with shims that are installed between the differential case and the carrier bearing housing. They also “shim-up” the backlash on the ring and pinion.