May 2011 Project e28s52t (Engine Management)
-
Nebraska_e28
- Beamter

- Posts: 9058
- Joined: Apr 13, 2006 11:18 PM
- Location: Council Bluffs, IA
- Contact:
-
Bill in MN
- Posts: 1718
- Joined: Feb 12, 2006 12:00 PM
- Location: The Boonies, Mn
- Contact:
Thanks - I appreciate the "props"...
Thanks for the compliments/comments. This has been a fun project - but to be honest - I am soooooooooo ready to drive this thing. Sometimes at night I sit in it and make car noises.
I like to think of my project is a German Resto-Mod. Old school looks with modern performance - I hope.
Bill - Ground clearance is 5" at the sump and sway bar, and 6" at the intercooler - but the front spoiler is 5". The stock valance w/o spoiler fits over the intercooler - barely. I have coil overs, so if it is too ugly - I can raise it up.
If I had a US based 535is with the factory front spoiler - just remove the metal valance and fab up some spoiler mounts. There would be acres of room under there for an intercooler, nuclear reactor, small South American village and "the Girls Next Door" - I seriously considered keeping the US setup for that reason.
Next few mods include -
1 Using an Z3 M Coupe diff cover with the cool cooling ribs to mount the diff.
2 Finalize the front sheet metal and paint.
3 Modify and fit my under tray.
4 Place 2 large cooling air exits in the hood - found some nice cooling vents from http://www.raceace.com/ - they have them white. I am very worried about under hood temps.
5 Place oil cooler.
6 Finish up cooling system install.
Again - thanks for the support. This has been fun.
SBSP
new progress???
Have you got a chance to drive your project yet?
-
andy535iyes
- Posts: 336
- Joined: Feb 12, 2006 12:00 PM
- Location: Fort Fun Colorado
Update - April Fools Update 3/31/10
OK Guys -
I wanted provide a qiuck update since my installment. It has been a while. Things like work keep getting in the way - but I am happy to be employed - enough said.
One thing I have noticed - this project is like building a house - lots of big stuff gets done pretty fast relative to the whole project (foundation, framing, roof, windows) but then everything slows way down for the smaller detail stuff (trim, cabinets, paint, plumbing).
I am in the smaller stuff.
1 Wiring - cleaned up the e36 engine harness and sliced it into the e28 engine harness. There was lots of purging from the e36 harness to get rid of functions that were not applicable - since I will be running MS.
2 Wiring - ran power from the trunk where the battery will live to the front of the car. Not a big deal until I needed a battery lug crimper - holy smokes they are pricy - borrowed one. Terminated the power at a insulated stud behind the passenger side strut tower and other in front of the fuse box.
3 Wiring - cleaned out the OBC, cruise control wiring and control boxes behind the dash - this was pretty straigh forward and required no wiring cutting, just needed to know which stuff to unplug.
4 Wiring - hooked up the reverse lights - not a big deal, but the e36 transmission and the e28 chassis made this a bit harder than it needed to be.
5 Wiring - need a place to house the e36 wiring box which normally sits on the fire wall on an e36, so I put a tab on my stress bar and mounted there - worked pretty nicely.
6 Wiring - no just kidding - suspension - cut the top of the strut towers to allow maximum camber and cast adjustment - using GC camber/caster plates. This took a while - because this is part of the car that is hard to fix.
7 Rear Diff- installed the e36 M Roadster/Coupe diff cover and am now fabing a proper support bar. This setup no longer uses the e28 diff mount - which is pretty week anyway.
I am going to put her in the sunshine this weekend for a proper wash and photo shoot.
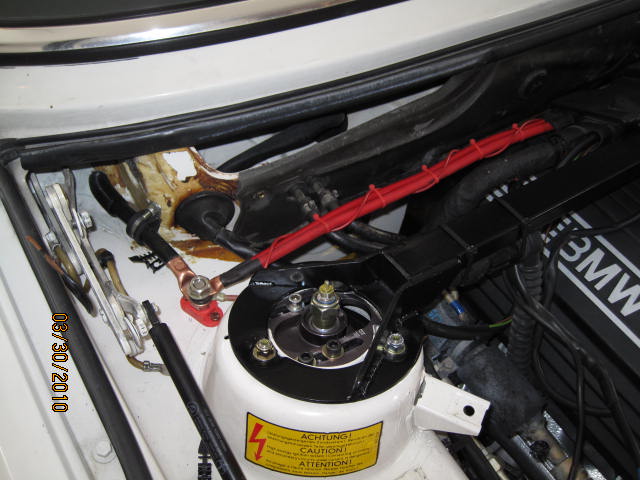
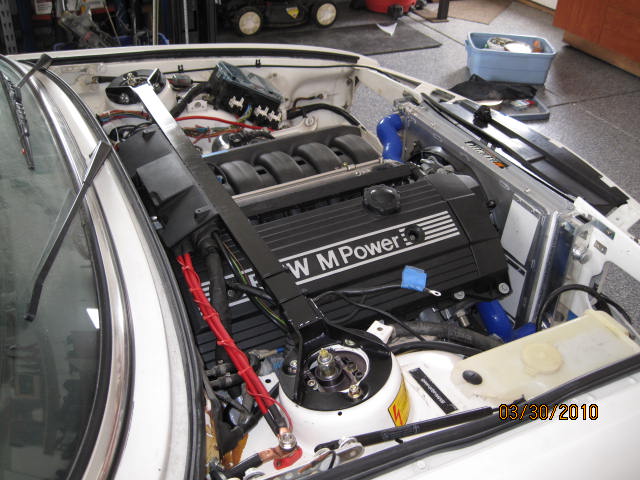
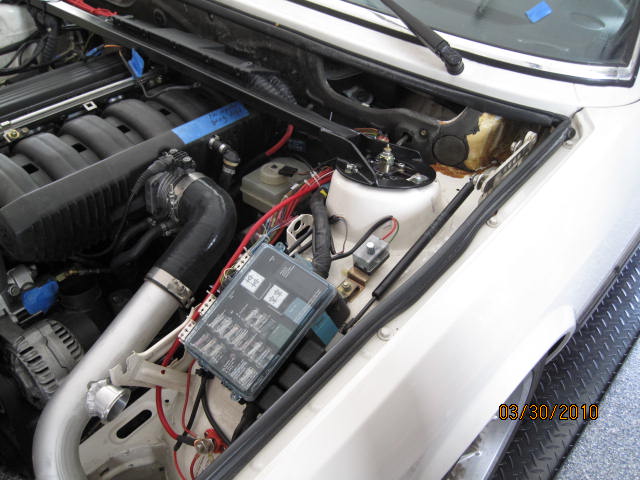
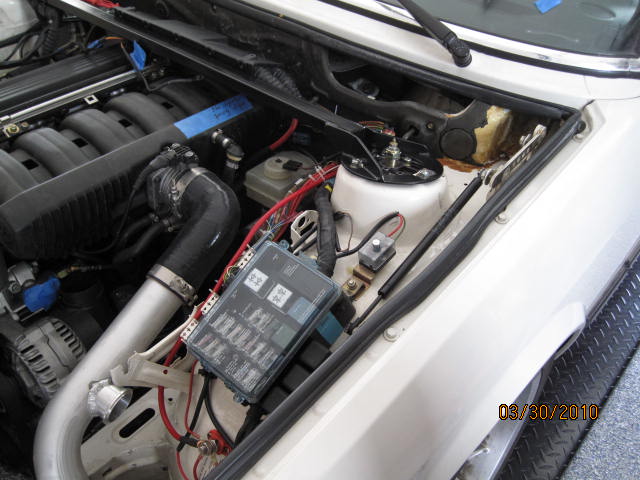


Enjoy.
I wanted provide a qiuck update since my installment. It has been a while. Things like work keep getting in the way - but I am happy to be employed - enough said.
One thing I have noticed - this project is like building a house - lots of big stuff gets done pretty fast relative to the whole project (foundation, framing, roof, windows) but then everything slows way down for the smaller detail stuff (trim, cabinets, paint, plumbing).
I am in the smaller stuff.
1 Wiring - cleaned up the e36 engine harness and sliced it into the e28 engine harness. There was lots of purging from the e36 harness to get rid of functions that were not applicable - since I will be running MS.
2 Wiring - ran power from the trunk where the battery will live to the front of the car. Not a big deal until I needed a battery lug crimper - holy smokes they are pricy - borrowed one. Terminated the power at a insulated stud behind the passenger side strut tower and other in front of the fuse box.
3 Wiring - cleaned out the OBC, cruise control wiring and control boxes behind the dash - this was pretty straigh forward and required no wiring cutting, just needed to know which stuff to unplug.
4 Wiring - hooked up the reverse lights - not a big deal, but the e36 transmission and the e28 chassis made this a bit harder than it needed to be.
5 Wiring - need a place to house the e36 wiring box which normally sits on the fire wall on an e36, so I put a tab on my stress bar and mounted there - worked pretty nicely.
6 Wiring - no just kidding - suspension - cut the top of the strut towers to allow maximum camber and cast adjustment - using GC camber/caster plates. This took a while - because this is part of the car that is hard to fix.
7 Rear Diff- installed the e36 M Roadster/Coupe diff cover and am now fabing a proper support bar. This setup no longer uses the e28 diff mount - which is pretty week anyway.
I am going to put her in the sunshine this weekend for a proper wash and photo shoot.
Enjoy.
Yes and thank you.
TCD wrote - "Awesome. Looks like the e36 charge pipe is going to work."
Like it was meant to be there. It lands right where I needed it too. Saved me a TON of work - thank you.
I gotta get this bucket running - soon.
Like it was meant to be there. It lands right where I needed it too. Saved me a TON of work - thank you.
I gotta get this bucket running - soon.
-
Adam W in MN
- Posts: 5053
- Joined: Feb 12, 2006 12:00 PM
- Location: Don't waste my motherf***in' time!
- Contact:
Another Update...
Hey Guys - here is another update - holy smokes this thing is taking forever - it is all the small stuff that is killing me.
To answer a few questions-
1) This is NOT a no-expense spared build - that is why it is taking forever and ever - I have really think through stuff so I am not wasteful with my time or money- and I am slow thinker...
2) The turbo recommendation if from Todd at TCD - and he new what I was after - so no ball bearing setup.
While we are talking about TCD - I have to send out props - big thanks to Todd for the support, guidance and good phone conversations. He is a class act and I would recommend anyone that is thinking about a turbo BMW - give Turbo Charging Dynamics a call.
http://www.turbochargingdynamics.com/
(414) 712.5201 - Email: TCD - AOL IM: TCD TURBO
OK - back to my boosted bucket --- I have been to ACE Hardware 6 or 7 times in a 2 day weekend getting new fastners and other bits. Good thing they hire cute blonde 20 somehthings - they are easy on the eyes and the store is close.
Big updates -
Fuel system is done. You know it is a bad sign when you unscrew the drain plug on the tank and nothing comes out - until you put a screw driver in there to break thru the rust. I had to buy a new gas tank - the original did not fare well with 15 year old gas in it. It was a complete mess on the inside. After a little pondering - I decided to replace the entire fuel system front to back, this included:
Walbro 255 gph in tank pump.
New intank pick up.
New fuel gooahj sender
New high pressure pump.
New filter.
New supply and return hard lines - all the way to the engine compartment.
New BMW FI rubber fuel lines.
This was not cheap - but not as bad I as I thought it would be and after all the other work - I was not going to cheap out now.
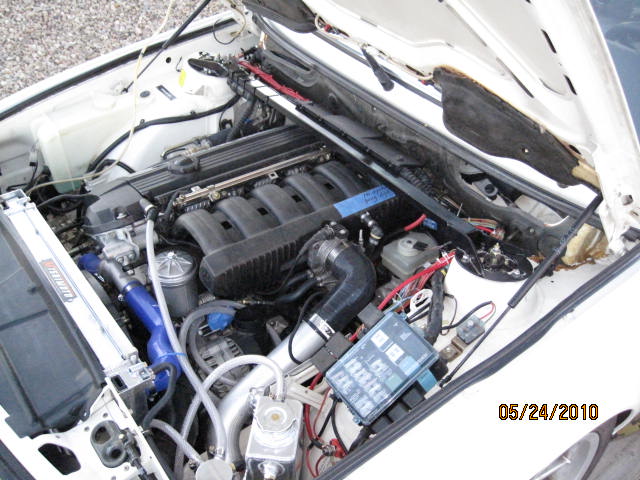
The cooling system is done - this is a case of changing one small item - leads to a complete redesign. Since I am running an S52 from an e36, I decided to keep the e36 cooling system - this was a good move...but I ended up buying an aluminum radiator and building a fanshroud with a electric fan...this move stopped me from using the OEM expansion tank - so I ended up buying a very pricy Canton expansion tank and figuring out how to mount it. Remember - the expansion tank has to be the highest point in the cooling system - because air does not run down hill...but once the S52 was installed - there was very limited room to mount an expansion tank. In the end it worked out - but took alot of head scraching.
The rear diff and stub axels are installed and sealed up - I was going to try to use an e36/MCoupe diff cover - because it has sexy fins, but decided that will be a phase 2 installation - that was going to be a few worth of work.
The crank case vent system is complete and plumbed. Again, a case of one small change cause lots of home brew engineering.
The shift linkage is complete - used e36 components - all of them - and installed a short shift kit. I am going to install one of those super tall shift knobs to get it close to the steering wheel - does not look too sexy, but it is all about going fast.
What is next?
Exhaust system - will run a 3" turbo down pipe and then if there is room 3.5" to the rear. She needs make a neat rumble.
Intake plumbing - need to have (1) intake pipe (2) turbo to intercooler (3) intercooler to intake pipe fabricated. I am not looking forward to that bill.
Drive shaft - need to graft e36 and e28 drive shafts together.
Exterior - euro bumpers, front valance, front spoiler, rear spoiler, fill US bumper holes.
Interior - gauges, seats, tunes,
Engine Management - MegaSquirt - have not order yet.
Enjoy the images...
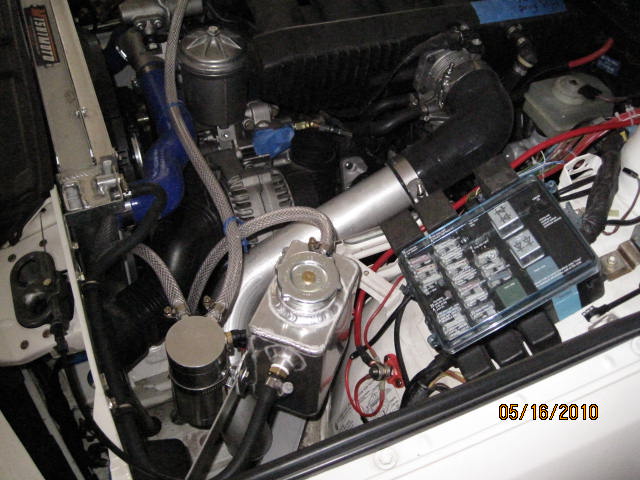
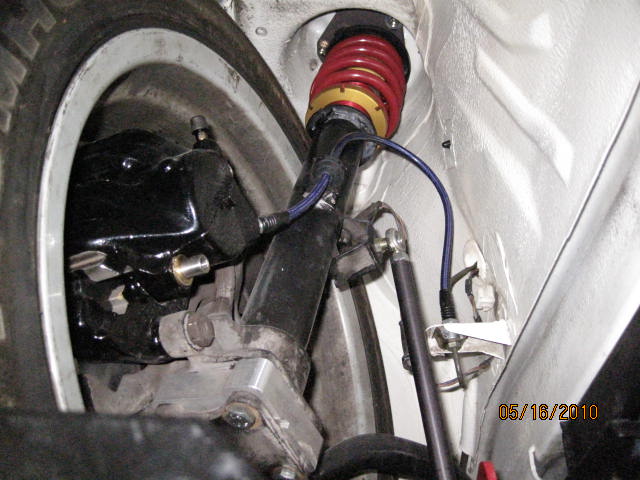
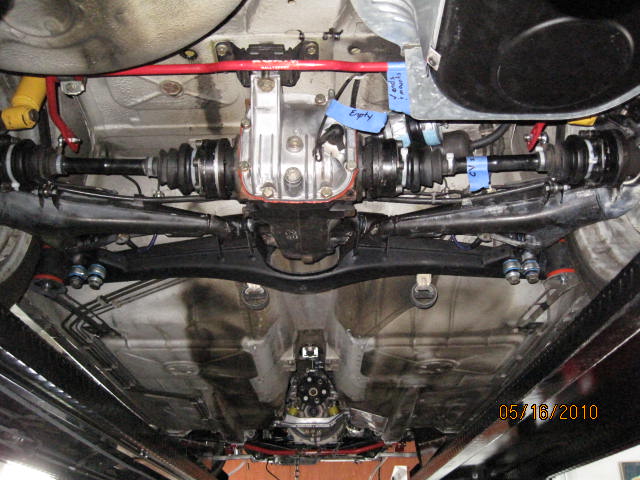
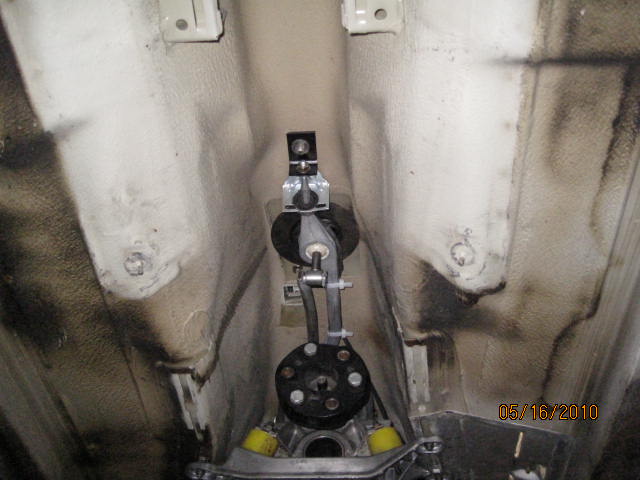
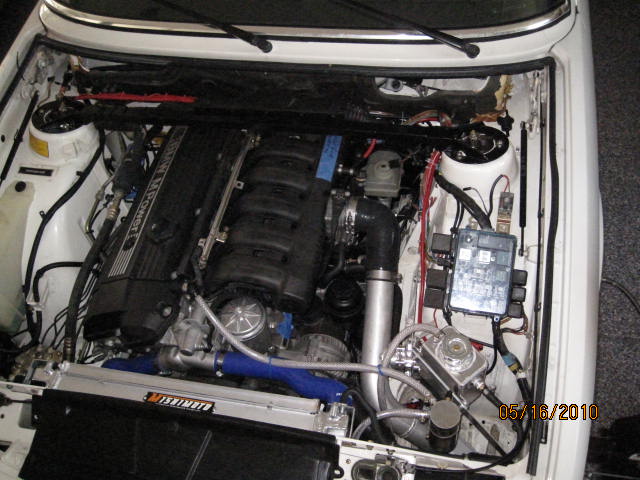
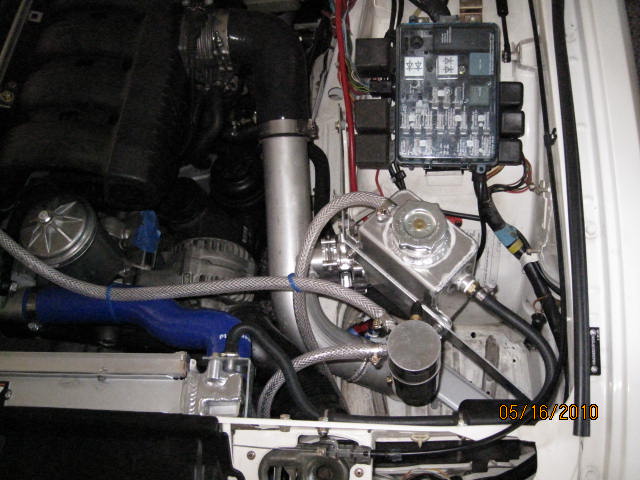
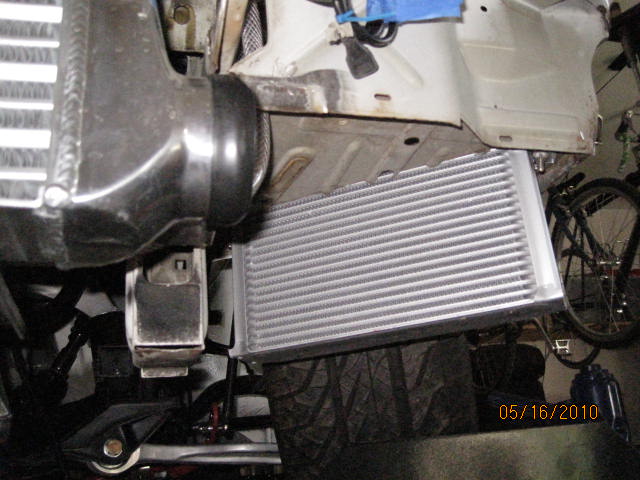
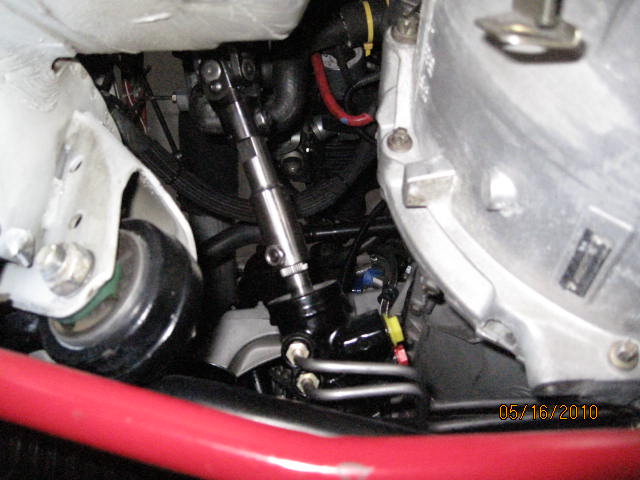
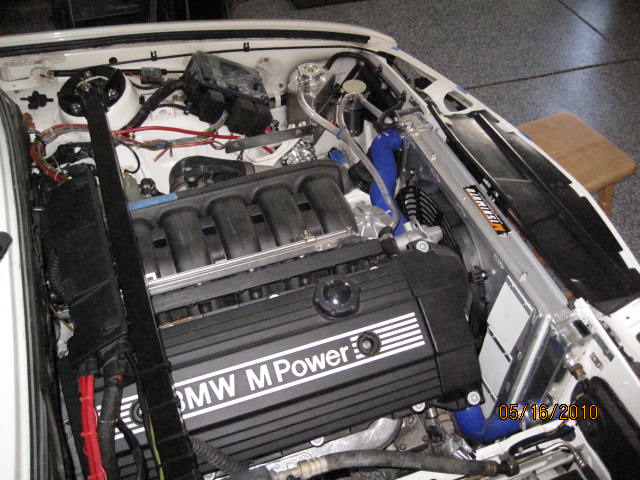
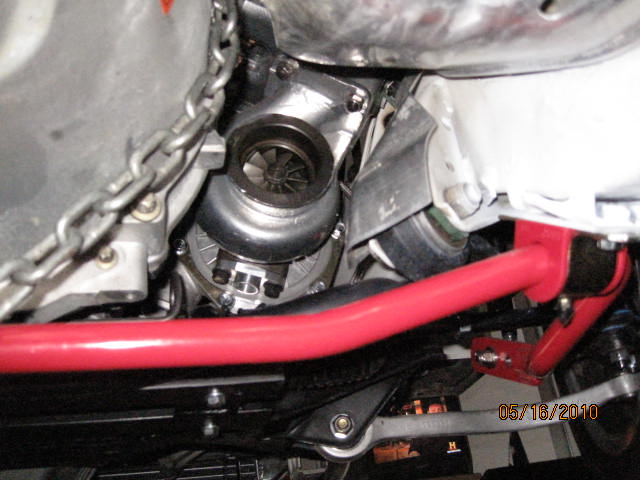
Oil Scavaging Setup....
Hi George -
I am running a small catch can coming off the valve cover, like the OEM setup, then running a line to the intake side of the turbo, so that the whole setup is under vacuum.
Seems to work for most of the M50/S52 boosted engines - so time will tell.
Hope the helps.
W
I am running a small catch can coming off the valve cover, like the OEM setup, then running a line to the intake side of the turbo, so that the whole setup is under vacuum.
Seems to work for most of the M50/S52 boosted engines - so time will tell.
Hope the helps.
W
Off to the muffler shop!!!!!
Well she is off to the muffler shop to have the exhaust done and the intake plumbing wrapped up.
I have decided to install the euro front spoiler I had and I really like the look. Thought I would share a few images.
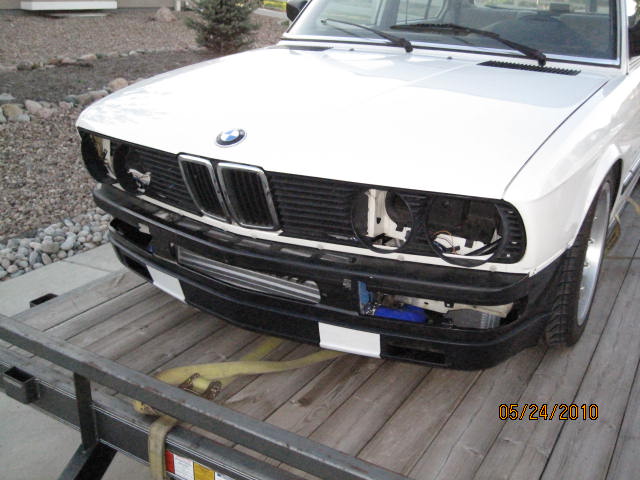
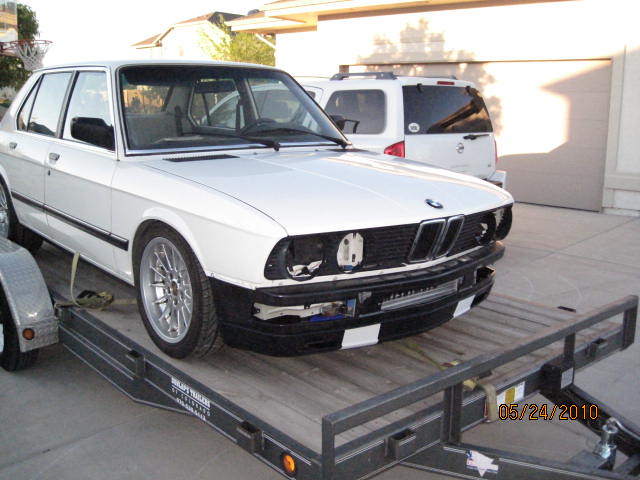
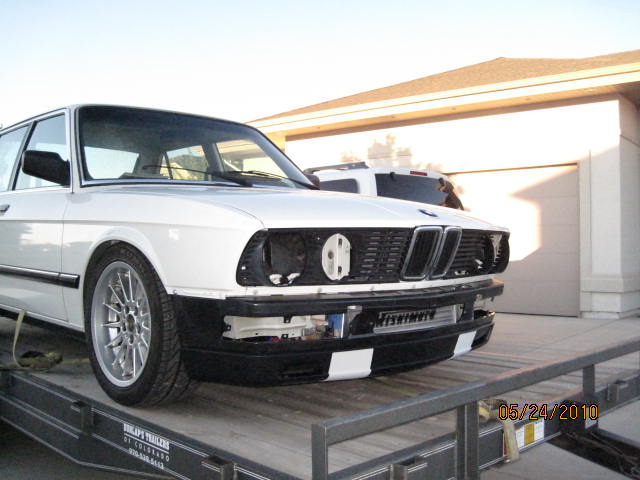
I have decided to install the euro front spoiler I had and I really like the look. Thought I would share a few images.
-
Adam W in MN
- Posts: 5053
- Joined: Feb 12, 2006 12:00 PM
- Location: Don't waste my motherf***in' time!
- Contact:
-
Slaytanic-666
- Posts: 861
- Joined: Oct 05, 2008 1:42 AM
- Location: Van Isle, BC, Canada
-
Slaytanic-666
- Posts: 861
- Joined: Oct 05, 2008 1:42 AM
- Location: Van Isle, BC, Canada
subscribed! clearly the rack and pinion is out of my league, but man that's sweet... what radiator application did you get? I'm planning to use mine with a 318 that has a built in coolant tank built it on the side of it. I'd love to do a turbo kit, but man this all seems too much for me, at least right now...
kudos!
kudos!
Update - still at the muffler shop
Holy Smokes - the plumbing is taking FOREVER and EVER...but it will be right when complete.
Will post images when I get her back.
Spongebob.
Will post images when I get her back.
Spongebob.
-
Adam W in MN
- Posts: 5053
- Joined: Feb 12, 2006 12:00 PM
- Location: Don't waste my motherf***in' time!
- Contact:
Re: Update - still at the muffler shop
I have no patience!!!SpongeBob wrote:Holy Smokes - the plumbing is taking FOREVER and EVER...but it will be right when complete.
Will post images when I get her back.
Spongebob.
-
itsbrokeagain
- Posts: 200
- Joined: Jul 14, 2009 2:11 AM
- Location: Long Island NY


