Page 3 of 4
Posted: Mar 20, 2012 8:34 AM
by clongo
The head is at the machine shop getting tanked, checked for cracks, decked (if it needs it), and new valve guide seals. I should have it back today.
The pan is army buddies shop getting the oil drain welded in. I'll have that back today as well.
Got the upper and lower timing covers cleaned and painted. I plan on doing the motor mounts and oil filter housing today.
If all goes well I should have the bottom end back together tomorrow. I'll post some pics as its going back together

Posted: Mar 22, 2012 9:21 PM
by oldskool
Will you please fix MY car. I can't wait to drive it!
Posted: Mar 22, 2012 10:14 PM
by grey ghost
I'm so jealous. While I'm back on the road, I'm having a shitload of issues.
Posted: Mar 23, 2012 9:02 AM
by clongo
oldskool wrote:Will you please fix MY car. I can't wait to drive it!
The e30 or e12?
Small update - the head was warped and they had to take .015 off. Luckily MLS makes a oversized .018 gasket so I will be running that. I also had them replace the valve guides and do a valve job. Parts should be here next week so I will put the motor in next sat if all goes well!
Posted: Mar 24, 2012 2:20 PM
by oldskool
clongo wrote:oldskool wrote:Will you please fix MY car. I can't wait to drive it!
The e30 or e12? (the 1985 545i in your shop. . . )!
Small update - the head was warped and they had to take .015 off. Luckily MLS makes a oversized .018 gasket so I will be running that. I also had them replace the valve guides and do a valve job. Parts should be here next week so I will put the motor in next sat if all goes well!
Posted: Mar 26, 2012 7:51 PM
by clongo
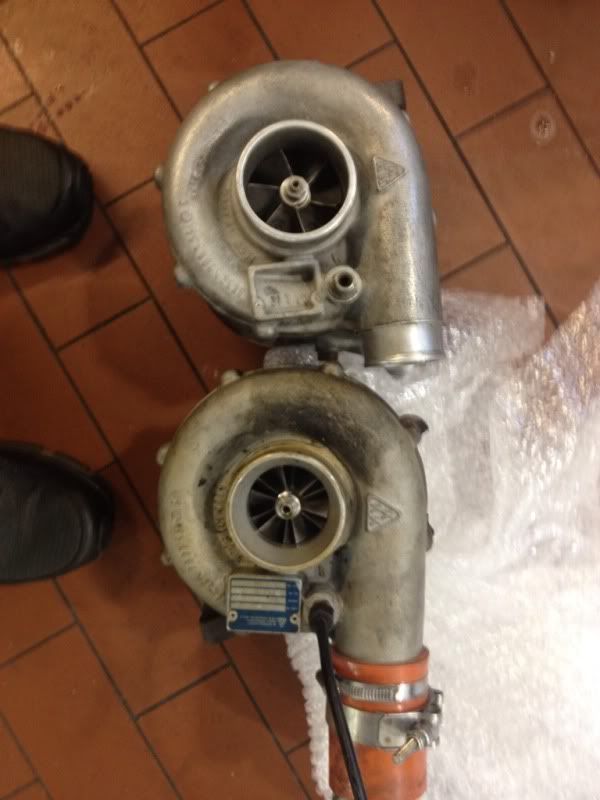
So i got my Peter Florance MS2 Extra setup, upgraded K27, and my head back from the machine shop today.
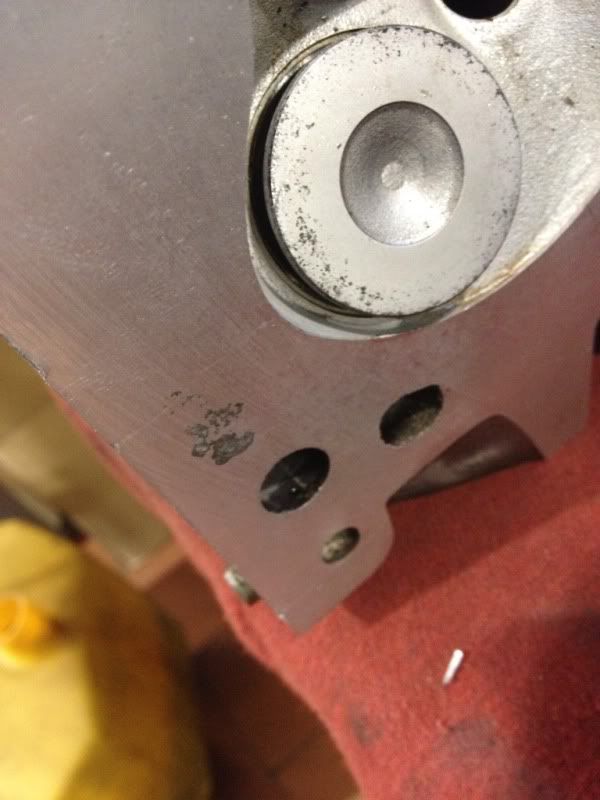
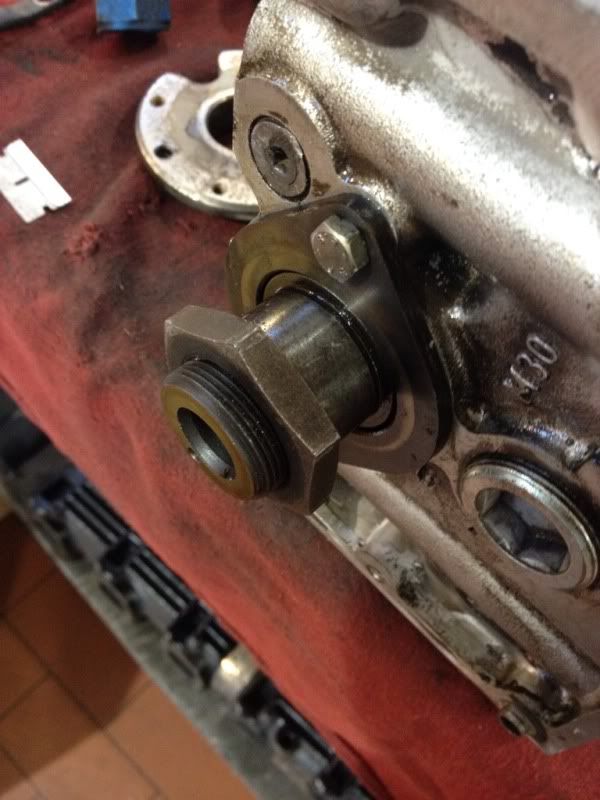
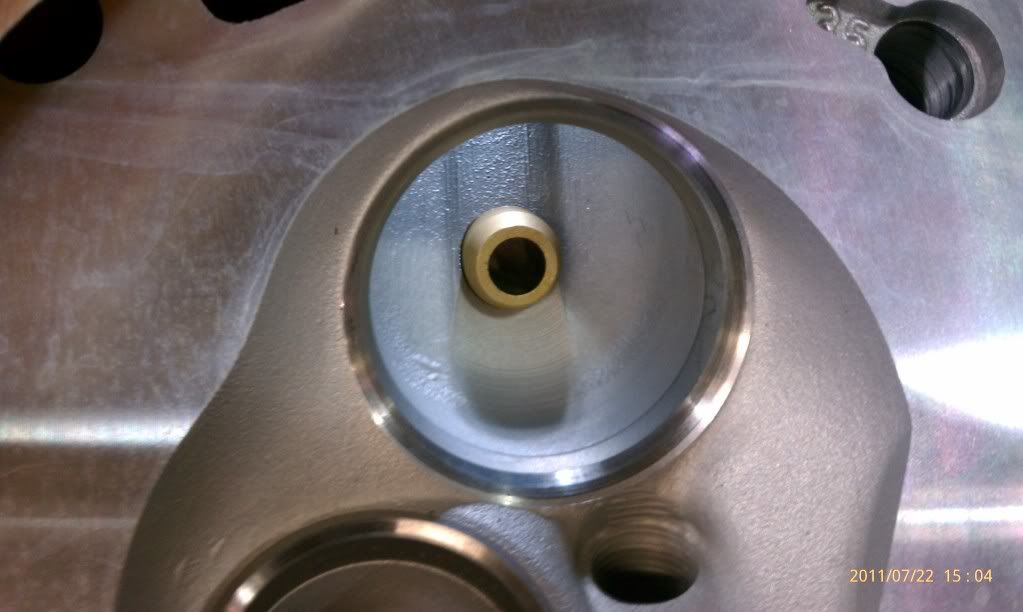
I'm not too happy about the work from the machine shop. I paid them to remove and install the cam. Needless to say they reinstalled the cam, but left the cam gear mount off the cam for some unknown reason. So now i have to pickup a 41mm socket and reinstall it. I'm also a little concerned with some pitting on cyl head surface. I'm not sure if its anything to worry about, but i figured i would post a pic.
Here is the head.
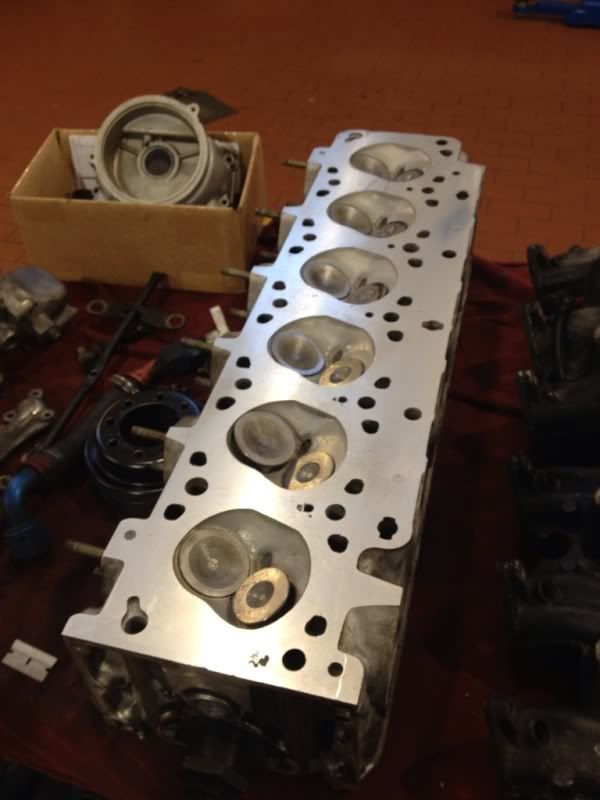
Here is the area I'm a little concerned about.
And here is where they didn't install the flange for the cam gear. You can see the flange sitting on the bench in the pic.
I also got a comparison shot of the upgraded K27 vs the stock K27. Upgraded unit is on top (pretty obvious).
And last but not least the Peter Florance MS2Extra!
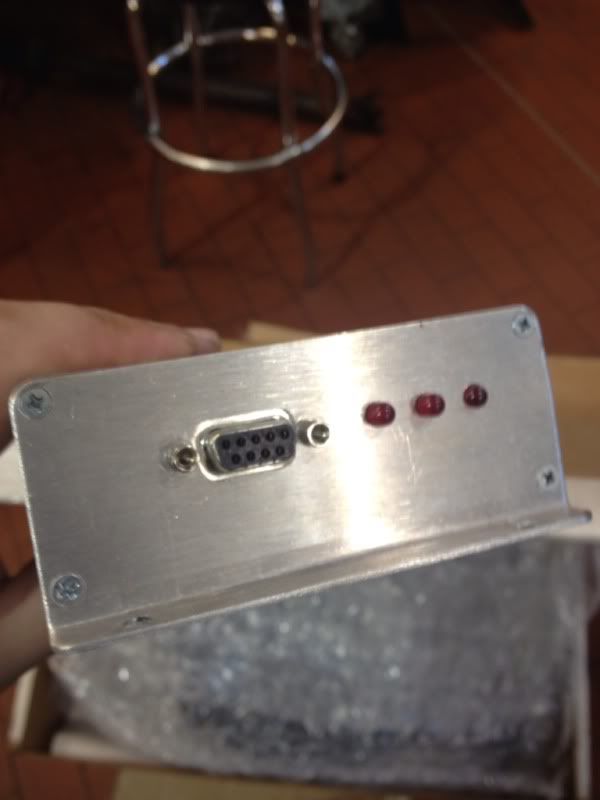
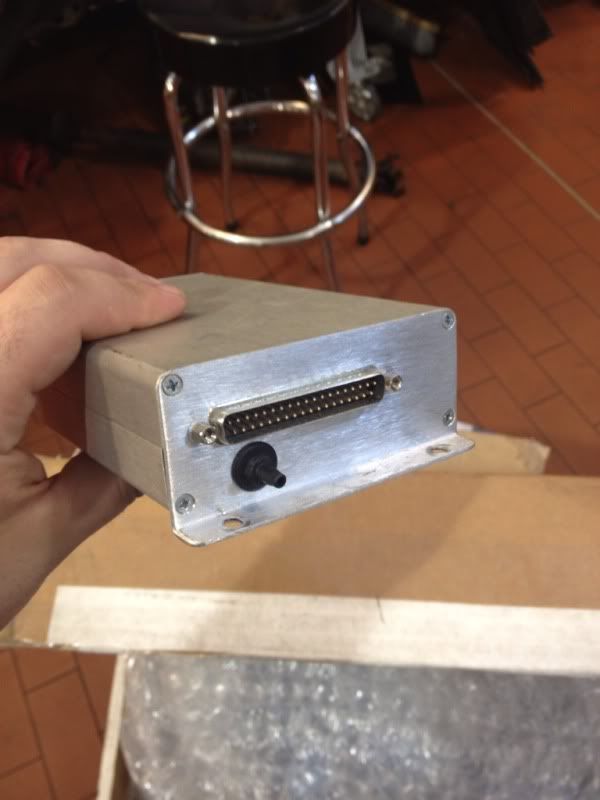
I can't wait to get everything back together. It's killing me not being able to drive my car. I'm really hoping for some power gains and much better drivability with this setup.
Posted: Mar 26, 2012 8:59 PM
by mooseheadm5
Did they do the upper timing cover when they resurfaced the head?
Posted: Mar 26, 2012 9:00 PM
by T_C_D
mooseheadm5 wrote:Did they do the upper timing cover when they resurfaced the head?
Good catch!
Posted: Mar 26, 2012 9:04 PM
by clongo
Yes they did. Do you think that pitting will be ok?
Posted: Mar 26, 2012 9:20 PM
by mooseheadm5
I've seen worse. Given that there is still some left to machine off, I personally would have gone further. You need to check your engine and cylinder head grounds, BTW. Either that or you got a seriously porous casting.
Posted: Mar 26, 2012 9:27 PM
by Duke
clongo wrote:
RA looks very bad........fix it or look forward to more HG changes.
Posted: Mar 26, 2012 9:27 PM
by clongo
The grounds are in good shape. I looked at them as i removed the motor. You should see the thermostat housing! Where the hoses attach look as if they have been corroded away. Luckily i was able to get those parts new from my dealer. I don't think the PO's ever did coolant flush's.
I feel a bit better since you have seen worse. It's not really close to anything important so i think I'm just being overly stressed about this setup. I have quite a bit of $ tied up this go around and I'm really hoping everything stays together. I have read quite a few horror stories with MLS gaskets on this site.
Posted: Mar 26, 2012 9:28 PM
by clongo
Duke wrote:clongo wrote:
RA looks very bad........fix it or look forward to more HG changes.
I told him what head gasket i was planning on using. I'm going to give the machine shop a call in the morning.
Posted: Mar 26, 2012 9:33 PM
by Duke
clongo wrote:I told him what head gasket i was planning on using. I'm going to give the machine shop a call in the morning.
Head should look like this (RA = 16) -


I know it sucks but do it right now. Your guy may not have the skill of equipment to do it right. Paul Burke did the above head.
Posted: Mar 26, 2012 9:41 PM
by clongo
Duke, what was the RA that PB used to finish that head?
Posted: Mar 26, 2012 9:42 PM
by Duke
clongo wrote:Duke, what was the RA that PB used to finish that head?
16
http://www.mye28.com/viewtopic.php?t=29 ... hlight=mls
If the engine uses an MLS head gasket, the recommended surface finish may be 20 RA or less.
Ford specifies an unusually smooth surface finish for its 4.6L V8 engine. This engine, like a growing number of late model Japanese engines, uses a multilayer steel (MLS) head gasket. The recommended surface finish for the OEM gasket on the 4.6L V8 is 8 to 15 RA!
Posted: Mar 26, 2012 9:47 PM
by mooseheadm5
Smooth as a veal cutlet.
Posted: Mar 26, 2012 10:15 PM
by clongo
Great. I'm curious to see what it is. He already took off .015 to make it flat. My gasket is .018 over. So hopefully he can do it.
Posted: Mar 26, 2012 11:46 PM
by M. Holtmeier
Maybe try a different machine shop.
The place I use builds diesel tractor pulling engines for a number of guys. I have never been disappointed with thier work. I have also never changed a head gasket due to compression in the radiator in the 3 motor builds in my current e28 and 1 stock 745i with a TCD system. Every one of those heads was decked per thier specs, which they claim is "guaranteed below 30 RA."
Posted: Mar 27, 2012 3:09 AM
by clevertd
clongo wrote:Great. I'm curious to see what it is. He already took off .015 to make it flat. My gasket is .018 over. So hopefully he can do it.
I hope so, better to wait a bit longer than have to do it all over again. You can come drive the E39 in the mean time (figured out it has the updated rotor).
Posted: Mar 27, 2012 10:27 AM
by clongo
I called the machine shop and he said it was finished at 15 RA. I had 2 other BMW tech's with experience using MLS gasket's on BMW's come look at it and they said it should be fine. I'm not sure what to do at this point.
Posted: Mar 27, 2012 10:39 AM
by Duke
clongo wrote:I called the machine shop and he said it was finished at 15 RA.
OK....look at your head, and look at the pictures of mine and M. Holtmeier's. Does yours look close to a mirror? If "should be fine" is good for you, then install it. I am just going by your pic, could be different in person.
Posted: Mar 27, 2012 10:49 AM
by T_C_D
clongo wrote:Great. I'm curious to see what it is. He already took off .015 to make it flat. My gasket is .018 over. So hopefully he can do it.
Your gasket is .028 over.
Posted: Mar 27, 2012 12:06 PM
by M. Holtmeier
Taking Duke's advice way back when on his FI build concerning RA probably kept me from blowing any HGs.
Posted: Mar 27, 2012 2:17 PM
by clevertd
Is the block side RA something to worry about/check as well?
Posted: Mar 27, 2012 3:20 PM
by clongo
I brought the head back to the machinest. I found a little scratch that i didnt like near one of the coolant passages and told him how i wanted it finished. He guaranteed me it would be right when i get the head back. So i guess we will find out tomorrow when i get it back.
Posted: Mar 27, 2012 4:23 PM
by clongo
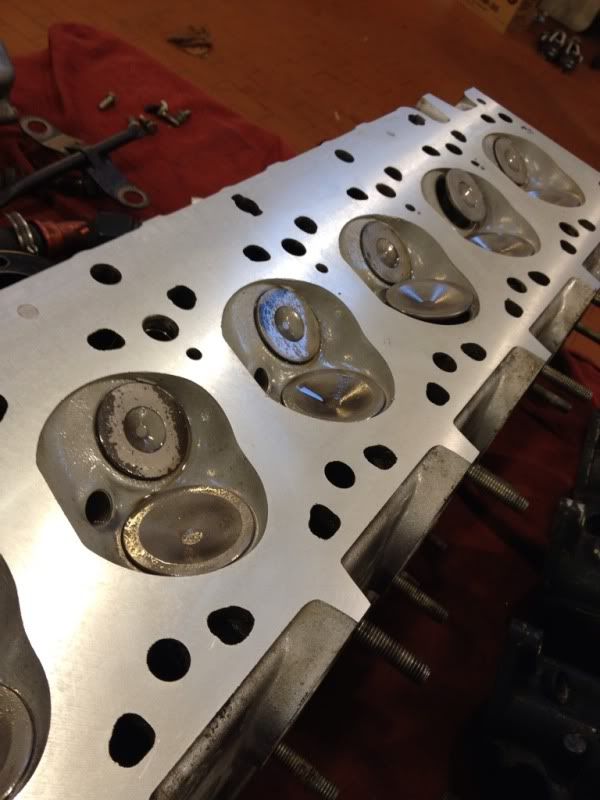
Well the head is already back! It looks much better!
Posted: Mar 27, 2012 4:28 PM
by Duke
clongo wrote:Well the head is already back! It looks much better!
See....that was easy and you will feel much better doing the install.
Posted: Mar 27, 2012 5:34 PM
by clongo
Yeah! Thanks for giving me the heads up. When I install heads at work they are new... With oem gaskets. So this is new for me.
Posted: Mar 27, 2012 6:24 PM
by Duke
clevertd wrote:Is the block side RA something to worry about/check as well?
Yes and no. The iron does not expand near as much as the aluminum and thus does not need such a low RA. Thats why you hear some much about prepping Aluminum heads.
For years, most aftermarket gasket manufacturers have said surface finishes with a roughness average (RA) of anywhere from 55 to 110 microinches (60 to 125 RMS) are acceptable. The preferred range they have recommended is from 80 to 100 RA. Even so, as long as the surface finish on the head and block end up somewhere between the minimum smoothness and maximum roughness numbers, there should not be any cold sealing or durability problems with the head gasket (assuming everything is assembled correctly and the head bolts are torqued in the proper sequence and to the specified torque, too).
But like everything else, these numbers have been changing. These recommendations were primarily for older cast iron heads on cast iron blocks. As castings have become lighter and less rigid, the need for smoother, flatter surfaces has become more important. Consequently, some aftermarket gasket manufacturers now recommend a surface finish of 30 to 110 RA for cast iron head and block combinations, with a preferred range of 60 to 100 RA for best results
For aluminum heads, the numbers are even lower. The typical recommendation today for an aluminum head on an OHC bimetal engine is a surface finish of 30 to 60 RA, with the preferred range being from 50 to 60 RA.
Smoothness has become a major issue with bimetal engines because the difference in thermal expansion rates between an aluminum head and cast iron block creates a tremendous amount of sideways shearing force and scrubbing action on the head gasket. If the surface finish is too rough (more than about 60 RA), the metal will bite into the gasket and pull it sideways as the head expands and contracts. The cumulative effect over time can cause a delaminating effect in the gasket, literally tearing it apart causing it to leak and fail.


